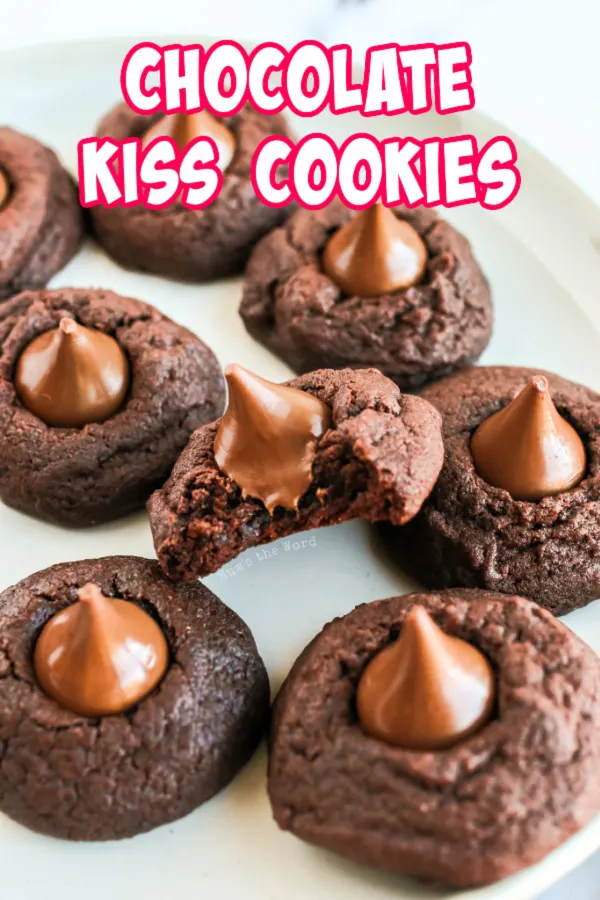
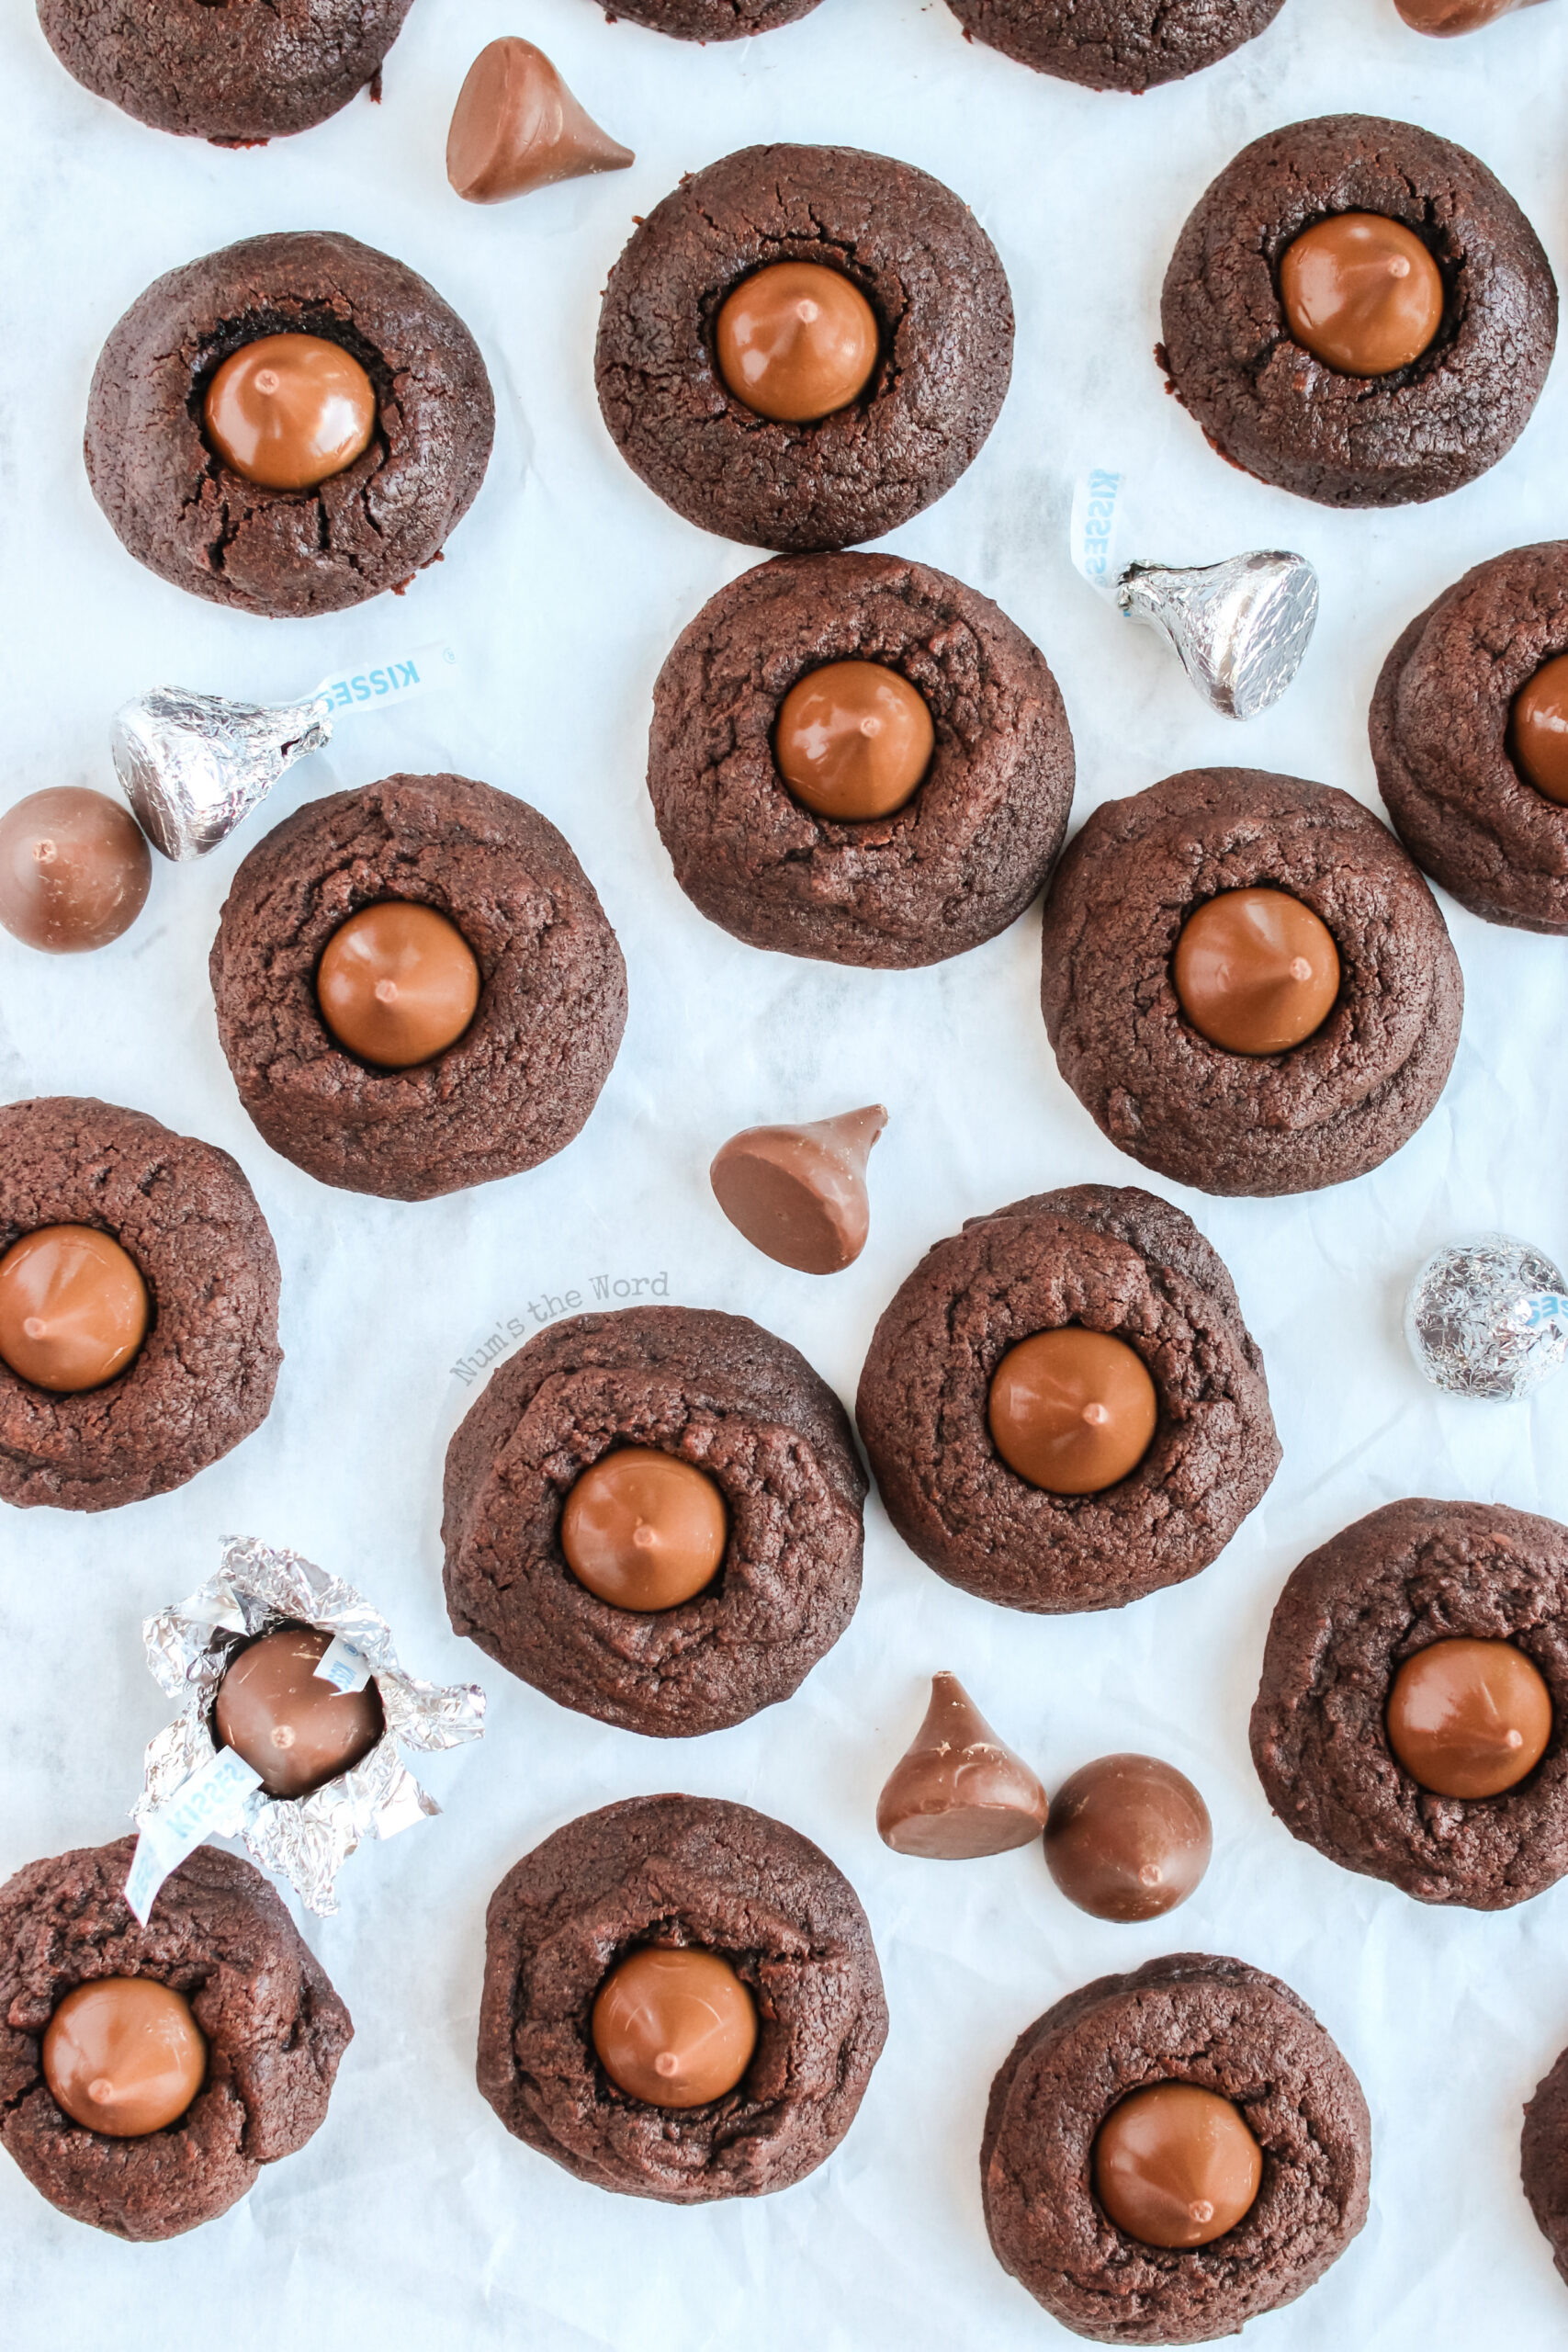
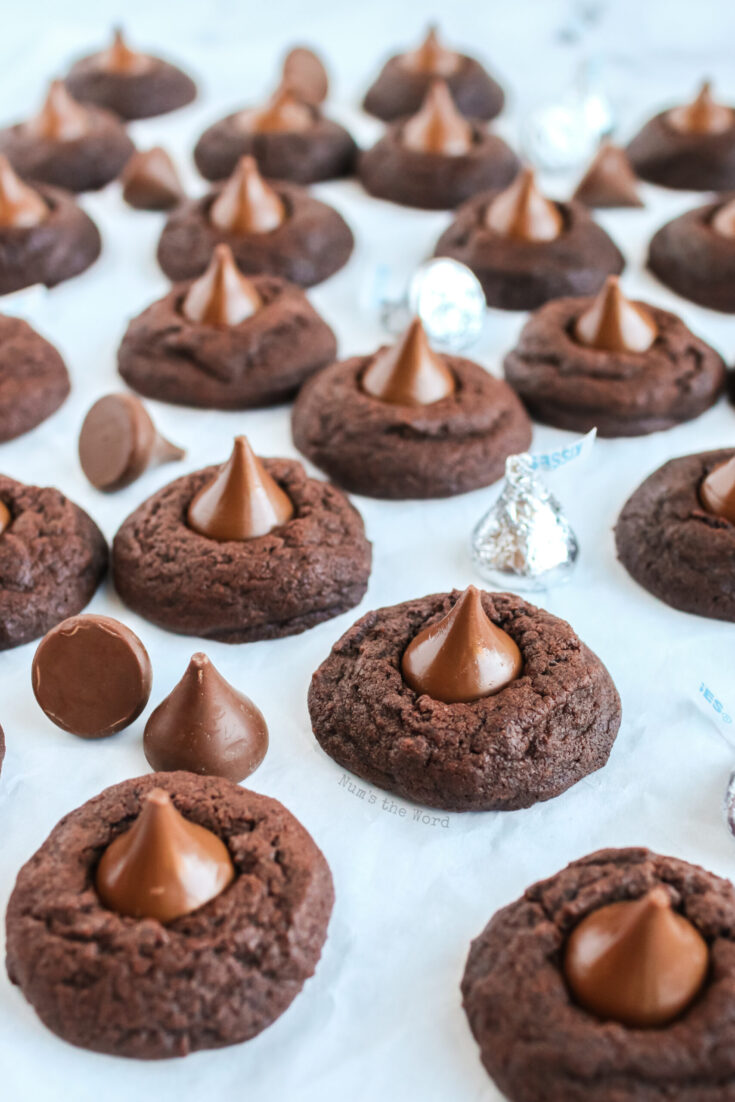
These delicious Chocolate Kiss Cookies are the ultimate kid friendly cookie! Quick, easy, and really fun to make, these are the perfect cookies for any chocolate lover!

These cookies have also been called chocolate blossom cookies. The cookies are the same but go by different names depending on what part of the country you live in.
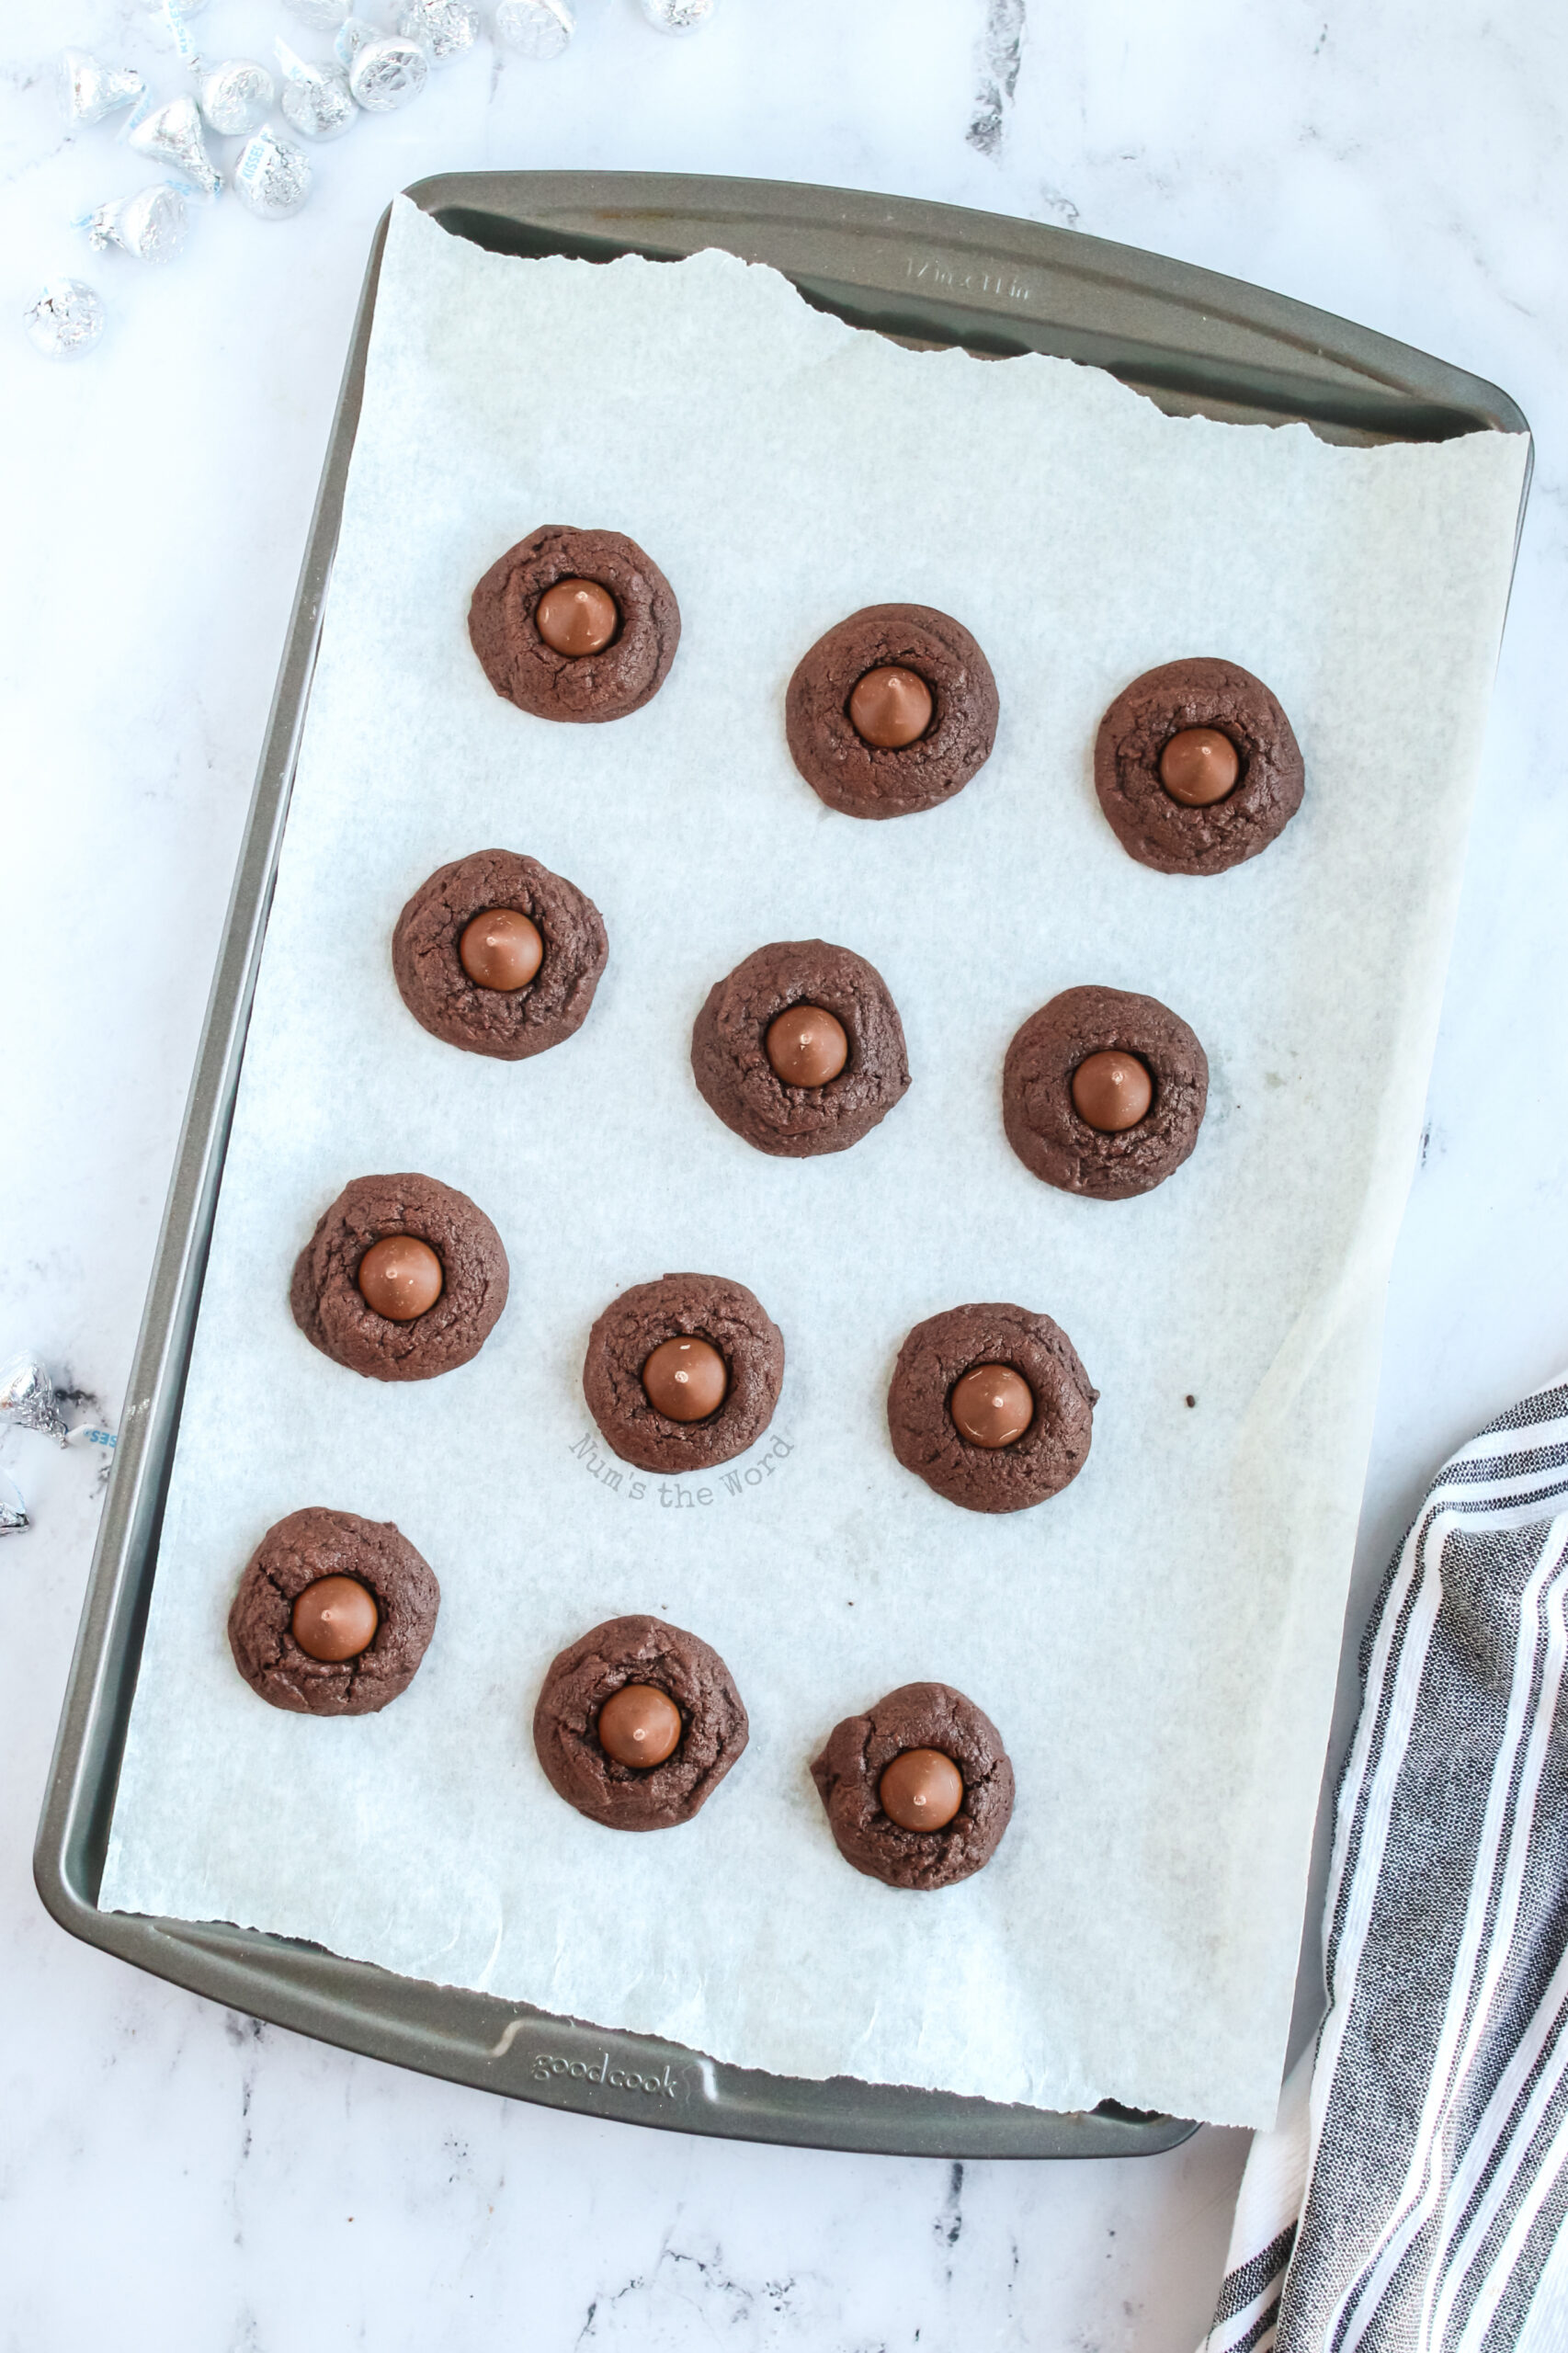
My absolute favorite part of making chocolate kiss cookies is pressing the Hershey kiss into the soft, warm cookie. It squishes in ever so lightly, then the chocolate melts slightly “gluing” it onto the cookie when it hardens.
I also love how incredibly easy these are to make and yet they look so decadent! I can make it look like I spent a lot of time when I didn’t. And talk about the ultimate cookie to pass around to the neighbors. I love you enough to share my Hershey’s chocolate kisses. I mean that is saying something.

Ingredients in Chocolate Kiss Cookies
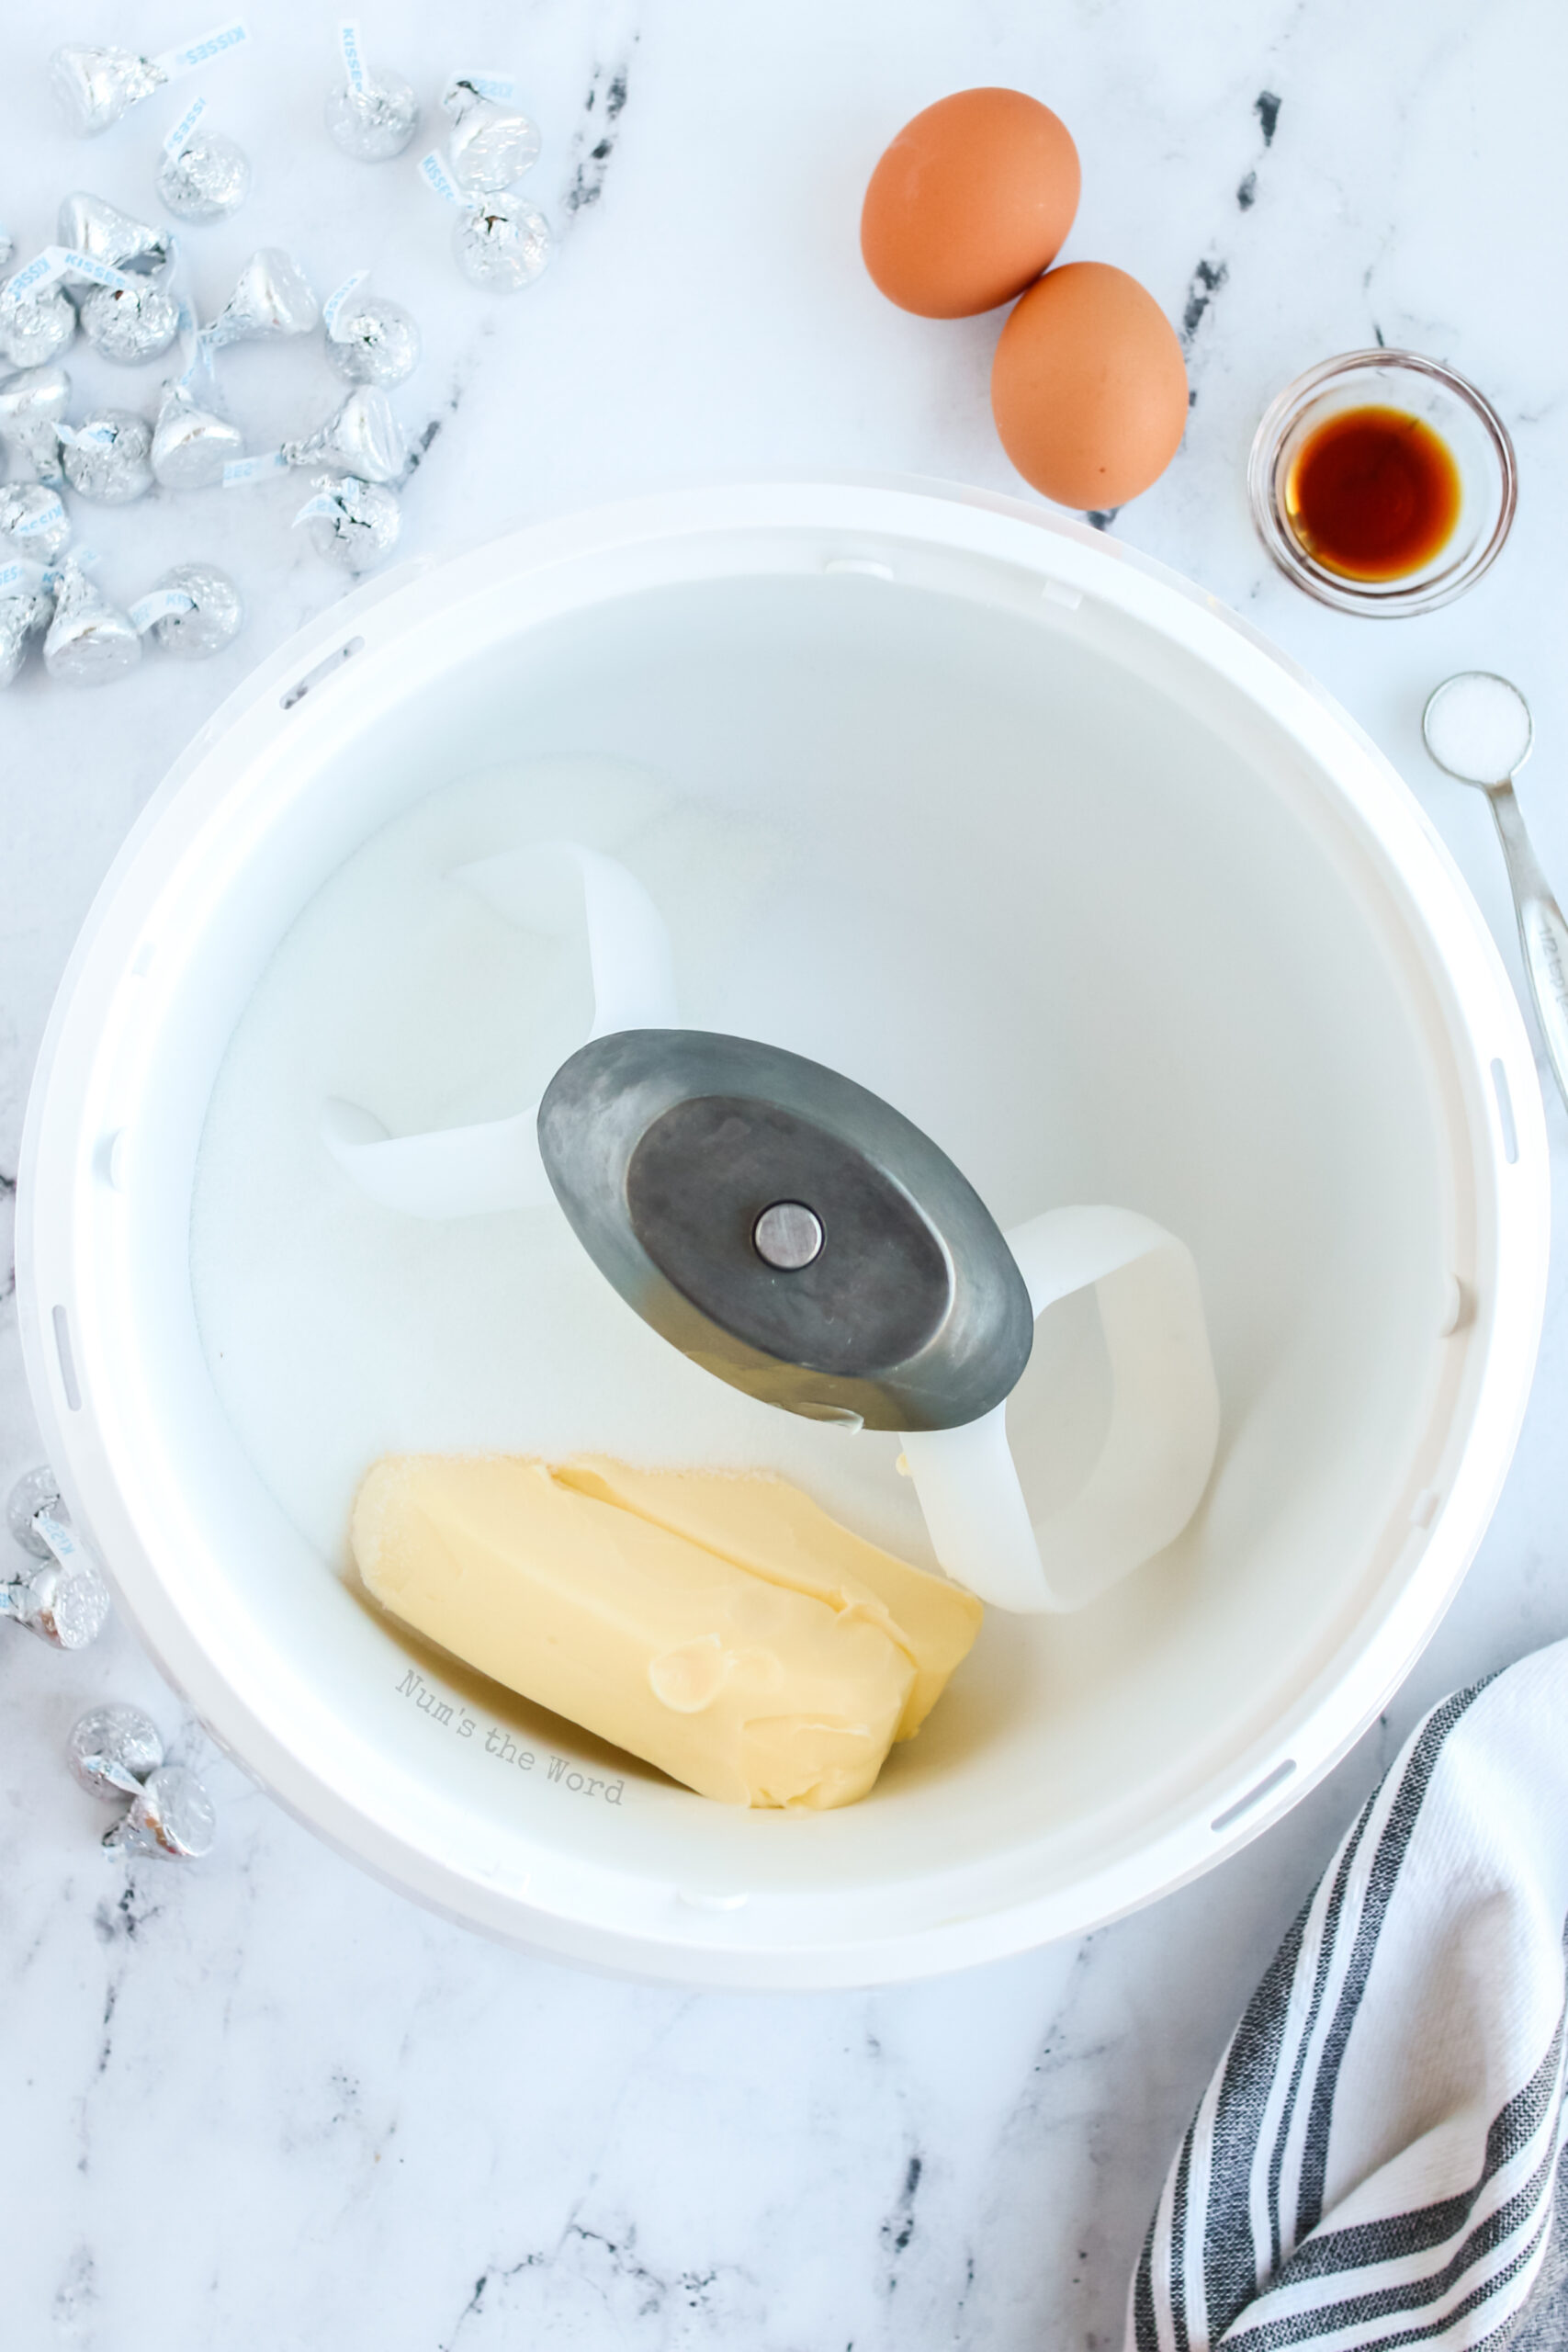
- Butter: You’ll want the butter to be room temperature. This makes for easy blending with the sugar. Salted or unsalted – the choice is yours. Personally I use salted for EVERYTHING.
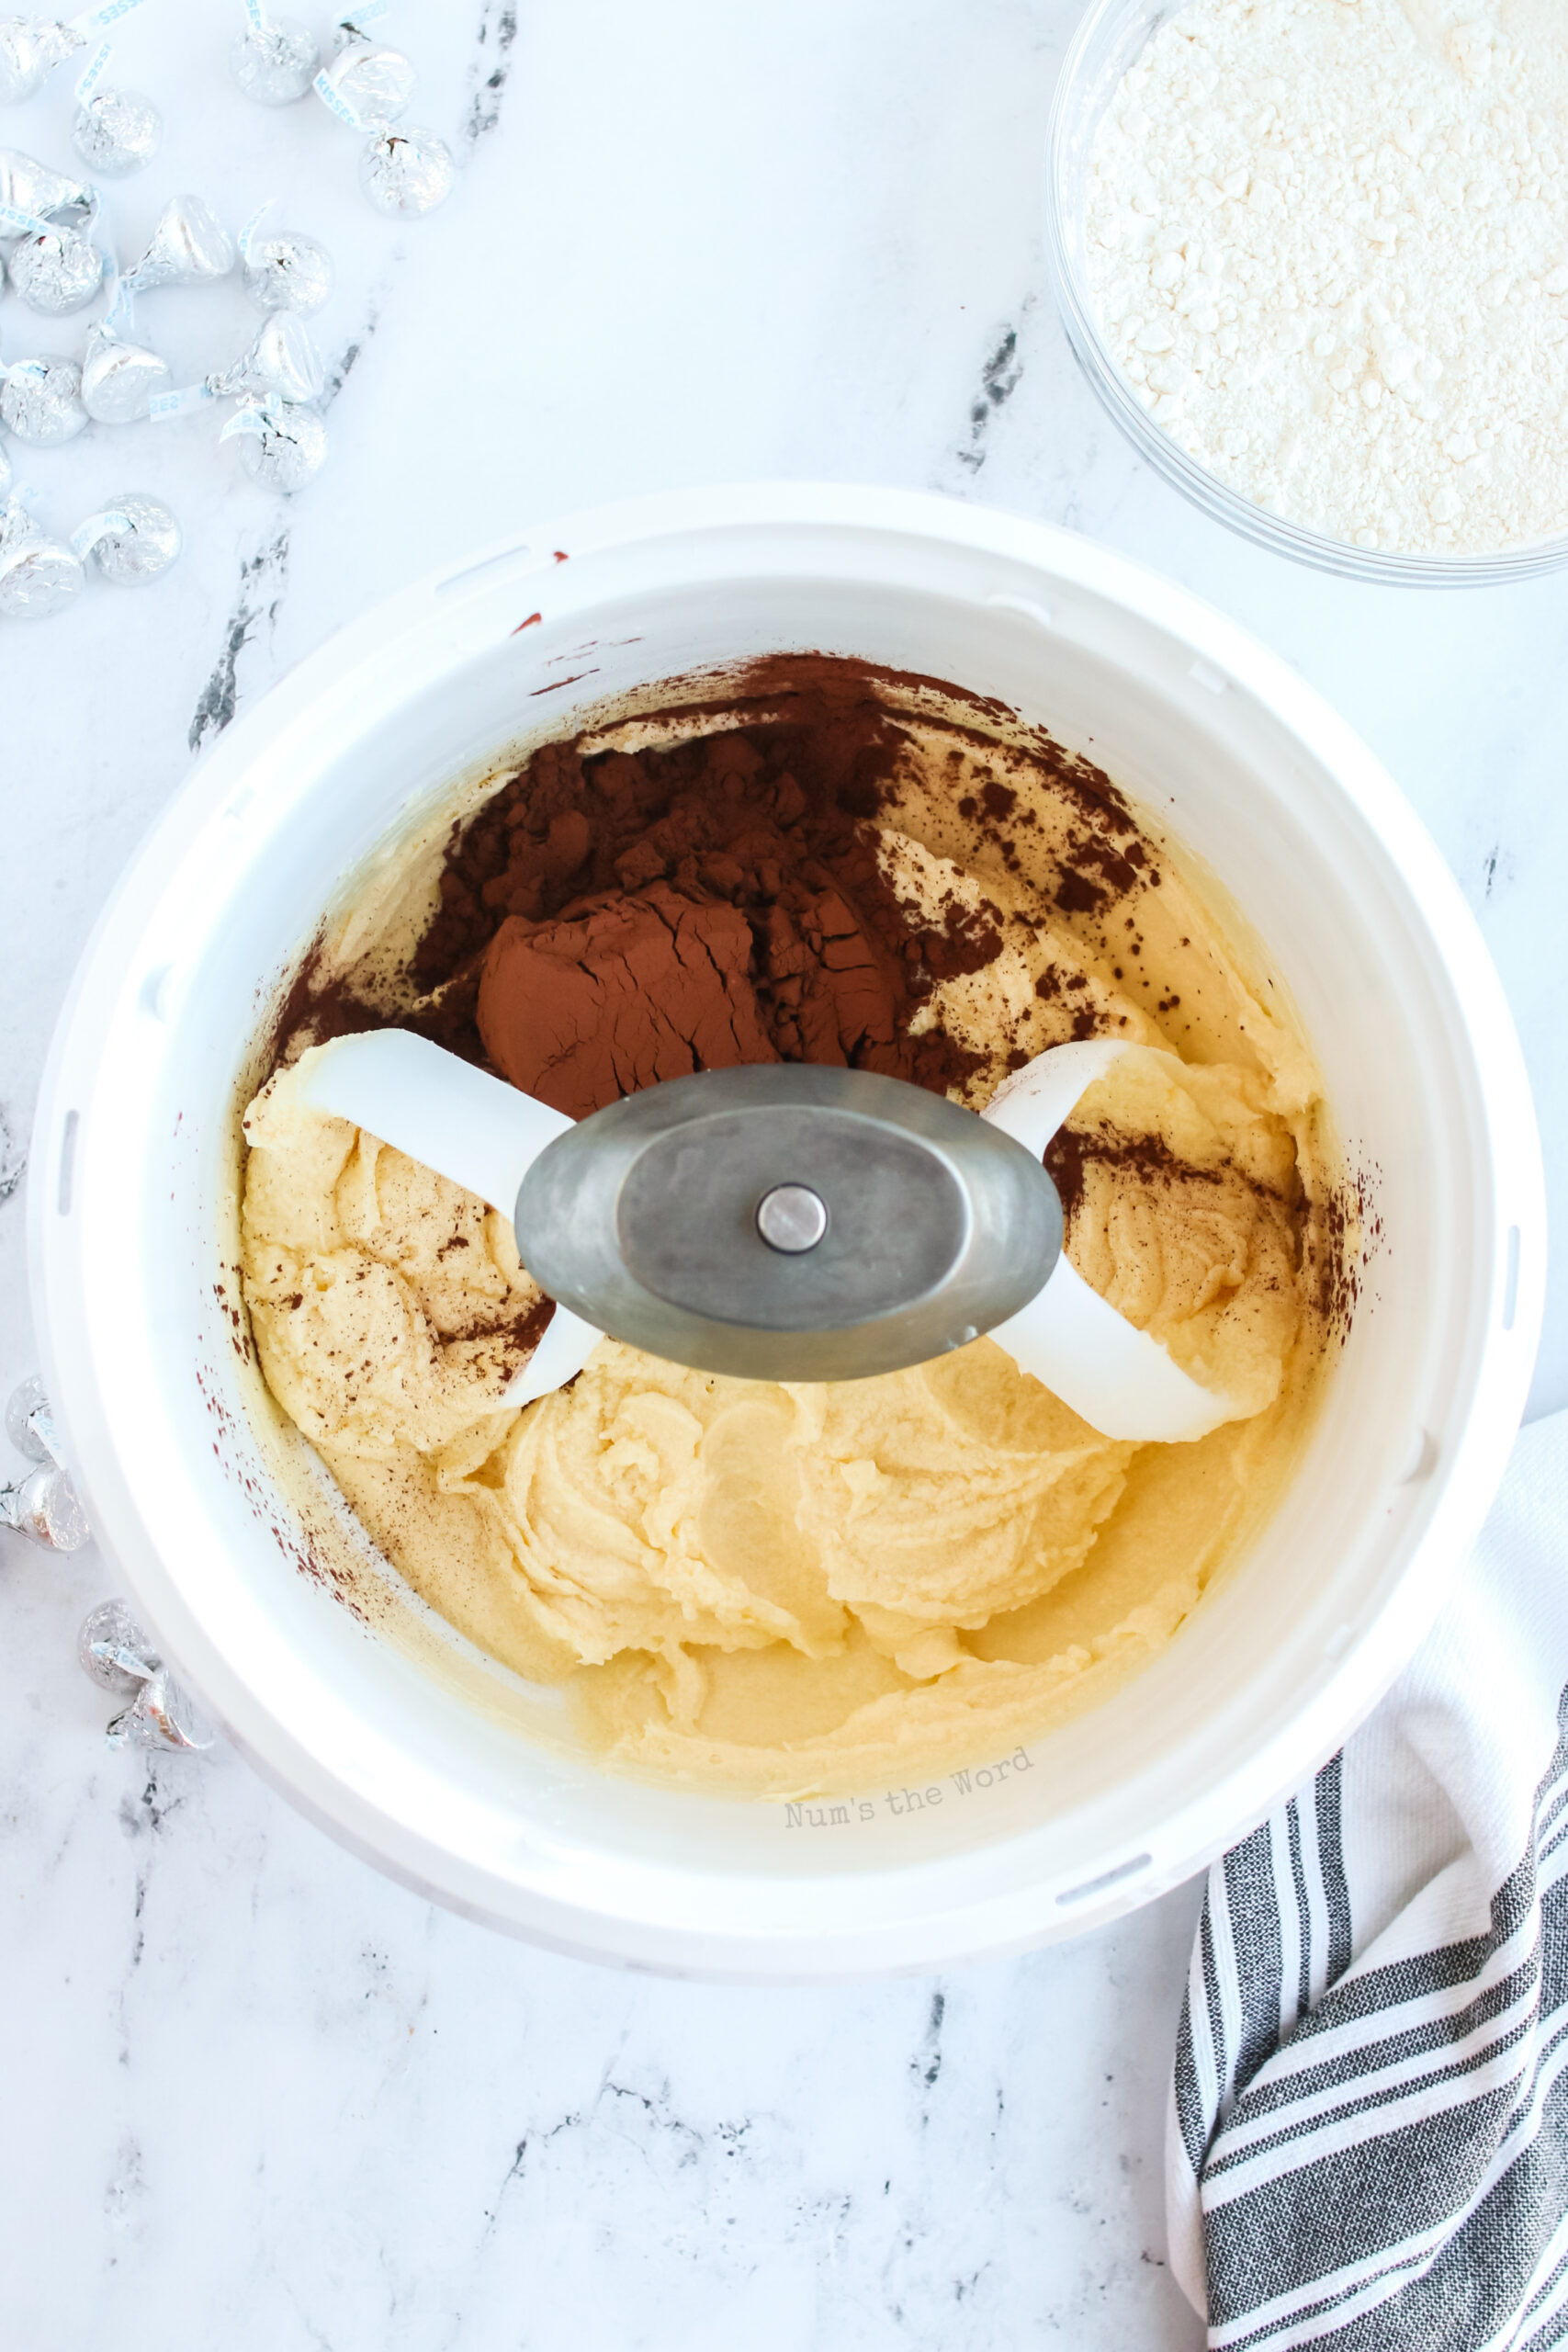
- Sugar: I use all white sugar in this recipe. It sweetens up the bitter cocoa powder.
- Eggs: I try to use room temperature eggs when I am adding them to a baking recipe. But it really shouldn’t matter much here if you grab them straight from the fridge.
- Vanilla: When buying vanilla extract look for the pure extract. If you don’t think it makes that big of a difference, buy them both and have a taste test. The pure will win out every time.
- Salt: Salt is the ultimate secret ingredient that isn’t that big of a secret. It goes in almost every thing you make for a reason. Don’t leave it out of this chocolate kiss cookie recipe.
- Cocoa Powder: The cocoa powder is what gives the cookies their chocolate flavor. If you want a different flavor try these Peanut Butter Kiss Cookies.
- Flour: I use regular, all purpose flour. I haven’t tried substituting for any other type of flour but I have lots of Oatmeal Cookie recipes if you want to give any of those a shot.
- Hershey’s Kisses: I use milk chocolate here but there are so many options! Try peppermint, caramel- filled, white chocolate, or almond chocolate kisses. Or if you don’t want a chocolate kiss try these spooky Monster Eyeball Cookies. We love making those!
Pro Tips:
- Level the flour: Too much flour will cause the cookies to become dry and crumbly.
- Buy extra Hershey’s kisses: The recipe needs 32 Hershey kisses but while unwrapping for some reason my kids seem to help those 32 disappear quickly.

How to Make Chocolate Kiss Cookies
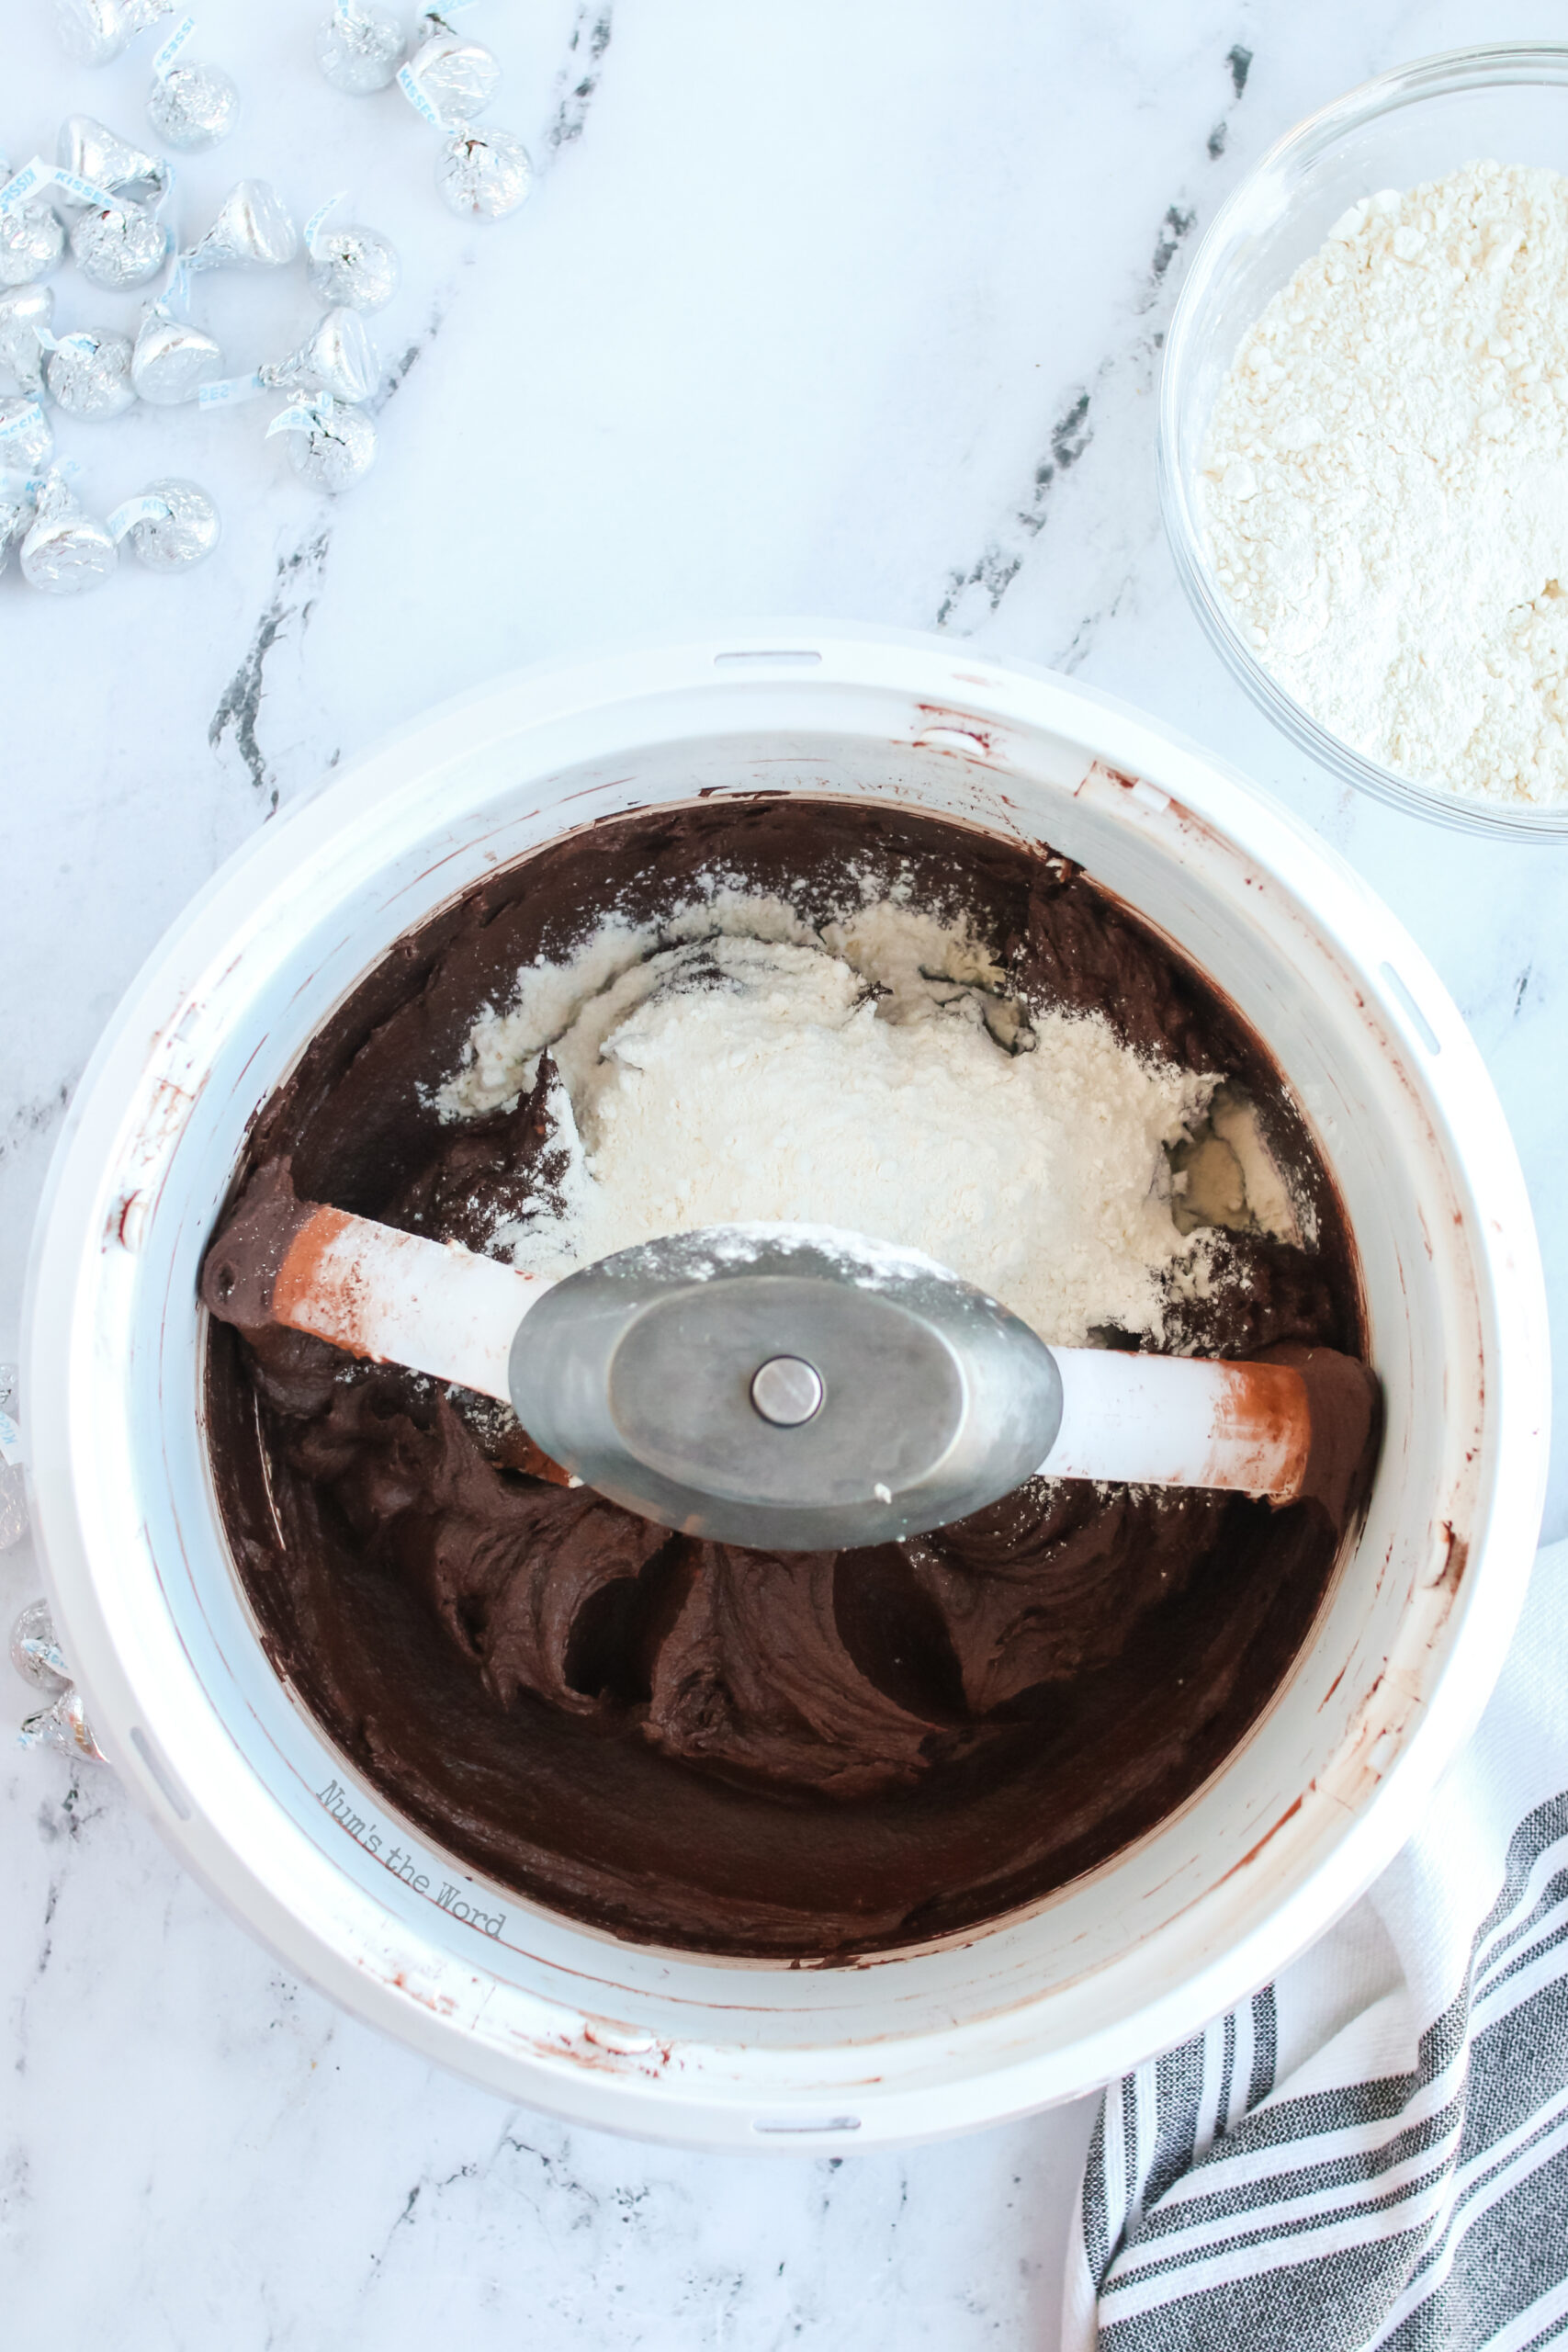
- Mix: It is so important to add your ingredients in the right order. As a kid I thought, well they are all getting mixed, does it really matter how? It really does! The wet ingredients get mixed first followed by the dry ingredients. This allows everything to properly disperse and mix. Otherwise you might end up with a chunk of butter in the middle of your cookie. Yuck.
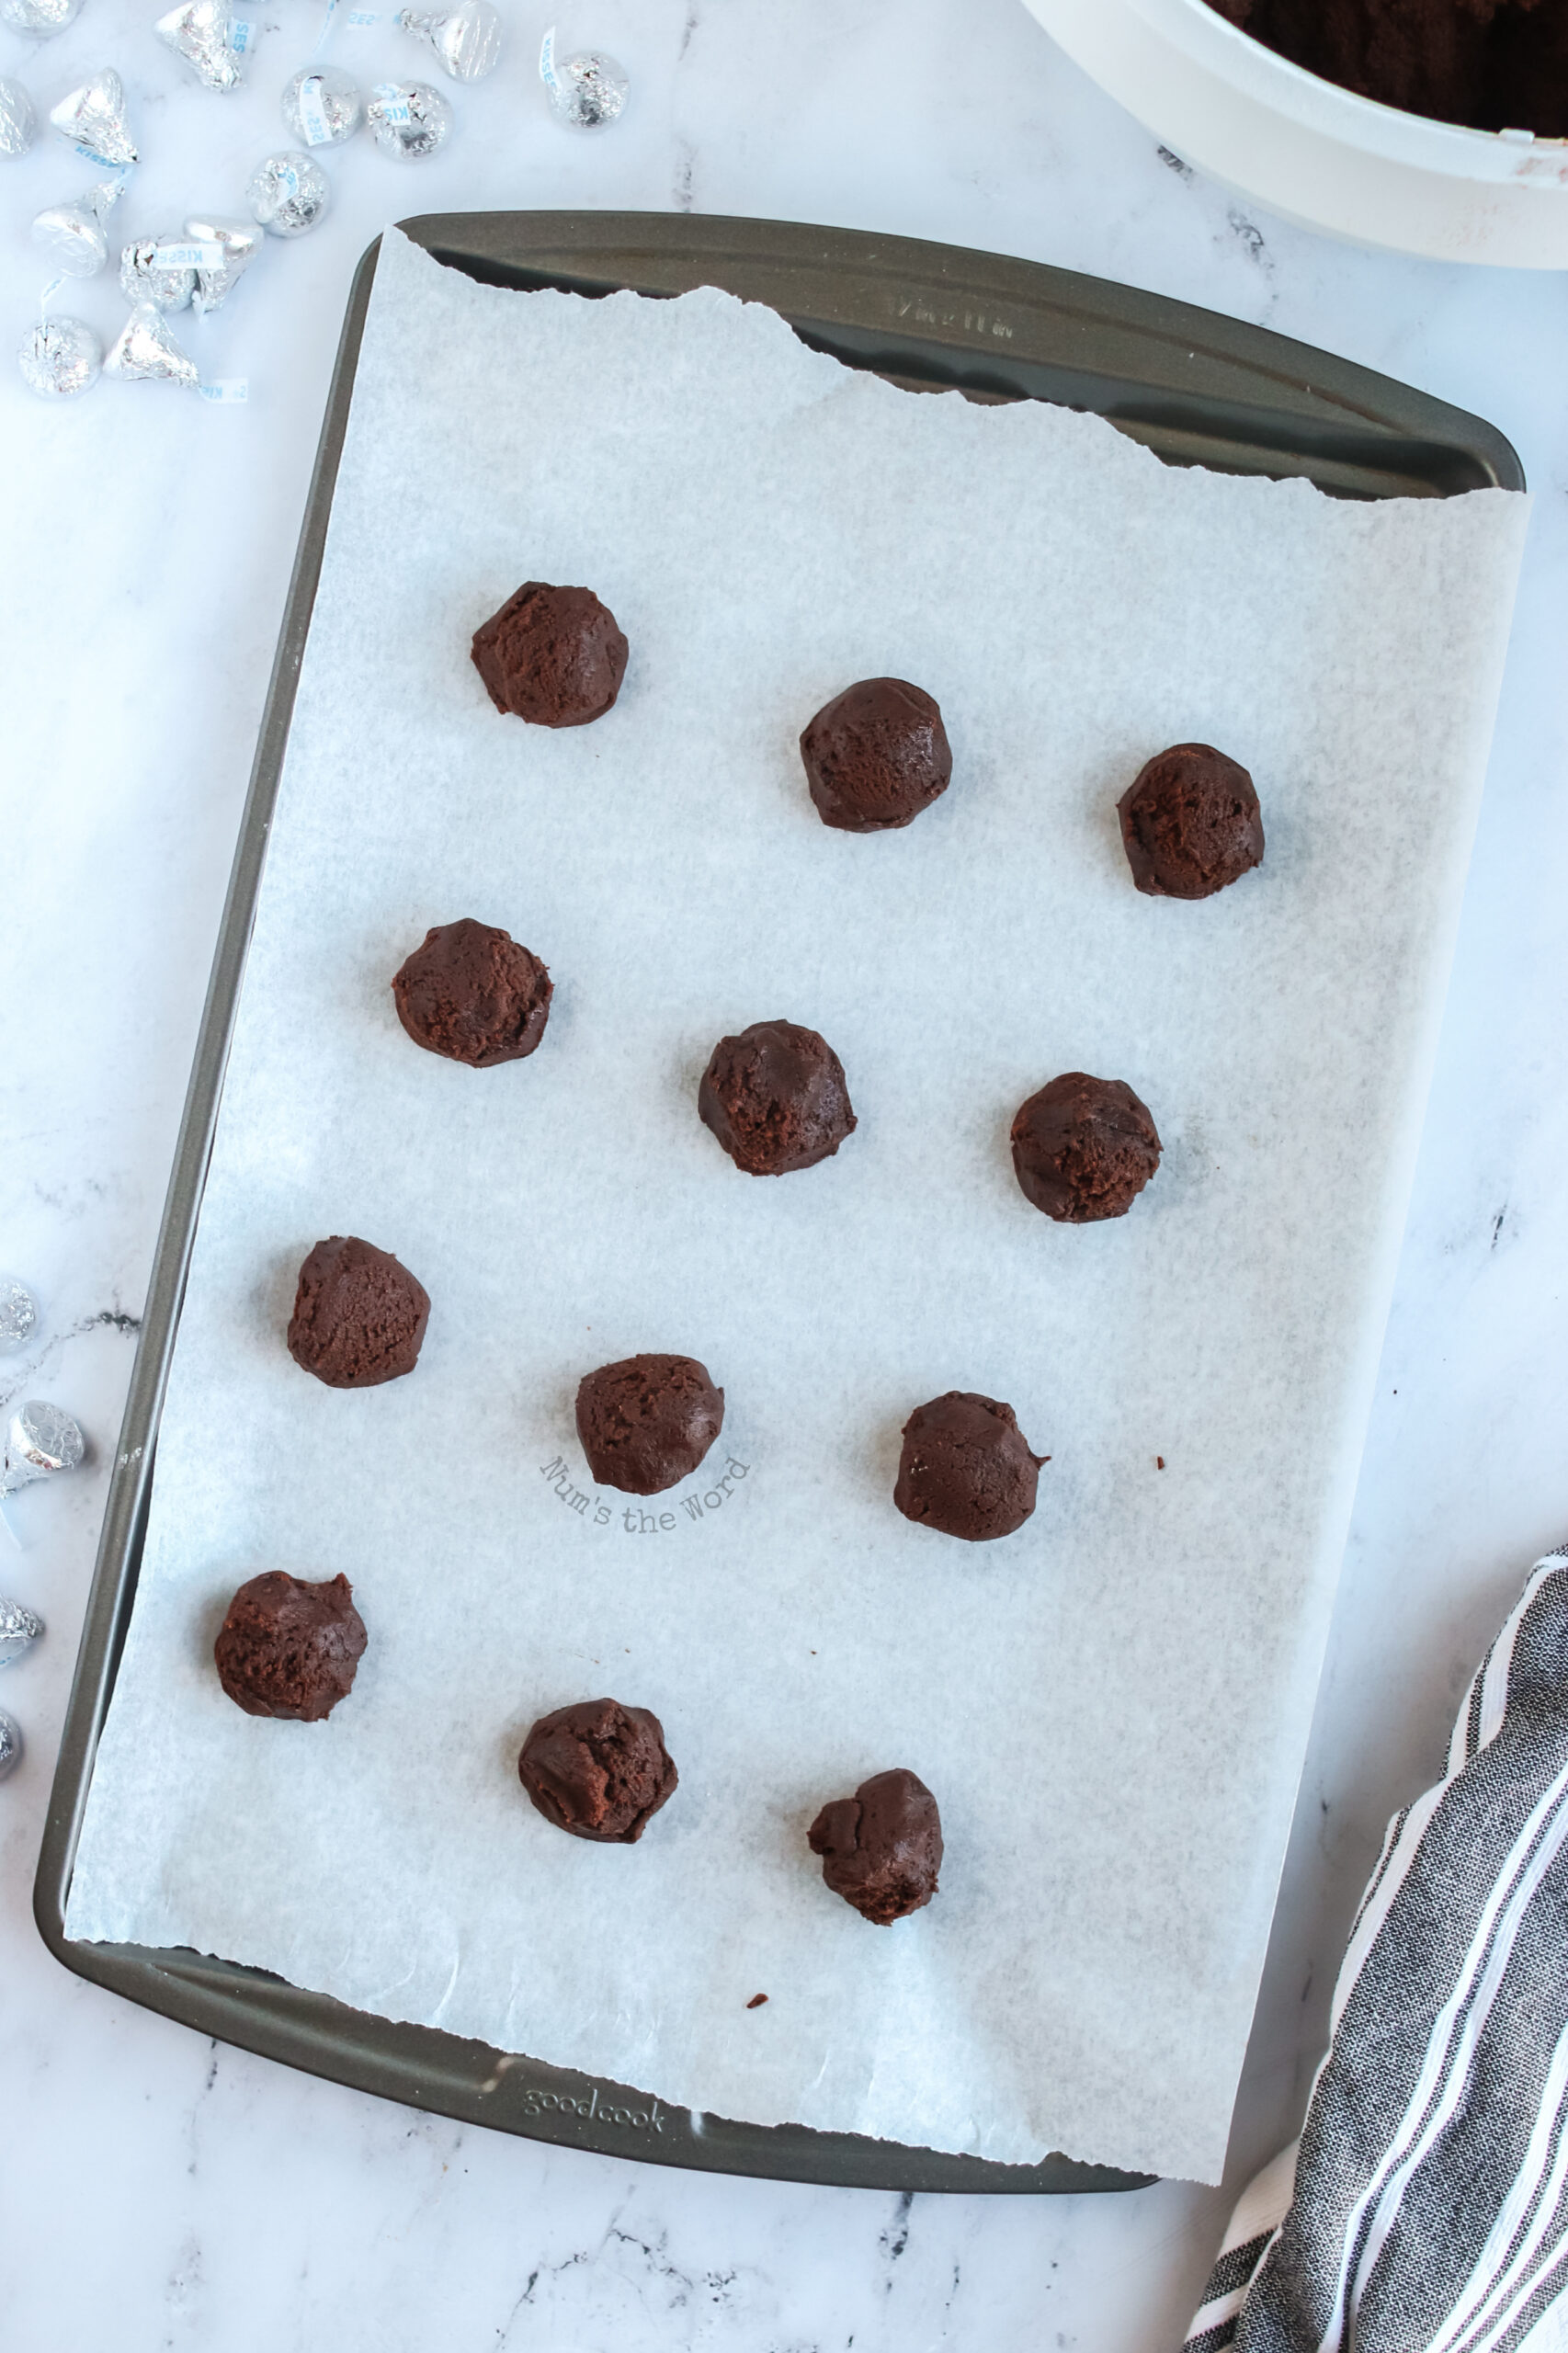
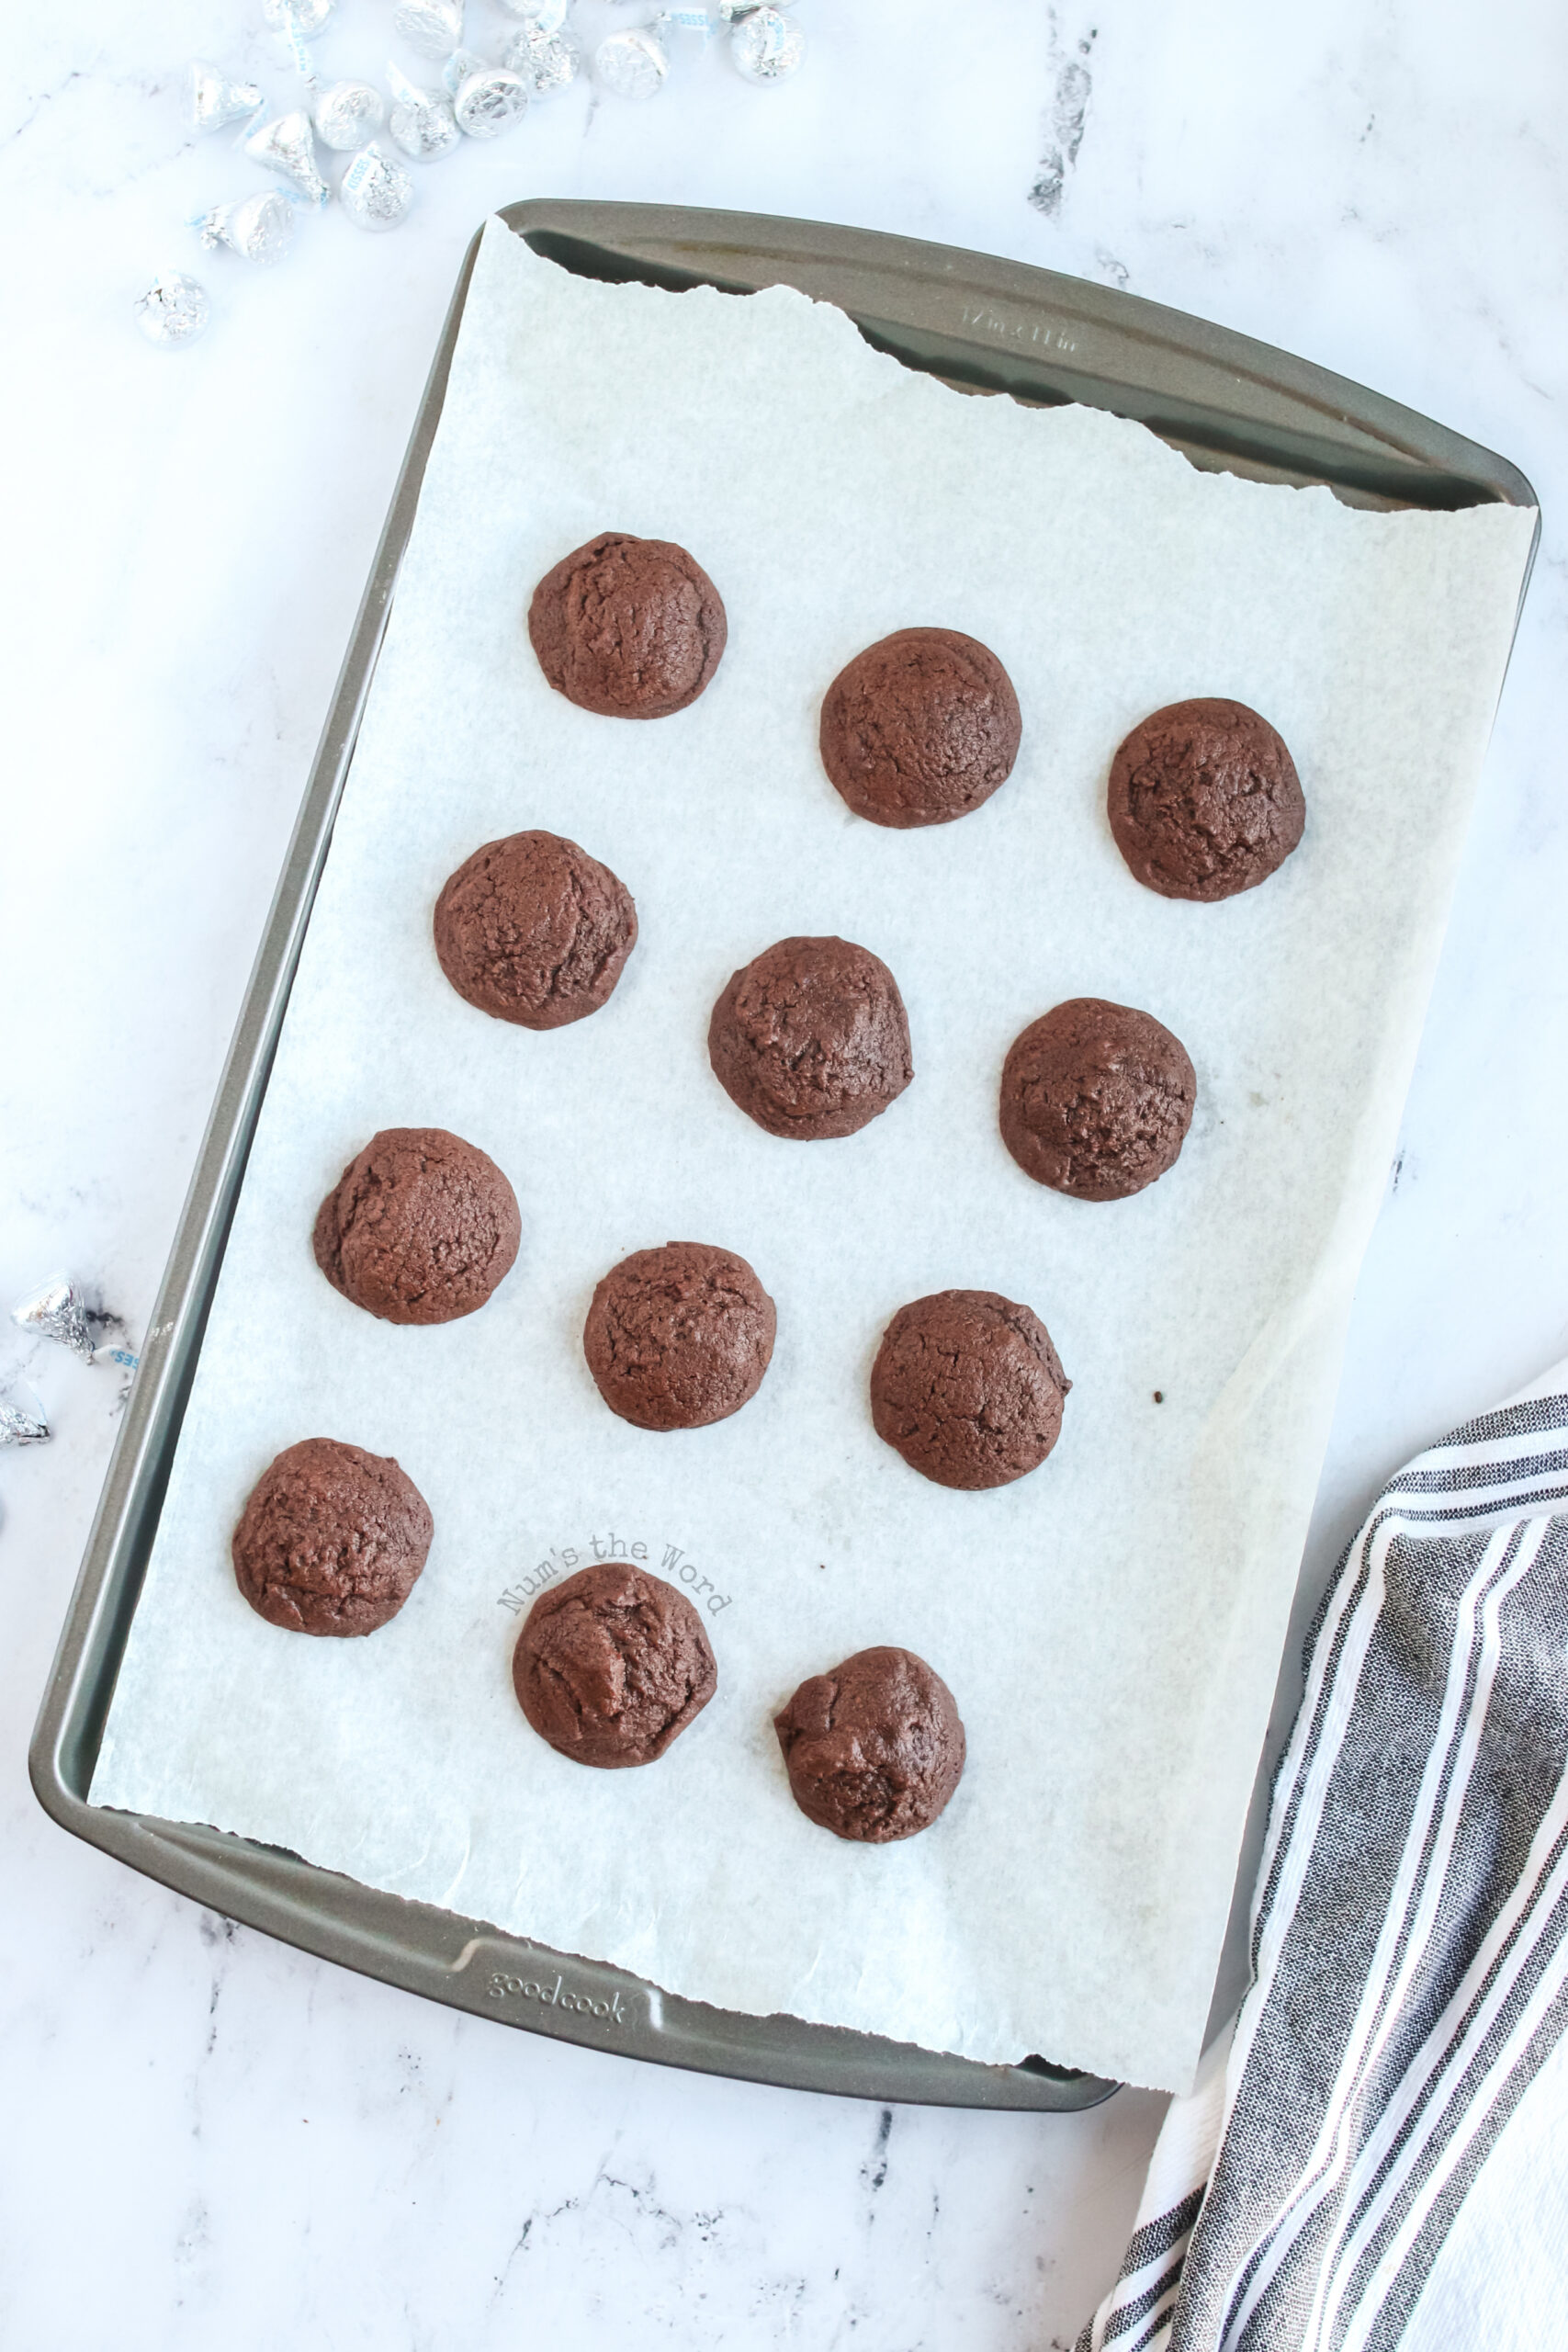
- Bake: Biggest tip ever- line the pan! This has changed my life. Right before I cook I always think- but the mess! Line the pan. It’s worth it. Watch the cookies carefully so as not to overcook.
- Press: This gets its own little special step because seriously, the BEST part. Press those chocolate kisses lightly in, don’t smash them to the bottom. Unless your two year old is helping. Then just try to keep them from squashing the whole thing into a flat, melted mess. Just saying.
- Eat: It will take about 5 minutes of cooling before you should transfer them to a cooling rack and then enjoy!

Pro Tips:
- Unwrap the Hershey kisses before the cookies come out of the oven. You’ll want to work quickly to get them into the cookies before the cookies cool.
- That little piece strip of paper with the Hershey’s kiss is called a Niggly Wiggly. Did you know that? I have no idea why. Teach it to your kids and call their homeschool vocab good for the week!

Storing Chocolate Kiss Cookies
- Room temperature: My favorite option as it keeps the cookies soft. Place a slice of bread in an airtight container with the cookies to help absorb moisture. Cookies never last very long at my house so this one works for us. If you are storing longer than a week, try the fridge or freezer.
- Fridge: In an airtight container in your fridge, these cookies will keep for up to 2 weeks. I like separating each cookie with parchment paper to keep them from pressing into one another.
- Freeze: If you are looking for longer term storage, up to three months in your freezer is the option for you.

Variations of Chocolate Kiss Cookies:
- Flavored Kisses: There are so many flavors of kisses! You’ve got the standard: white, milk, and dark, plus combos of them. And then there are the holiday flavors: peppermint, strawberry, birthday cake, caramel filled, truffles, almond, cookies and cream. The possibilities here are lovely.
- Sprinkles: Before adding the cookies to the oven, roll the balls in some sprinkles. Instantly make these a holiday cookie by adding a holiday colored sprinkle. How is that for easy!
- Sugar: Instead of rolling the dough balls in sprinkles you can also roll them in plain white sugar or a colored sugar to match your mood!

More Chocolate Recipes You’ll Love…
- 3 Ingredient Peanut Butter Blossoms
- Monster Eyeball Cookies
- No Bake Cookies
- Easy Chocolate Pie
- See’s Fudge Recipe
- Oreo Truffles
- Andes Mint Cupcakes
- 3 Ingredient Chocolate Cookies
- Raspberry Chocolate Tart
- Chocolate Cherry Cookies
- Pecan Turtles
- Peanut Clusters
- White Chocolate Puffcorn
- Chocolate Drop Cookies
- Devil’s Food Cake Cookies
These Chocolate Kiss Cookies are a chocolate lover’s dream come true. The sweet chocolate cookie topped by a perfectly shaped chocolate kiss. Kid friendly. Holiday friendly. “I’m eating these in the pantry so my kids don’t see me” friendly. Enjoy!
Chocolate Kiss Cookies

These delicious Chocolate Kiss Cookies are the ultimate kid friendly cookie! Quick, easy, and really fun to make, these are the perfect cookies for any chocolate lover!
Ingredients
- 1 cup butter
- 1 1/2 cup white sugar
- 2 eggs
- 2 teaspoons vanilla extract
- 1/2 teaspoon salt
- 1/2 cup cocoa powder
- 3/4 teaspoon baking soda
- 2 cups all purpose flour
- 1 bag Hershey's Kisses (at least 32)
Instructions
- Preheat oven to 350*F
- Blend butter and sugar together until fluffy.
- Add eggs, vanilla and salt. Blend again.
- Add cocoa powder and baking soda and blend well, scraping sides of bowl as needed.
- Add flour 1 cup at a time, blending after each addition.
- Scoop out with a cookie scoop onto a lined baking sheet.
- Bake in the oven for 8 - 10 minutes (my oven is 10 minutes).
- Remove from the oven and gently place 1 kiss on each hot cookie, pressing down slightly, while cookies are hot.
- Let cool on the pan for 5 minutes then transfer to a cooling rack.
Nutrition Information:
Yield:
32Serving Size:
1Amount Per Serving: Calories: 127Total Fat: 6gSaturated Fat: 4gTrans Fat: 0gUnsaturated Fat: 2gCholesterol: 27mgSodium: 83mgCarbohydrates: 16gFiber: 0gSugar: 9gProtein: 2g
Erin
Friday 5th of December 2025
I tried making these twice, following the recipe to a T but both times they spread so much I can’t even put a Hershey kiss in them. I’m not sure what’s causing this.
Janelle
Friday 24th of April 2026
This makes me so sad Erin! I've made this recipe lots and never had spreading. You said you made this recipe to the T so that must mean you used, real butter that isn't melted but room temperature, and all purpose flour and no substitutes. If so I'm not sure. Perhaps altitude? If it's spreading for you, add a little more flour to firm them up. I wish I had a better answer for you.