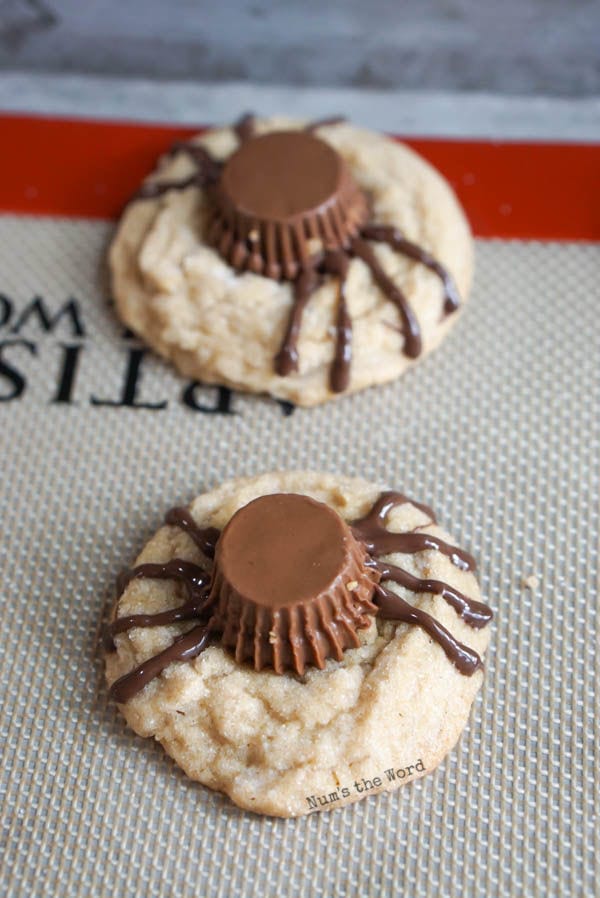
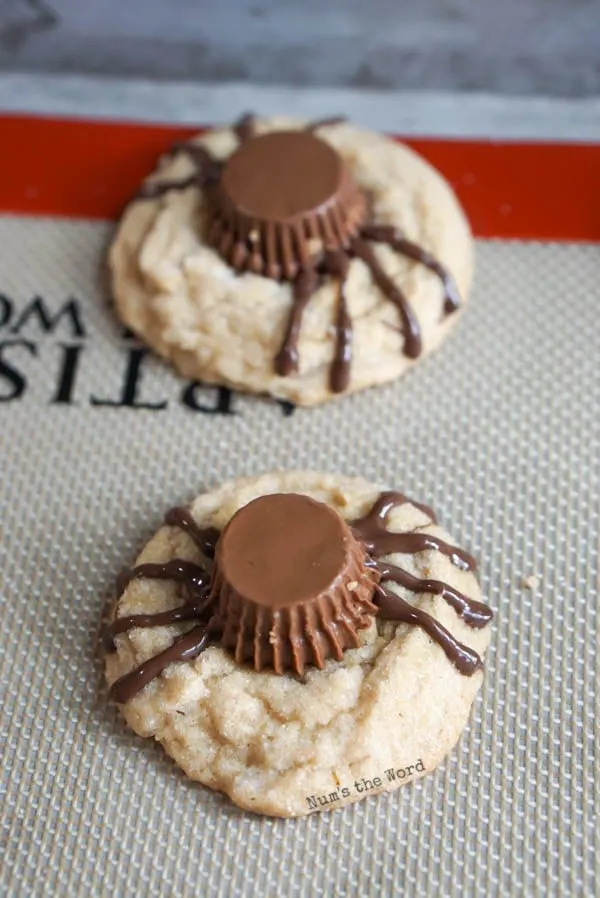
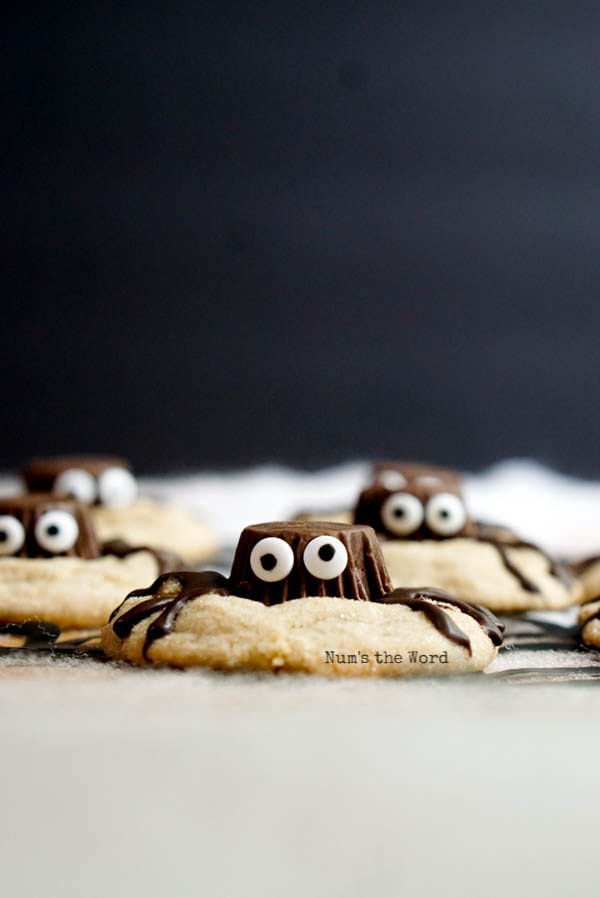
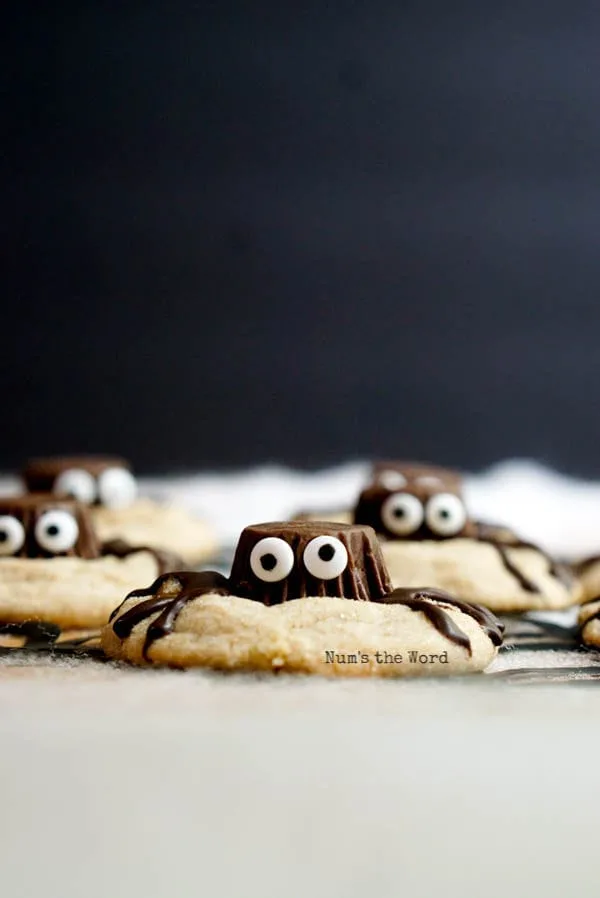
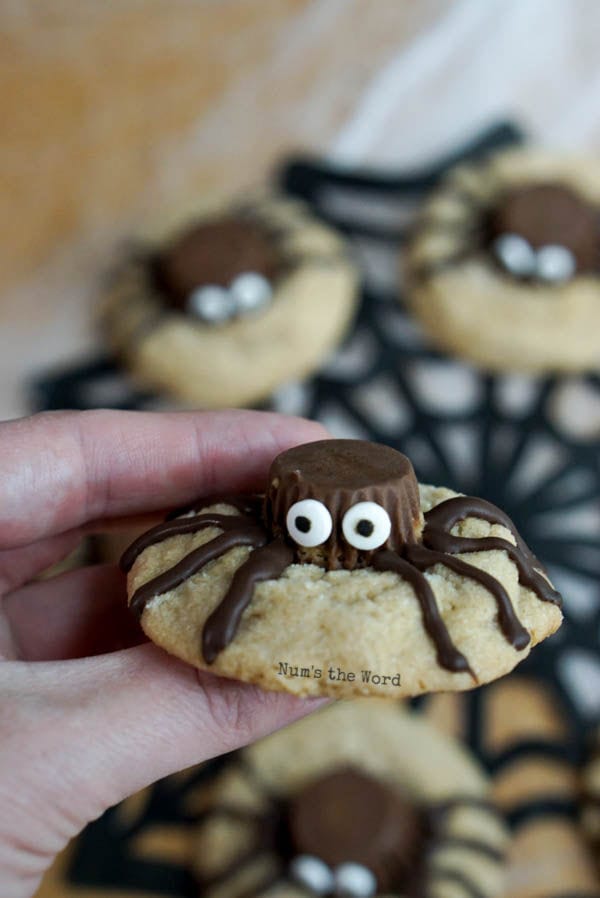
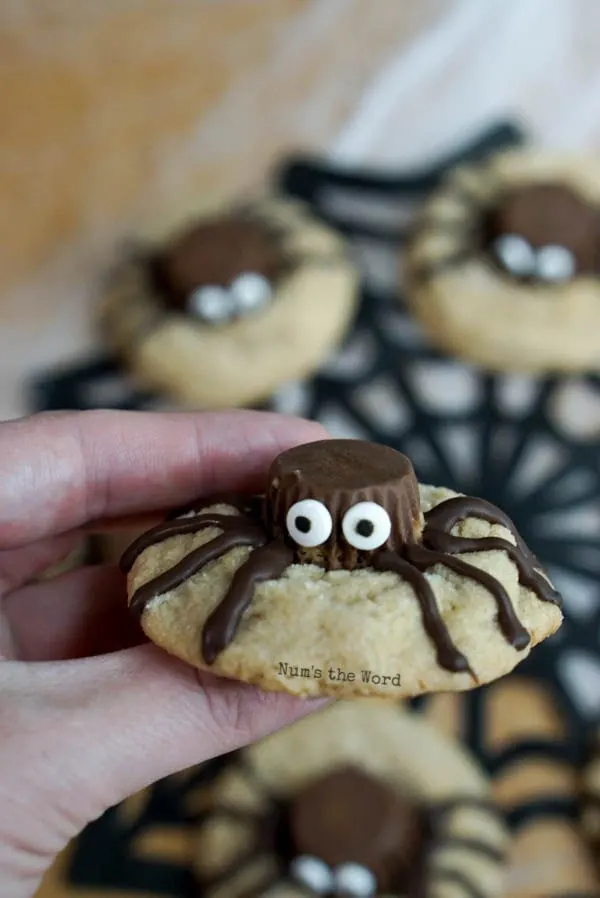
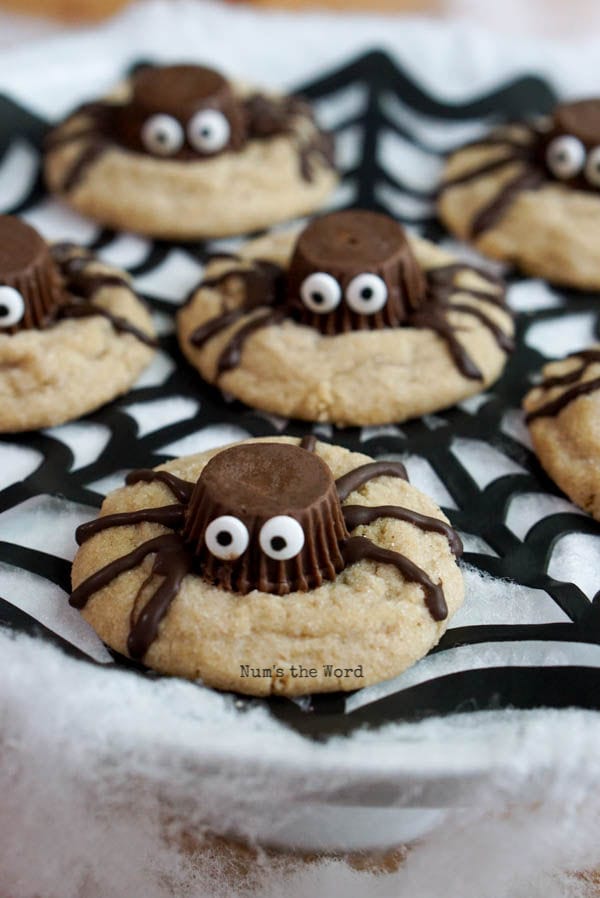
If you’re looking for a peanut butter cookie recipe, try this this Halloween Spider version! Soft & chewy peanut butter cookies topped with a peanut butter cup, chocolate legs and cute eyeballs are perfect for your Halloween party!


Imagine going to a Halloween party where these spooky, but fun, Halloween spider cookies are on display! Not only are they delicious but they also are a great way to use up some of that Halloween candy you’ve been stocking up on!
I’m a huge fan of using Halloween candy for baking and this recipe is no exception! Whoppers work great in cookies, Tootsie Rolls make delicious Caramel Corn and Skittles can be turned into these kid friendly Skittle Pops.
Every candy at Halloween can easily be turned into something else! It’s all a matter of tossing out the rule book and playing with your food once again!
The hardest part of hosting a good Halloween party is all the prep work. Not only do you have to pass out invitations, decorate, find a costume and clean your home, you’ve also go to prep all the food!

No one wants to be stuck in the kitchen while a fun and spooktacular party is happening in the living room!
Rather than make complicated treats and snacks, how about whipping these up? The best part is that these easy peanut butter cookies can be made ahead of time! Whip up a batch at the beginning of the month and then freeze them! When you’re ready to have your party, pull them out and serve them! Really it doesn’t get any easier!
Hosting a bit party doesn’t have to be difficult. It’s all about great planning and seamless execution!
How Do You Make Spider Peanut Butter Cookies?
If you already have a favorite peanut butter cookie recipe the feel free to use that. Otherwise, I recommend this one! It’s so easy!
- The first step to making these spider cookies with peanut butter cups is to of course make your cookies!
- While your cookies are baking, unwrap your peanut butter cups.
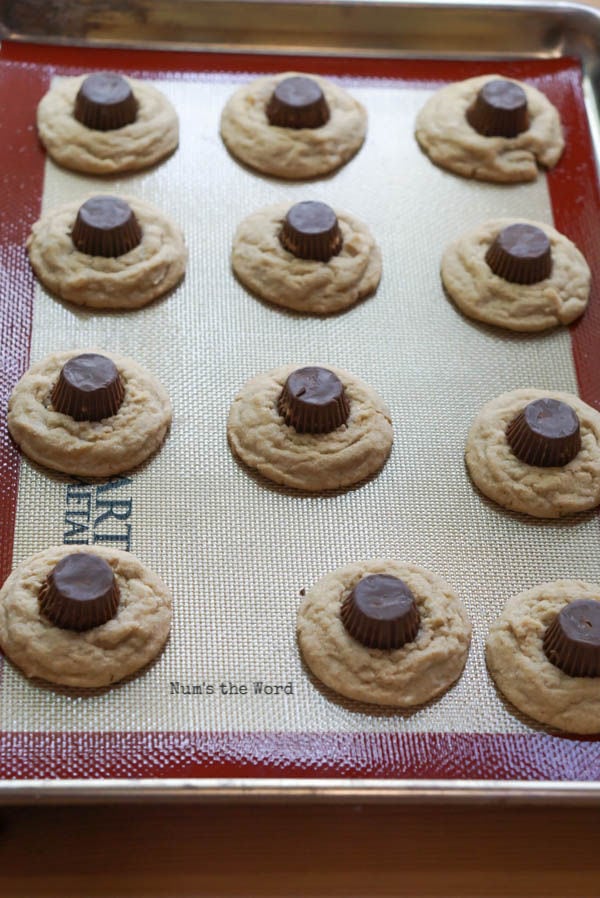
- After you pull your cookies out of the oven, gently press a peanut butter cup (fat side down) in the center of each cookie. Don’t press too hard.
- After you get a peanut butter cup on each cookie, go back through and GENTLY push on each cup to make sure it sticks (melts on to) each cookie.
- Now attach your eyes. You’ll want to do this while your peanut butter cups are still soft and melty. Because your chocolate is already soft, the eyes should easily attach without any extra ingredients.
- Now it’s time for your spider legs! In a freezer zipper bag, melt chocolate chips or bakers melting chips in the bag for 10 seconds at a time, massaging the bag each time until melted.
- Once melted, snip a tiny corner off your bag and slowly pipe eight legs onto each cookie.
- Now’s the hardest part. Wait. The peanut butter cup will be the SLOWEST to dry. You could pop these into the fridge or freezer to speed up the process or just wait. Once solid, you can enjoy or freeze!

Can You Freeze These Cookies?
Yes you can! Freezing these peanut butter spider cookies is by far one of the greatest time savers come party day! Or create a Boo Kit and secretly leave cookies and goodies on someones door step!
To freeze:
- Place your finished cookies on a cookie sheet – they can be close together – even touching.
- Freeze for 1 hour or more.
- Once frozen, gently place in a freezer zipper bag or air tight container and place back in the freezer for up to 3 months.
- When ready to enjoy, remove from freezer and allow to thaw on counter for 1 hour.
What is the Difference Between Peanut Butter Blossom Cookies and a Peanut Butter Kiss Cookie?
The only difference between the two cookies is the name. Believe it or not they are the same cookie!
Peanut butter blossom cookie is by far the more popular name. However depending on what part of the country you grew up in, you may have known it as a peanut butter kiss cookie instead.
With a blossom, you could technically use any kind of chocolate since the type of chocolate is not specified. I’ve known people to use chocolate stars, peanut butter cups and even thick fudge sauce in the center instead of a Hershey Kiss.
Despite the type of chocolate you choose, they all start with the same soft peanut butter cookie recipe. However if you want to try something unusual, check out this 3 ingredient Peanut Butter Cookies version!


How do I Keep Cookies from Getting Hard?
Keeping any cookie soft and chewy after a few days can be difficult. However there is a timeless trick that your grandmother used, that is still used today! Bread.
You read that right, bread. Whether you use a cookie jar, zipper bag or container, place a quarter slice of bread in with your cookies. This will ensure soft and chewy cookies for weeks!
How Do I Soften Over Baked Cookies?
If your cookies have already turned into hard rocks or were over baked and could break your teeth, don’t fret. The same trick will work on hard cookies too! Simply place your rock hard cookies in a container, add a quarter slice of bread and seal shut. Within 24 hours your cookies should be chewy! It’s my favorite baking magic trick!
What Else Could I Use for Legs?
If melting chocolate and piping on legs sounds like it’s too labor intensive for you, don’t fret! Try one of these spider cookie leg alternatives!
- Stick Pretzels
- Black Licorice Wheels
- Black or Brown Frosting
- Crispy Chow Mein Noodles

Other Must Have Halloween Recipes:
- Ghost Poop
- Vampire Kiss Drink
- Blood Dip
- Monster Eyeball
- Chocolate Brains
- Creepy Witches Fingers
- Tootsie Roll Fudge
- Tootsie Roll Caramel Corn
- Mummy Hot Dogs
- Witch Hat Cookies
Spider Cookies
Halloween cookies have never looked cuter than these peanut butter cup spider cookies! Make them in advance and freeze them for your Halloween party or Boo Kit!
Ingredients
- 1 cup butter (room temperature)
- 1 cup light brown sugar
- 1 cup white sugar + 1/4 cup white sugar
- 2 eggs
- 1 cup creamy peanut butter
- 3 cups flour
- 2 teaspoons baking soda
- 1/4 teaspoon salt
- 1 bag miniature peanut butter cups
- candy eyeballs
- 1/2 cup melting chocolate (dark, semi sweet or milk)
Instructions
- Preheat oven to 350*F
- Prepare a cookie sheet with parchment paper, non stick foil, baking mat or spray with cooking spray.
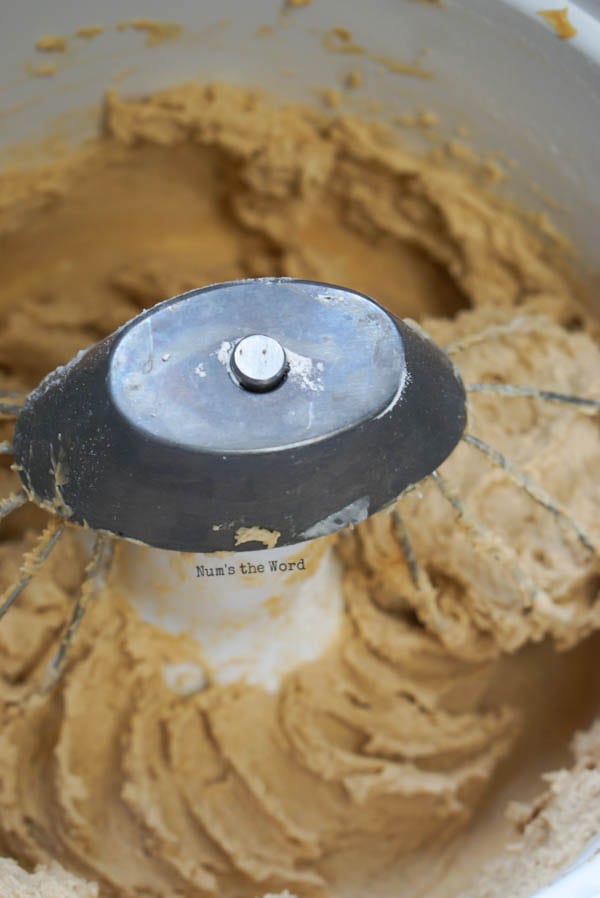
- Cream butter, brown sugar and 1 cup white sugar together.
- Add eggs and blend well, scraping sides of bowl as needed.
- Add peanut butter and blend again. Scrape sides.
- Add flour 1 cup at a time, mixing between each addition.
- Add baking soda and salt - blend.
- In a small bowl add 1/4 cup of sugar.
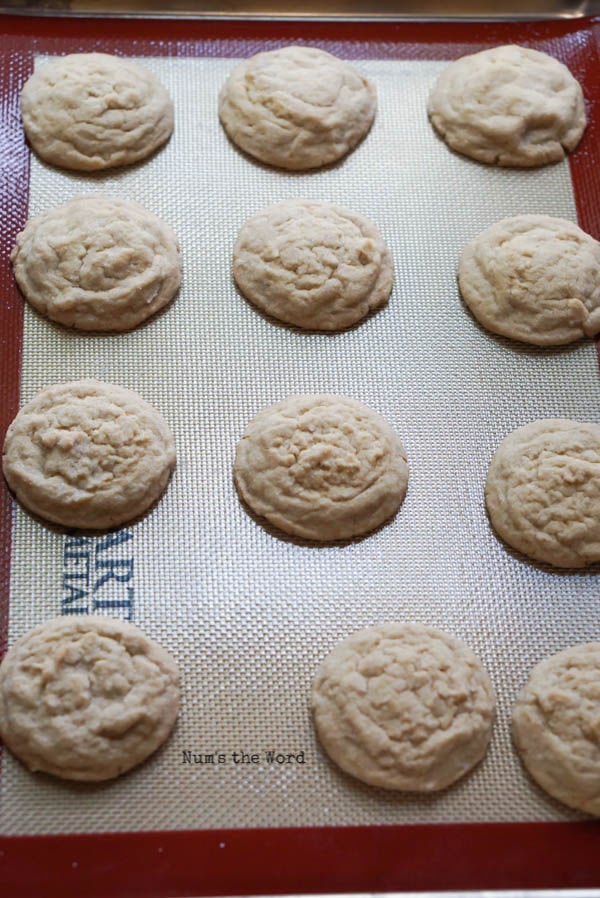
- Scoop out 1 Tablespoon portions of dough and roll into a ball.
- Place cookie dough in sugar and roll around, coating entire ball.
- Place sugared ball onto prepared cookie sheet. Fill entire sheet, leaving enough space between so cookies can expand.
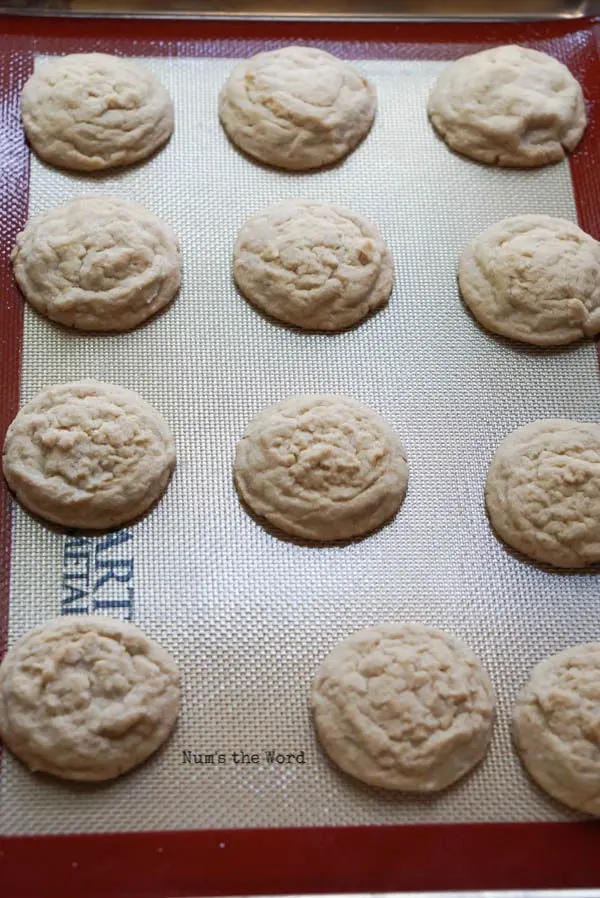
- Bake for 8 - 10 minutes.
- While cookies are baking, unwrap enough peanut butter cups to place one on each cookie.
- Remove cookies from oven and gently press one peanut butter cup in the center of each cookie.
- When all cookies have a peanut butter cup on them, go back around and gently press each cup again into cookie.
- Add two eyeballs onto the sides of each peanut butter cup.
- Place melting chocolate wafers in a freezer zipper bag - into a corner of the bag. Cook in microwave for 10 seconds then massage wafers. Repeat until all wafers are melted. Ensure that all chocolate is in the corner of the bag.
- Snip a tiny piece of the edge of zipper bag and pipe on eight legs to every spider.
- Allow cookies to cool fully to allow chocolate to harden. Then store, freeze or eat!
Nutrition Information:
Yield:
30Serving Size:
1Amount Per Serving: Calories: 229Total Fat: 12gSaturated Fat: 5gTrans Fat: 0gUnsaturated Fat: 5gCholesterol: 29mgSodium: 202mgCarbohydrates: 28gFiber: 1gSugar: 17gProtein: 4g
Molly Pisula
Thursday 7th of November 2019
These are so adorable! Totally bookmarking for next Halloween!