This Oatmeal Molasses Bread is easy to make and perfect fresh out of the oven slathered in butter. There is absolutely nothing better or more comforting.


I love that I can pronounce all the ingredients in this bread. This recipe only calls for 7 ingredients and one of them is water!
One of the many reasons I love making homemade oatmeal molasses bread is because I feel no guilt when my kids eat 10 slices for lunch.
I also love the process that goes into making this oatmeal bread. Rising, punching, flattening, rolling. There is just something so therapeutic about making bread.
Plus it’s an easy recipe to bring the kids in to help with too!
And lastly I love the flavor. The smell itself is absolutely worth every moment of making this bread but the taste… heavenly!
If you’ve never had a hearty Oatmeal Molasses Bread it is incredible and you are going to love it.

Ingredients in Oatmeal Molasses Bread
- Water: You need water in this recipe to cook the oats.
- Oats: I recommend using old fashioned rolled oats. While you can substitute for quick oats, the texture is going to change and I think it’s best when you stick with the original. Though I will say that this recipe is pretty forgiving if you are in a pinch.
- Butter: I have not substituted for any other fats and I don’t recommend using margarine. The fats you use in baking lend A LOT to the flavor of the final dish and butter is my absolute favorite.
- Molasses: Unsulphured molasses has a very rich flavor and actually acts as a sort of preservative for the bread, which makes it last longer. Though honestly it never lasts very long in my house anyway!
- Yeast: Use rapid rise yeast for best results. In this recipe you’ll be adding the yeast directly to the ingredients. While you do allow it to proof after adding it, rapid rise yeast tends to do better in those scenarios than regular yeast does.
- Flour: No fancy flours needed. Just some regular all purpose flour will do the trick!
- Salt: I love sea salt myself but pick what you have in your cupboard. Salt almost never requires an extra stop at the grocery store for something special.


How to Make Oatmeal Molasses Bread
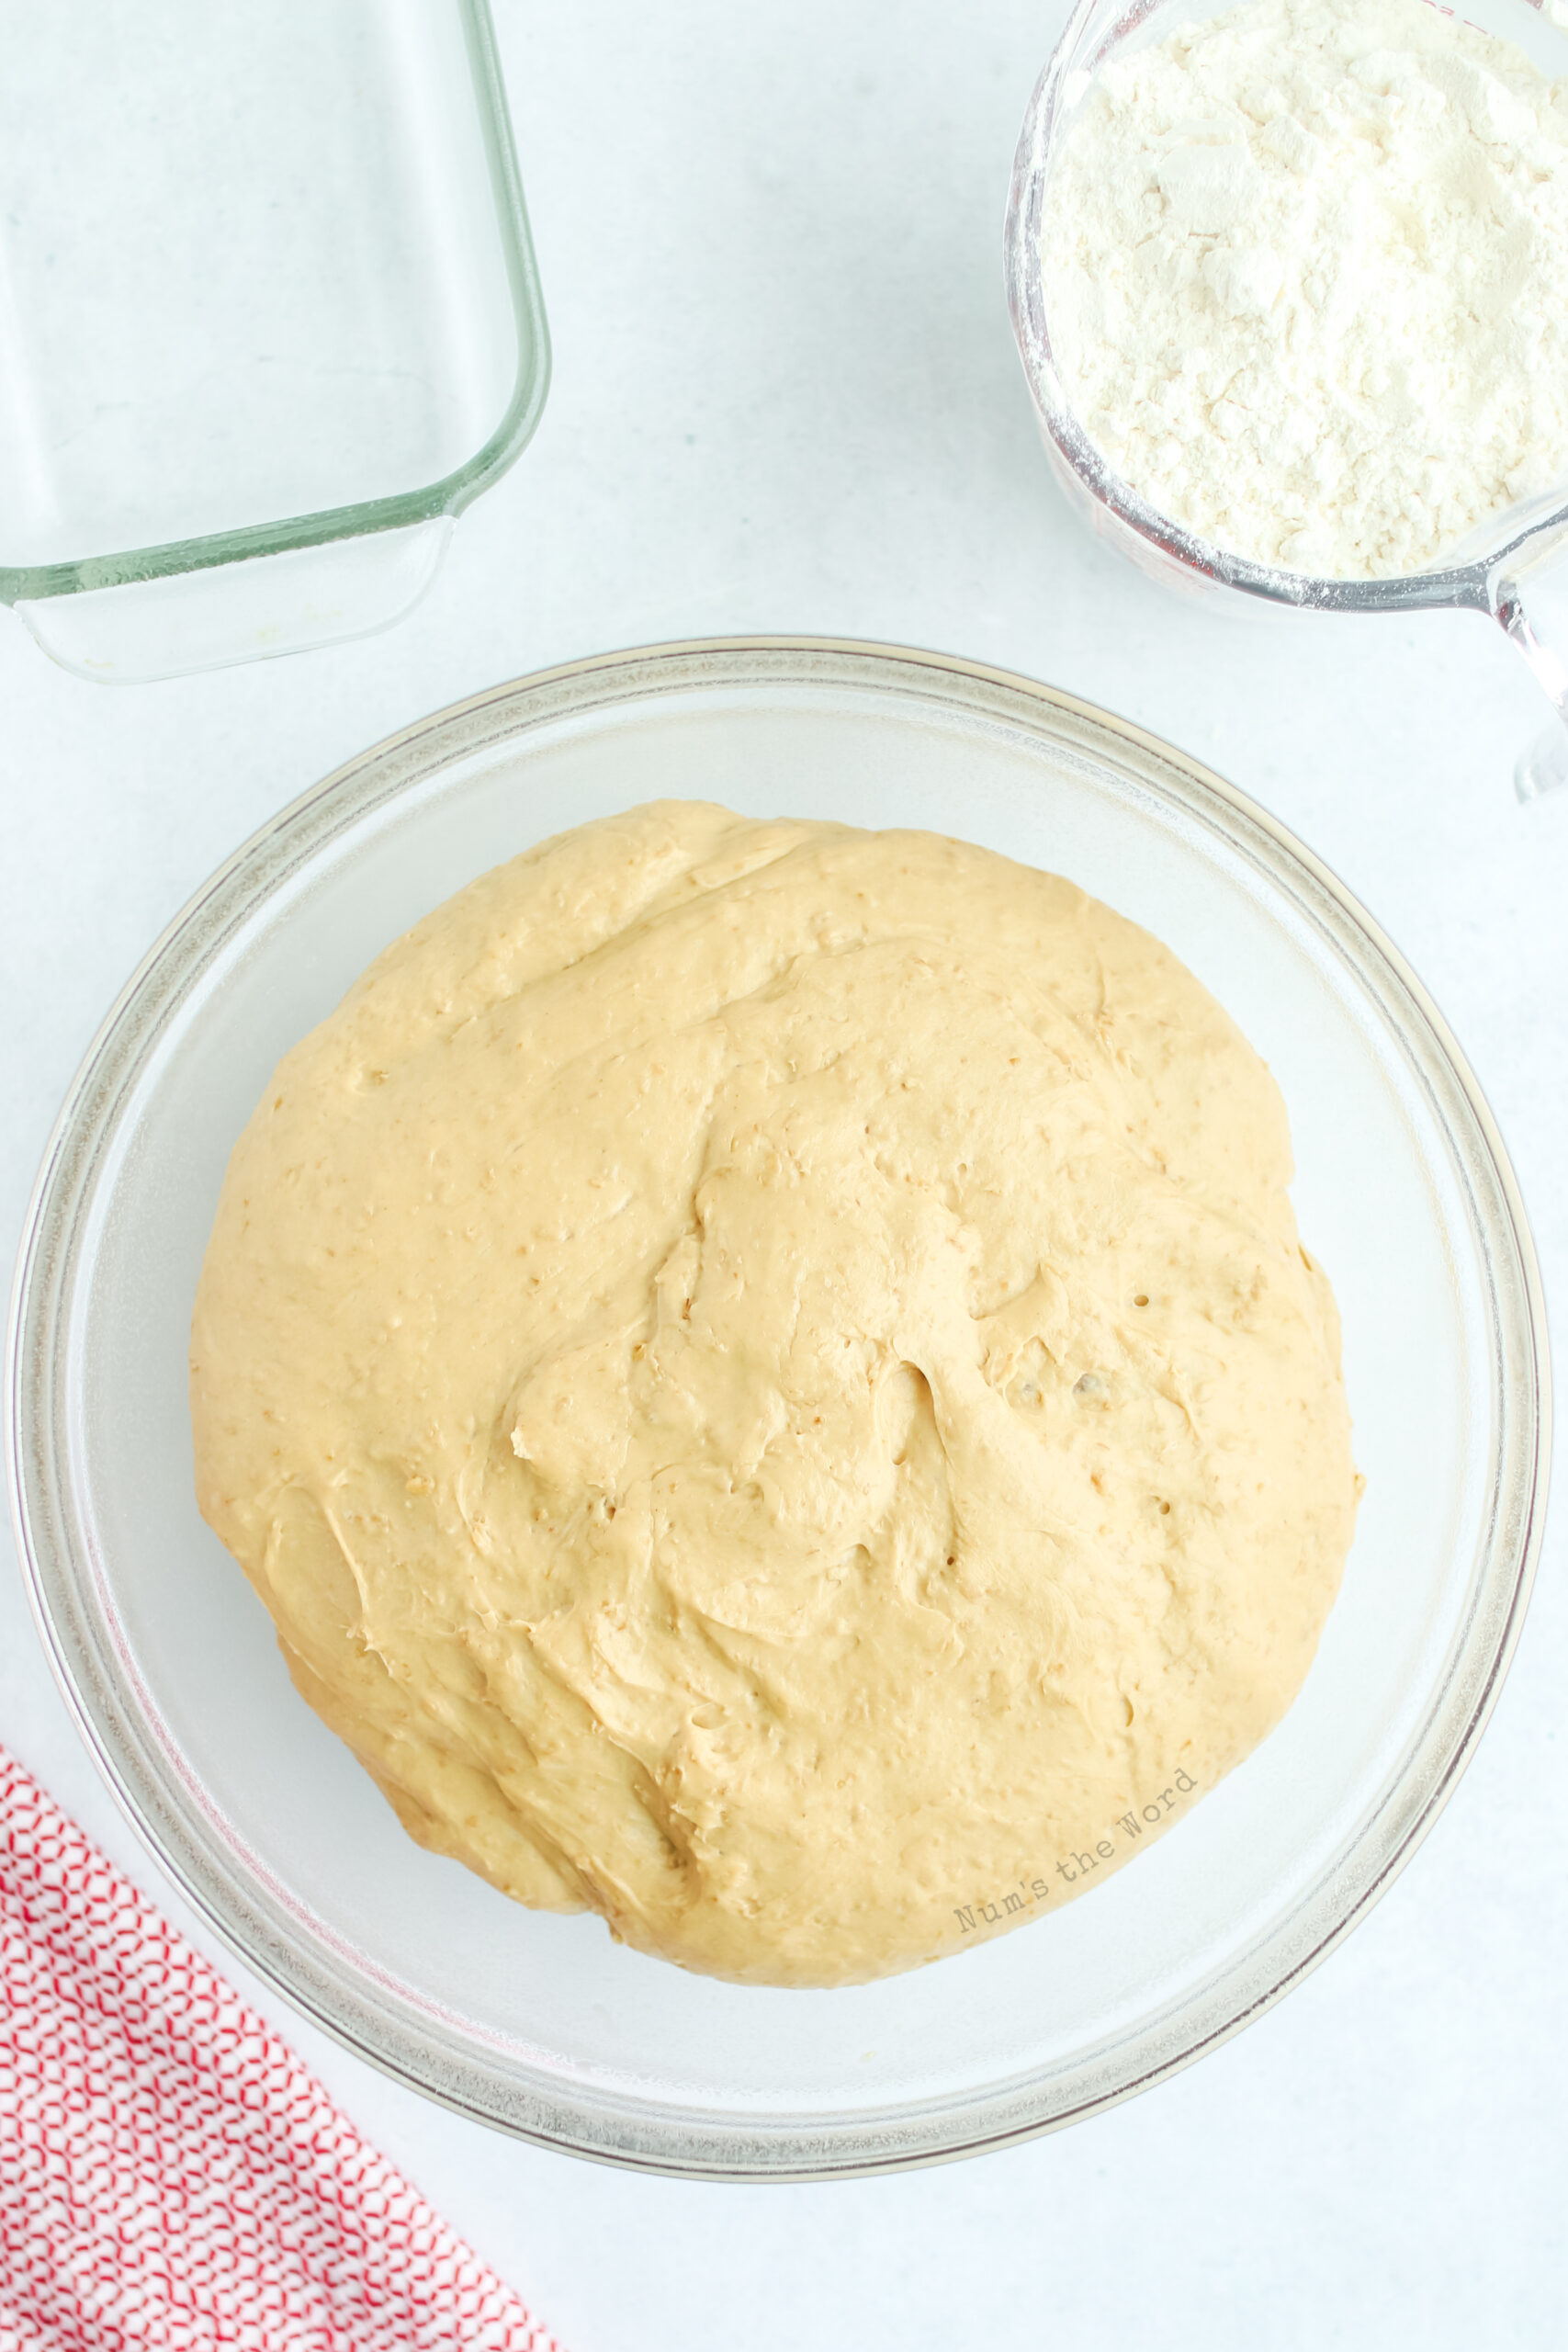
- Proof: Here is where you’ll add your yeast and then let it do it’s thing. Don’t rush the yeast if you want your bread to rise properly. Which believe me, you do.
- Mix: I recommend letting your mixer do all the work here but if you want some killer arm muscles, knead by hand.
- Rise: When your bread is rising it needs to be in a warm, draft-free spot.
- Shape: Best part of making bread right here! It’s like playdough only edible and my kids absolute favorite part.
- Rise: Notice the second rise! If you make bread a lot you’ll know this is a pretty standard procedure.
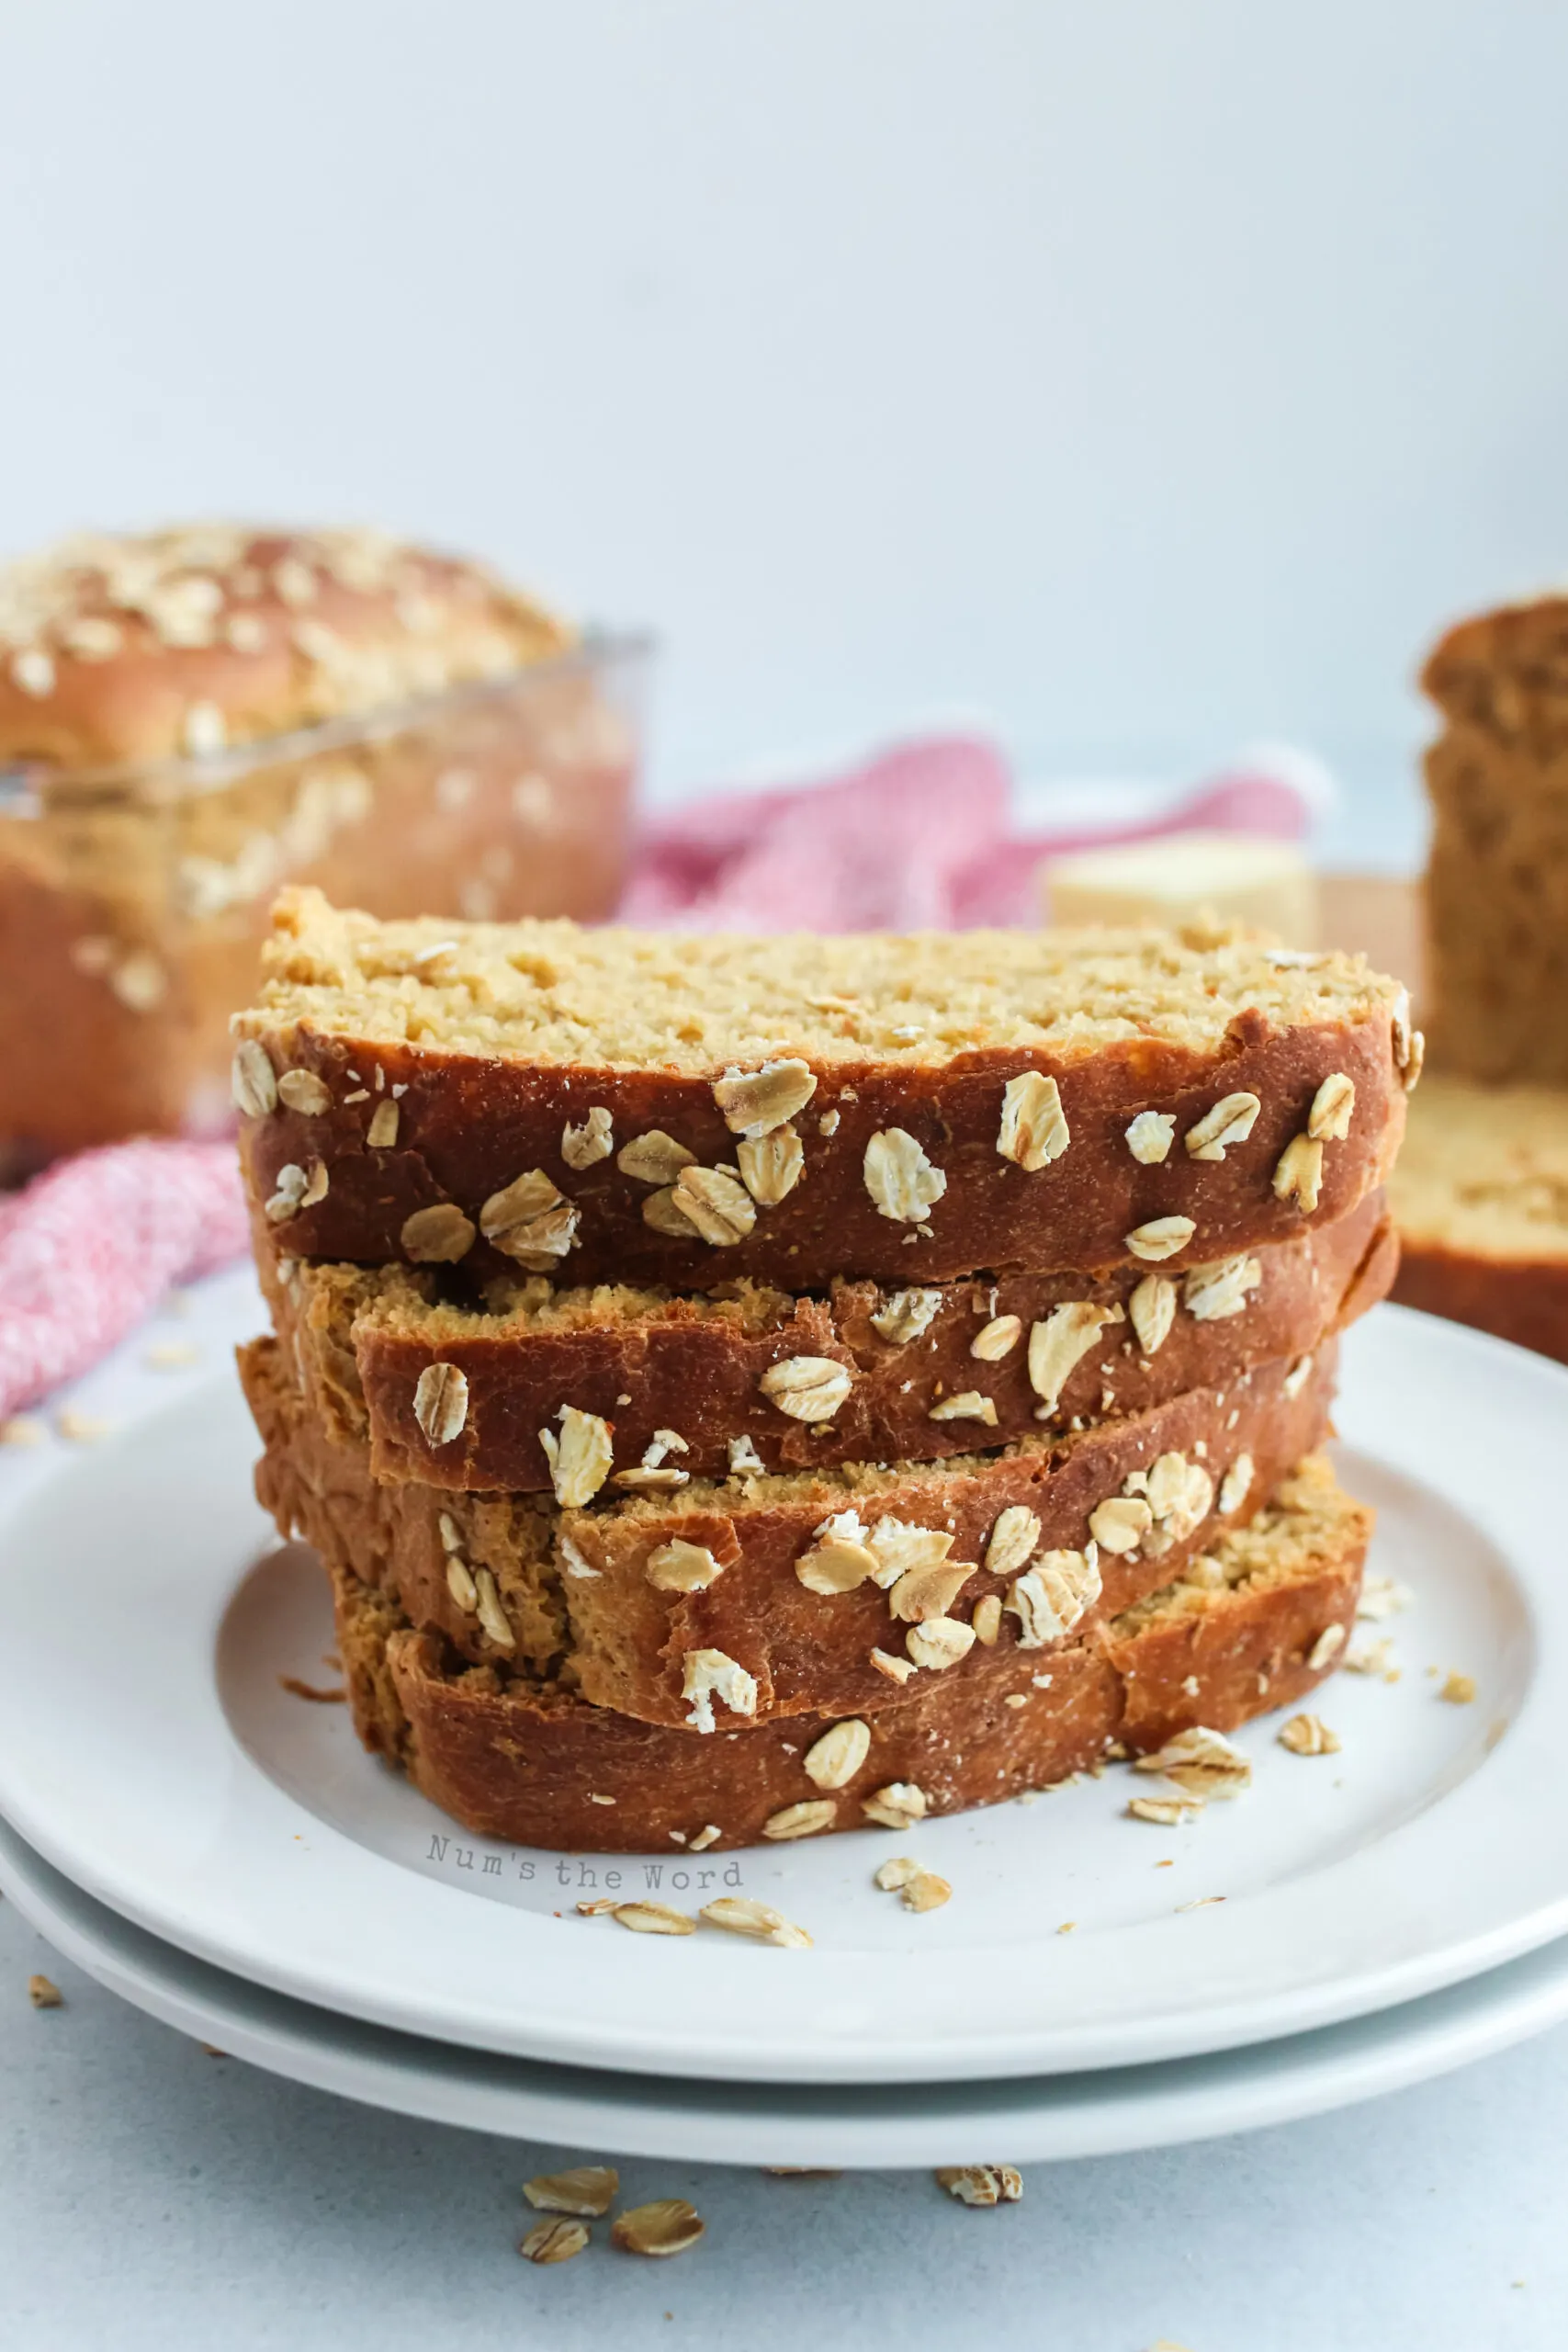
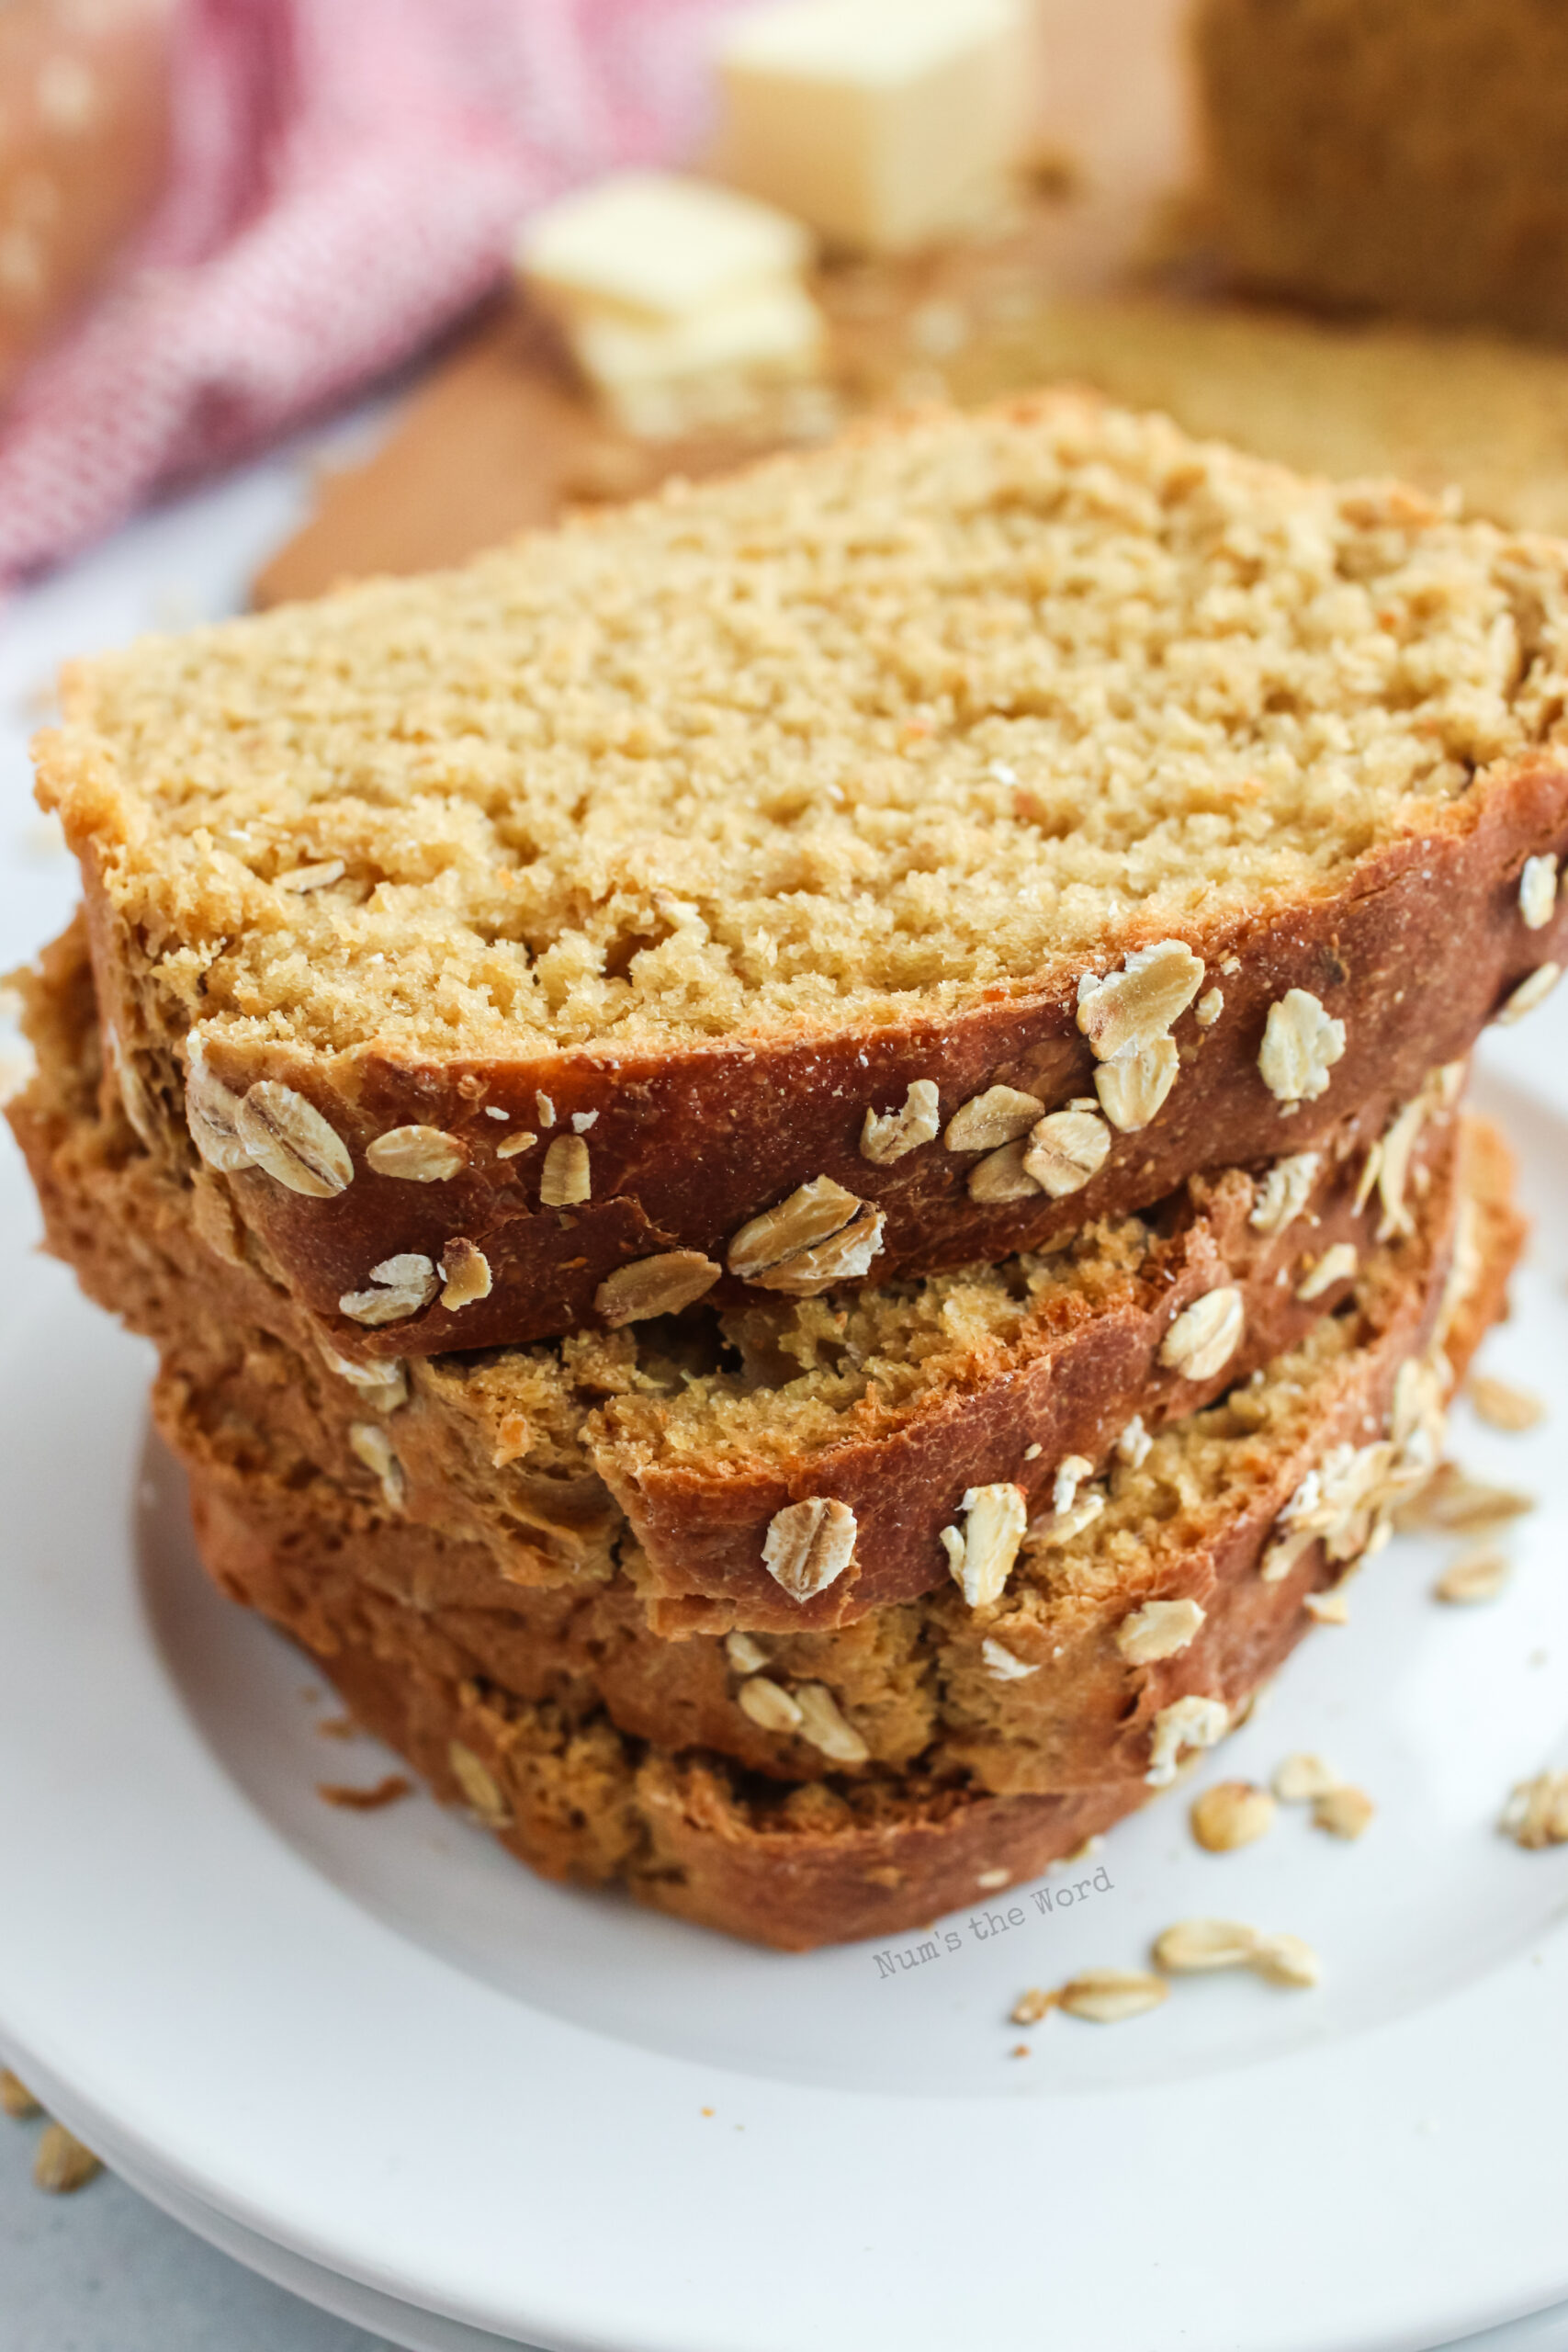
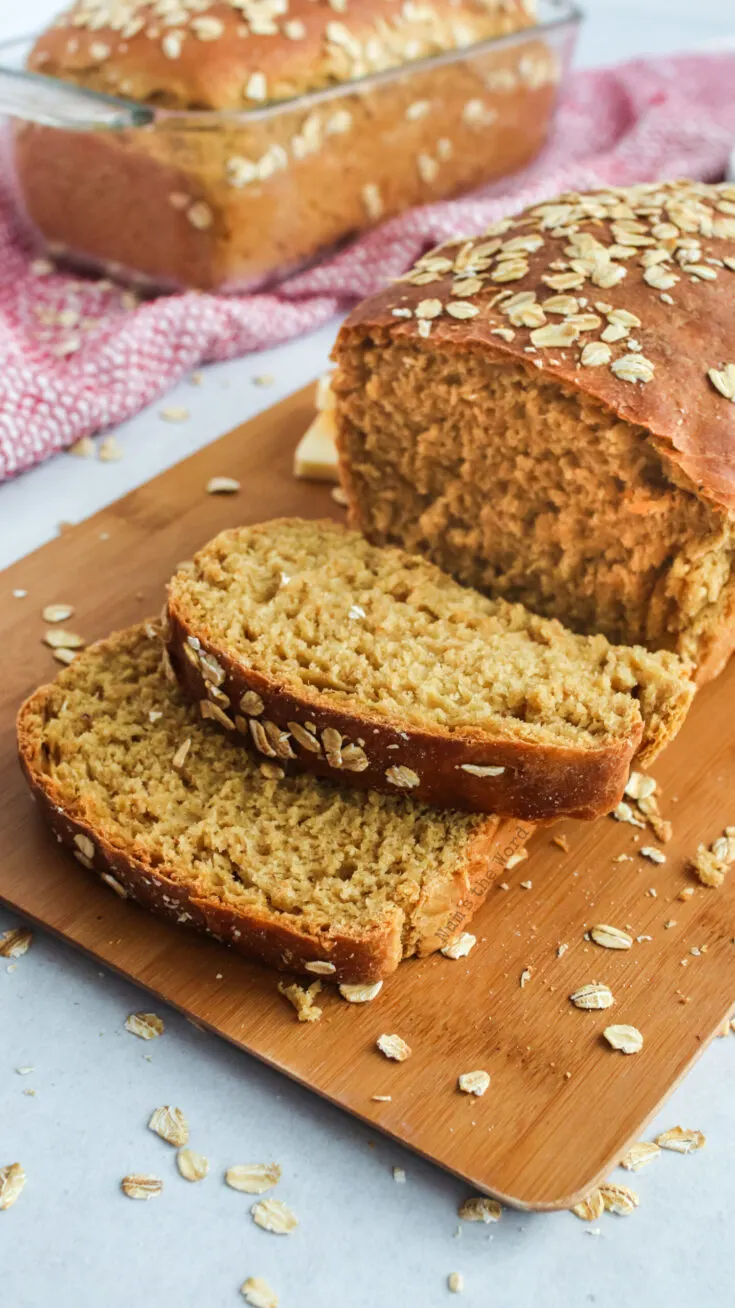
- Cook: I love sprinkling oats on top before baking because it turns out so beautiful!
- Eat: I always recommend letting things cool and not burning your tongue off when eating. But if you can’t resist, I totally understand.


Can You Freeze Oatmeal Molasses Bread Dough?
The good news is you can freeze dough! Here’s how:
- Make the recipe according to the directions up to the first rise.
- Do not allow the dough to rise but instead wrap tightly in plastic wrap, place in a ziplock bag, and toss it in the freezer.
- The day before you want to bake the bread, place it in the fridge to thaw.
- Take it out of the fridge and follow the rest of the recipe starting with the first rise.
Simple!
Pro Tips:
- It’s going to take longer for your oatmeal bread to rise. Possibly up to twice as long as if it hadn’t been frozen. So plan accordingly.
- Only store dough in the freezer for up to 4 weeks before baking for maximum flavor.

Can You Freeze Oatmeal Molasses Bread?
As is the case with most breads, this freezes very well with little to no loss in quality or texture. The only caveat is freezer air. If you’ve ever had freezer burned bread, you’ll understand.
Make sure your oatmeal molasses brown bread is wrapped tightly with plastic wrap. In fact, you might want to use two layers of plastic wrap to be safe. Then place in the ziplock bag as above.
Cooked bread will last longer than the dough but anything beyond three months is going to cost you a lot of flavor or texture so eat it before that.
When ready to eat, thaw your molasses bread on the counter to room temperature. Don’t remove it from the plastic during this process as it should help it maintain the moistness of the original bread.

More Bread and Roll Recipes You’ll Love…
- Homemade Crescent Rolls
- Green Tomato Bread
- Banana Yeast Bread
- Ham and Cheese Biscuits
- Potato Bread Recipe
- Pumpkin Bread Rolls
- 2 Ingredient Biscuits
- Oatmeal Bread
- Old School Biscuits
- Potato Buns Recipe
- Cheese Focaccia
- Sweet Potato Rolls
- Maple Syrup Cornbread
- Best Ever Banana Bread
This oatmeal molasses bread is divine. It is my go to bread when a neighbor or friend needs a good loaf of bread and some homemade soup.
Try it toasted, slathered in butter, or just it the whole thing as is! You are going to love it.
Oatmeal Molasses Bread

This Oatmeal Molasses Bread is easy to make and tasty fresh out of the oven. There is absolutely nothing better or more comforting.
Ingredients
- 2 1/3 cups water
- 1 cup old fashioned rolled oats, plus extra for topping loaves if desired.
- 1/2 cup butter
- 1/3 cup unsulfured molasses
- 2 packages rapid rise yeast (or 5 teaspoons)
- 5-6 cups all-purpose flour
- 2 teaspoons sea salt
Instructions
- In a small saucepan, bring the water to a boil.
- Put the oats a mixer bowl, and pour the water over the oats.
- Add the butter and molasses, and mix with a dough hook. then let the mixture cool to warm.
- Add yeast and mix. Cover with a towel for 5 minutes to proof yeast.
- Remove towel and slowly add 3 cups of flour to yeast mixture 1/2 cup at a time until fully incorporated.
- Add salt and continue to mix.
- Add remaining 2 - 3 cups flour as needed for the dough to come away from the sides of the bowl after a few minutes of kneading.
- Continue to allow mixer to knead your dough for 5 - 7 minutes (or knead by hand).
- Spray a large bowl with cooking spray.
- Scoop dough out of mixer bowl and place in oiled bowl, turning once to coat dough.
- Cover the bowl with plastic wrap and let the dough rise in a warm, draft-free spot until it doubles in size, about 1 hour.
- Butter two 9x5 inch loaf pans or line with parchment paper or non-stick foil.
- Punch down the dough and using a pastry scraper, scrape it out onto a clean work surface. Cut it in half with a sharp knife or bench scraper.
- For each half, evenly flatten the dough with the heel of your hand. Roll the top third down onto itself and seal it y pushing it gently down with the heal of your hand.
- Continue rolling and sealing the dough until you have an oval log. Place the logs, into the pans.
- Cover loosely with a kitchen towel and let them rise in a warm draft free spot until the double in size, 45 - 60 minutes.
- Position a rack in the middle of the oven, and preheat to 375*F
- Mist the tops of the loaves with water. Sprinkle the tops with a generous handful of regular oats.
- Bake until they loaves are golden brown and sound hollow when tapped on the top, 40-45 minutes. Carefully remove the loaves from the pans and let cool completely on a wire rack before slicing (if you can resist!)
Nutrition Information:
Yield:
20Serving Size:
1Amount Per Serving: Calories: 755Total Fat: 7gSaturated Fat: 3gTrans Fat: 0gUnsaturated Fat: 2gCholesterol: 12mgSodium: 255mgCarbohydrates: 150gFiber: 6gSugar: 5gProtein: 20g
Originally Posted: July 30, 2014
Photos & Text Update: July 6, 2021
Donna
Sunday 10th of May 2026
Do you think this could be mixed, kneaded, thru first rise in a breadmachine, then 2nd rise in a loafpan and baked in the oven?
Rosemarie
Monday 16th of February 2026
Have you ever made this using all purpose wheat flour instead of white or 1/2 white and 1/2 wheat flour?
Janelle
Tuesday 31st of March 2026
I have not made this with wheat flour Rosemarie, only all purpose. If you do try it with wheat flour or 50/50 let us know how it turns out!
Janet
Thursday 22nd of May 2025
Hi. Can this recipe be made in the bread machine? Thank you in advance. Have a nice day🌷
Janelle
Saturday 12th of July 2025
Hi Janet. I've not tried it in a bread machine. I'm sorry I can't answer your question. If you try it, let me know how it turns out.
Donna
Saturday 28th of December 2024
Could this recipe be halved and made in a breadmachine??
Claudia
Thursday 25th of April 2024
Love this recipe!! I got 3 1/2 loaves from this recipe. I would like to add a little more molasses to this recipe. Everyone love it.
Num's The Word
Friday 26th of April 2024
Woo hoo! Feel free to change things up. Glad you liked it!