Learning How to Can Tomatoes can be intimidating if it’s your first time. Don’t worry, I’ve been taught all the tricks by a canning expert who has helped me create this step-by-step guide so that you have GREAT results every time!
Whether your canning whole tomatoes, diced tomatoes or anything in between, this recipe for will give you the best results without a pressure canner!

There are two types of canning. Pressure Canning and Water Bath Canning. For this recipe, no need to panic about your pressure cooker exploding.
We use the simpler canning method called hot pack method for water bath canning. That means the food goes into the cans hot, not cold and you wont need a pressure cooker for this recipe.
Have you been interested in learning about how to can tomatoes? I sure have! A few years ago I had my Mother-in-Law Liz teach me How to Can Green Beans. She’s also taught me How to Can Potatoes and How to Can Carrots too! All valuable resources during gardening season!
We grew them in the garden and then learned how to can them and how to make these amazing Brown Sugar Green Beans with the leftover fresh beans we had.
It was that first recipe of canning green beans, that had me hooked! They were simple to make, tastes one hundred times better than the store bought version and kept us fed all year.
I never had to worry about the store having them in stock because I myself had plenty on hand.
So this year Liz taught me how to can tomatoes. We did a batch of whole tomatoes and a batch of quartered tomatoes, and in this tutorial I’ll teach you all the tips and tricks she’s passed on to me.
If you’ve never canned tomatoes, don’t worry. This step by step tutorial will guide you through, making the entire process easy and possible for even a new beginner! It’s a great way for home food preservation
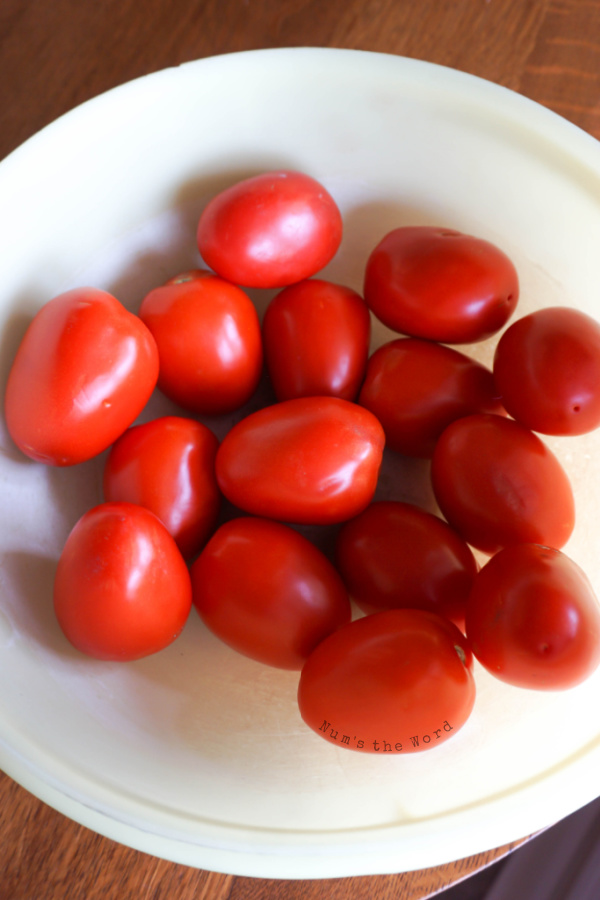
Step 1: Gather your Tomatoes
Unfortunately this year we weren’t able to grow a garden. If you don’t have your own tomatoes, you can purchase fresh tomatoes at a local grocery store.
I found that for Quart Jars, each jar held about 2.1 pounds of whole tomatoes. Quart jars could hold almost 3 pounds of quartered tomatoes, if you choose that method.
For this time I used Roma tomatoes. They tend to hold their shape well in canning, however you could do any type of tomatoes.
Liz usually cans Big Boy or Early Girl tomatoes as that’s what she typically grows in her garden. All types will work with this tutorial so use your favorite kind.
Once your tomatoes are gathered, wash tomatoes to remove any excess dirt.

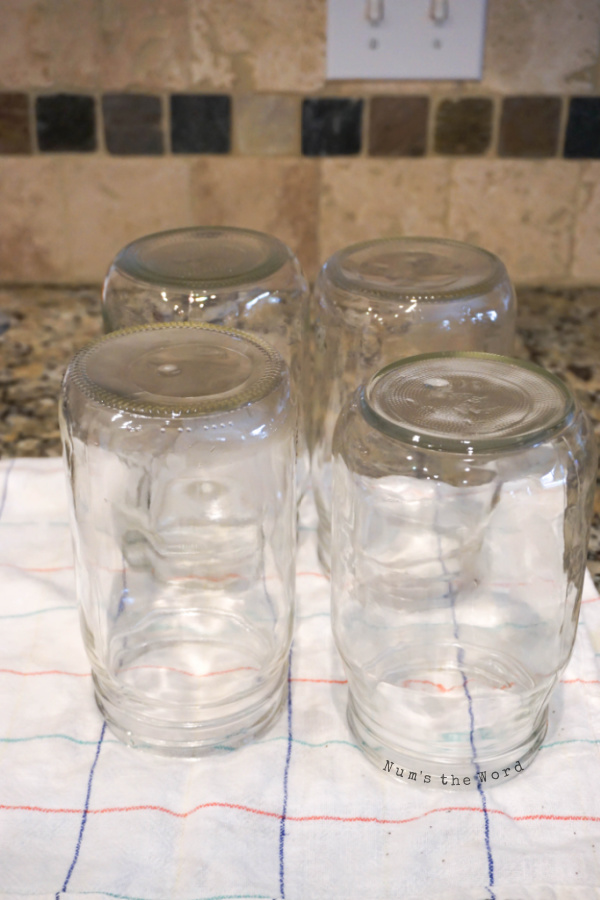
Step 2: Sterilize your Jars
You can use new or old canning jars (often called Mason Jars), just make sure there are no cracks in your jar. This is a great way to reuse jars year after year saving you a lot of money.
Because we will be using the jars for food, you’ll want to sterilize them well before use. This means you’ll want to boil them for about 5 minutes.
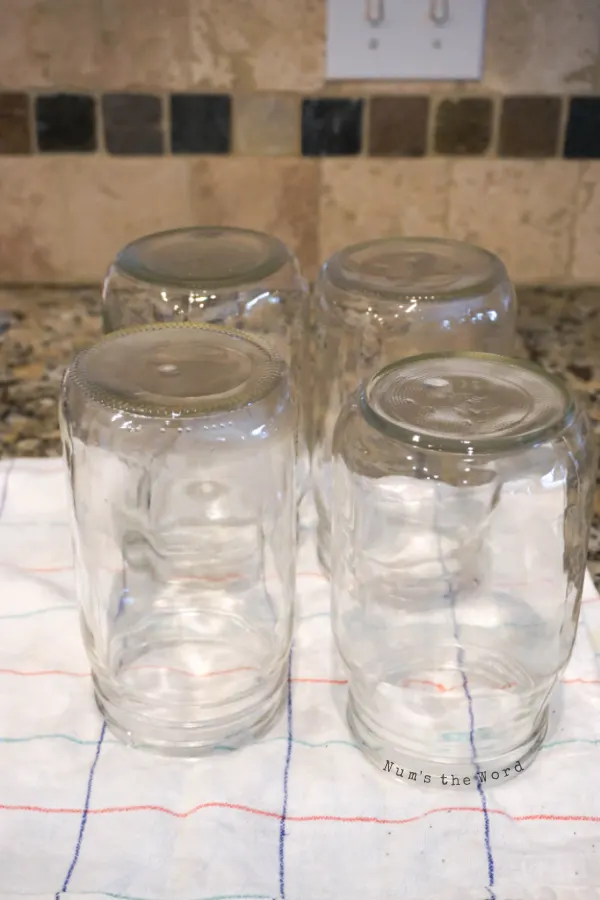
After boiling for 5 minutes, remove the hot jars from the water and let drip dry upside down on a cloth towel, preferably a kitchen towel or tea towel that wont leave a lint residue on your jars.
Fluffy bath towels tend to leave a little lint on the rims.
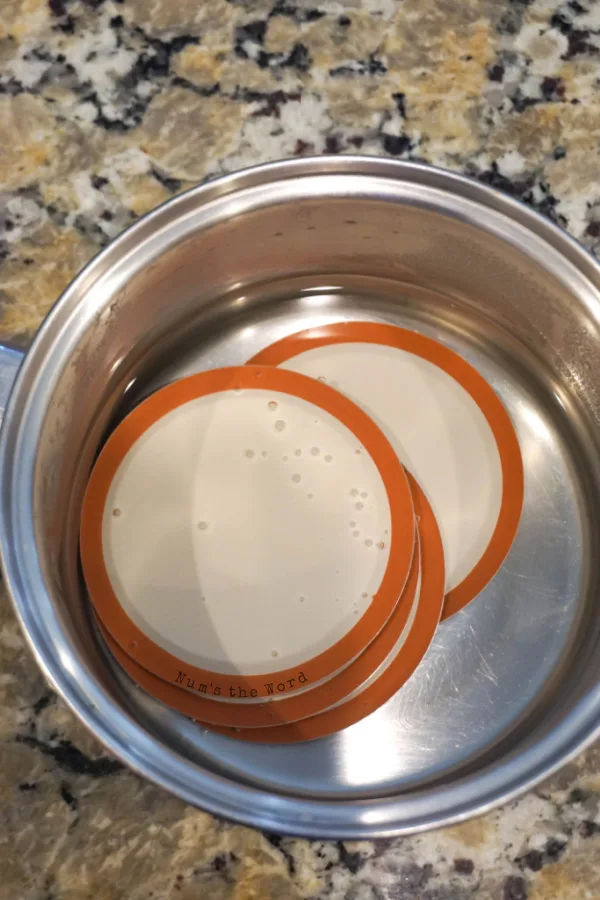
Step 3: Sterilize your Lids
For this step it is ESSENTIAL that you use NEW canning lids. Unfortunately once a canning lid has been used once or has been damaged, it cannot be used again.
The rubber seal will only give one good seal in it’s lifetime. So once they’ve been used, toss them or make a fun craft from them.
To prepare the lids, you’ll want to also boil these for 5 minutes in a small pot. It’s OK if they are touching and on top of one another in the pot.
After they’ve been sterilized leave them in the pot until ready to use. We REALLY don’t want to get anything on these so just leave them in the water.
Pro Tip: I have gotten a lot of feedback on my How to Can Green Beans post that you can reuse old lids as long as they are in perfect condition without any dents.
I’ve never tried this personally, and still recommend using new lids. However if you do try it, let me know if it worked for you.

Step 4: Prepare your Canning Pot:
Place a canning rack at the bottom of your canning pot. If you do not have a canning pot, any will do as we are not pressure canning these tomatoes.
Instead we are using a water bath canner or traditional canner pot. However you’ll need a canning rack at the bottom of your post as your jars cannot touch your pot.
They wont be allowed to touch the sides or bottom so a canning rack is essential. You’ll also want to ensure your canning pot is tall enough to fit your jars into it with a lid on without touching your jars.
Once the canning rack is on the bottom of your pot, fill it with water, about 3/4 full and bring to a boil. You’ll want enough water so that when the jar is placed in the canner it is covered with water.
While waiting for it to come to a boil, move on to step 5. It will be nice a hot by the time you’re ready for it, so don’t wait around for the boil.
Pro Tip: Water will rise as you add jars, so don’t over fill the pot or it will flow over the side. 3/4 full should do the trick.
Step 5: Blanch Tomatoes
Before we boil your tomatoes to make the skins literally slip off, you’ll want to prepare a nice large bowl of ice water. Set that aside.
Bring a pot of water to a boil. I use a medium sized pot, but any size will do. You could even use the same pot you used to sterilize your jars!
Once water is boiling, place tomatoes into the hot water – be careful not to burn yourself! Do not over crowd the pot. I blanched mine in batches.
Some people will say you should score your tomatoes with a small x on the bottom to make the peeling process easier.
You could do this, but trust me it’s just an unnecessary extra step. Save yourself time and just toss the tomatoes into the pot of boiling water.
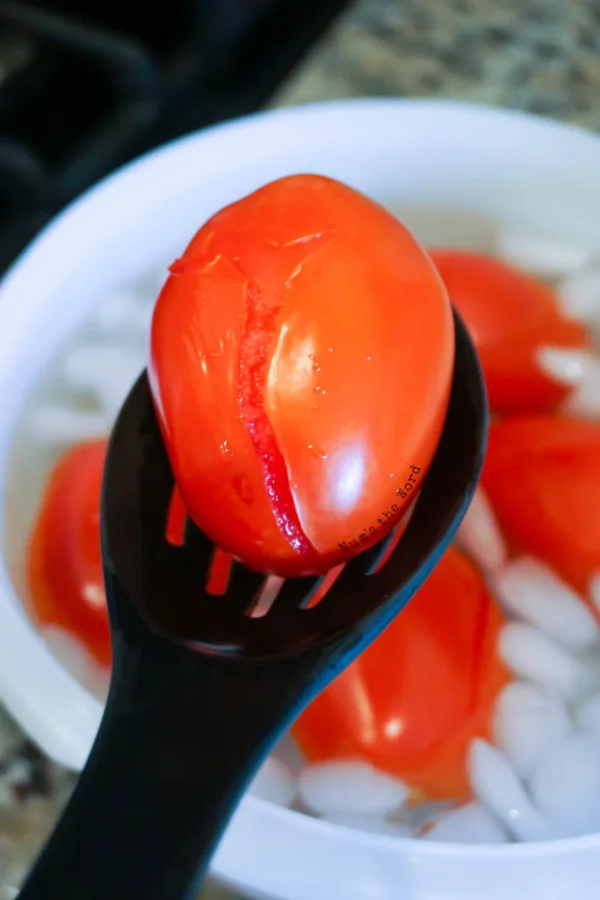
Boil tomatoes for approximately 2 – 3 minutes. You tomato skin will naturally crack and start to peel. This is how you know they are ready!
Remove them from the pot of boiling water with a slotted spoon and place in your bowl of ice water.
This will stop the cooking processes and bring the temperature of the tomato down so you can handle them, for me it took 2 – 3 minutes.
If you have more tomatoes to boil, do that now as the first batch is in the ice water bath.

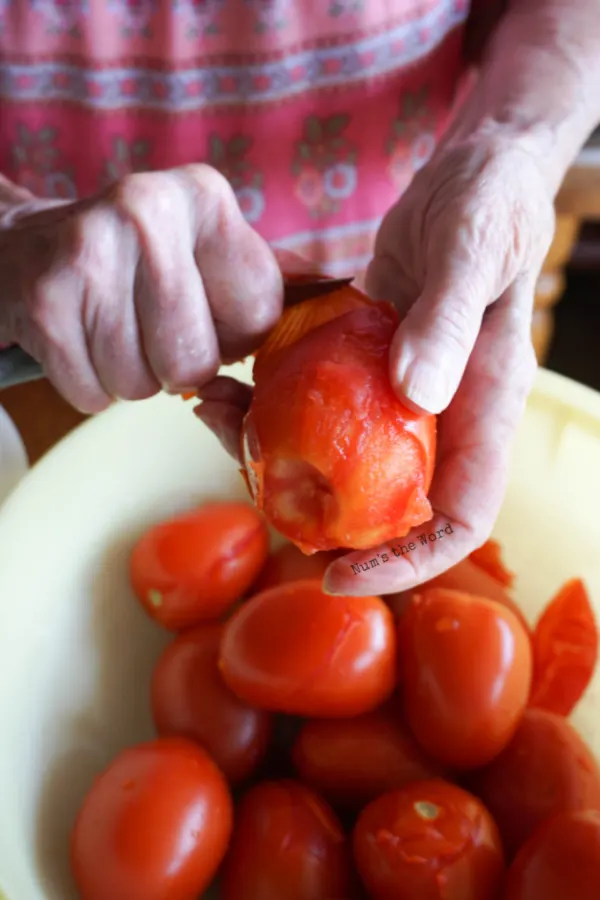
Step 6: Remove Skins
Once tomatoes are cool enough to handle, you should literally be able to grab a piece of tomato skin that has cracked and peel it off.
You’ll also want to remove the tough stem area. Simply cut around it and remove it. No need to go deep into the tomato, just enough to remove the tough stem.
Toss your skins away or save them in the fridge to make a vegetable broth with later.

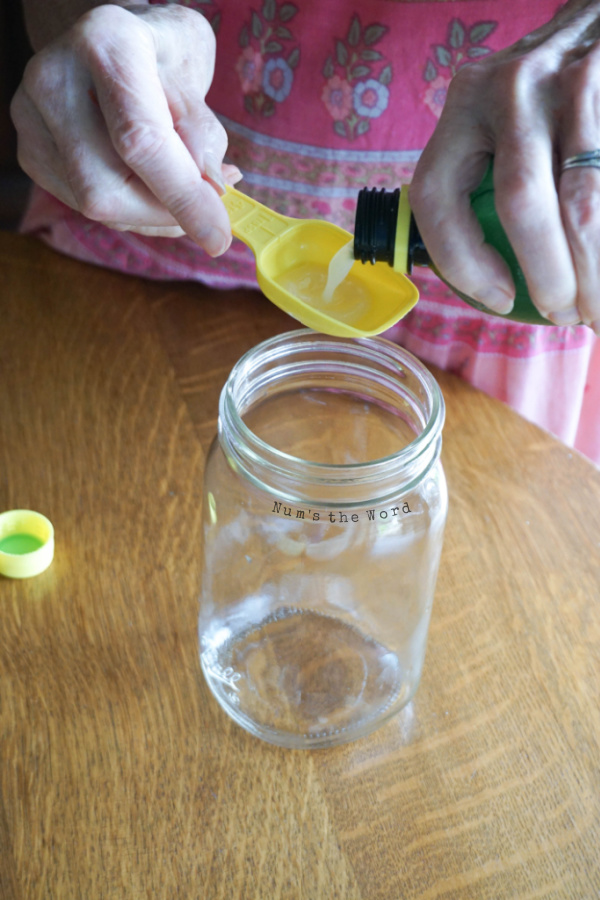
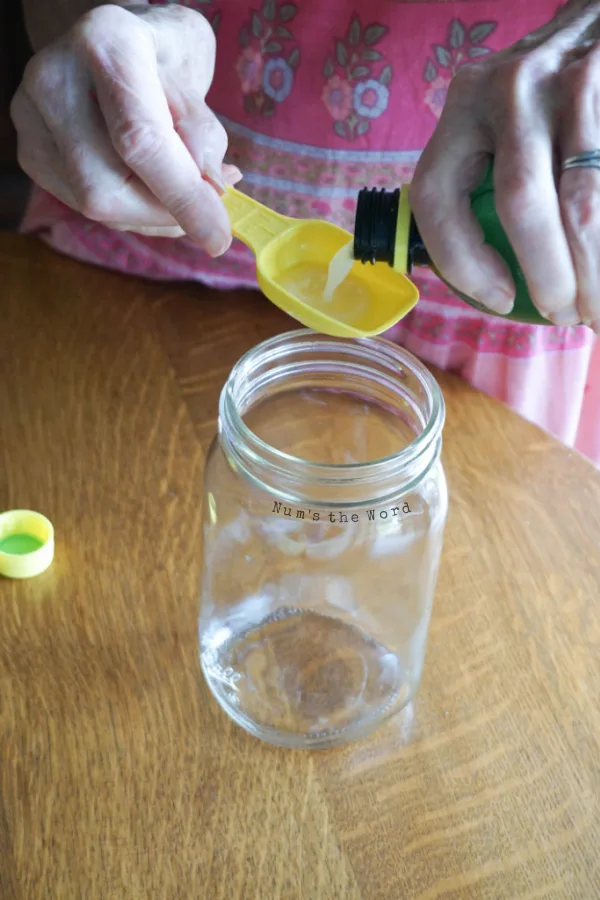
Step 7: Lemon Juice
Though tomatoes are considered a high-acid food food, according to a variety of universities and canning websites, lemon juice is a must to control the acidity of the canning process.
Without the lemon juice your tomatoes could grow spores of bacteria and cause food poisoning in some cases. So just to be safe, use lemon juice.
For each Quart jar, you’ll want to add in 2 Tablespoons of lemon juice to the sterilized jar. For Pint jars you’ll want to add 1 Tablespoon of lemon juice to each jar.
Can I use fresh lemon juice instead of bottled lemon juice in canning?
Fresh lemon juice and bottled lemon juice, though similar are not the same. Bottled has been processed which changes the juice slightly.
When it comes to canning, this does make a difference. You’ll want to use bottled lemon juice and save your fresh lemon juice for making Lemon Curd!
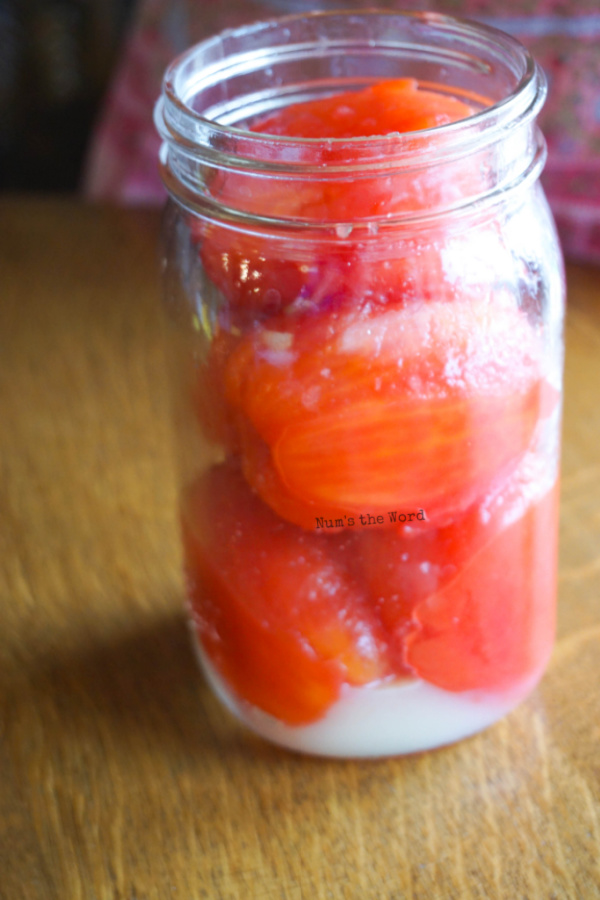
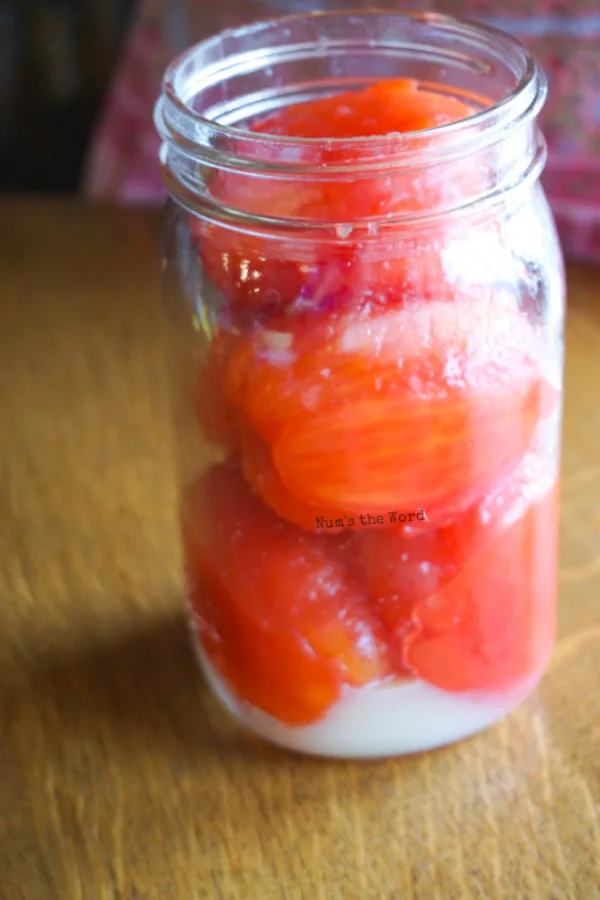
Step 8: Fill Jars
If you are canning whole tomatoes, then place your skinned whole tomatoes into your Quart jars. Don’t worry about being too gentle. Push them down to get in as many as possible into each jar.
If you prefer non whole tomatoes, then simply quarter your tomatoes. To do this, cut each tomato down the center from stem to bum. Then cut each of those in half from side to side.
You’ll want to fill jars leaving one inch of head space at the top.
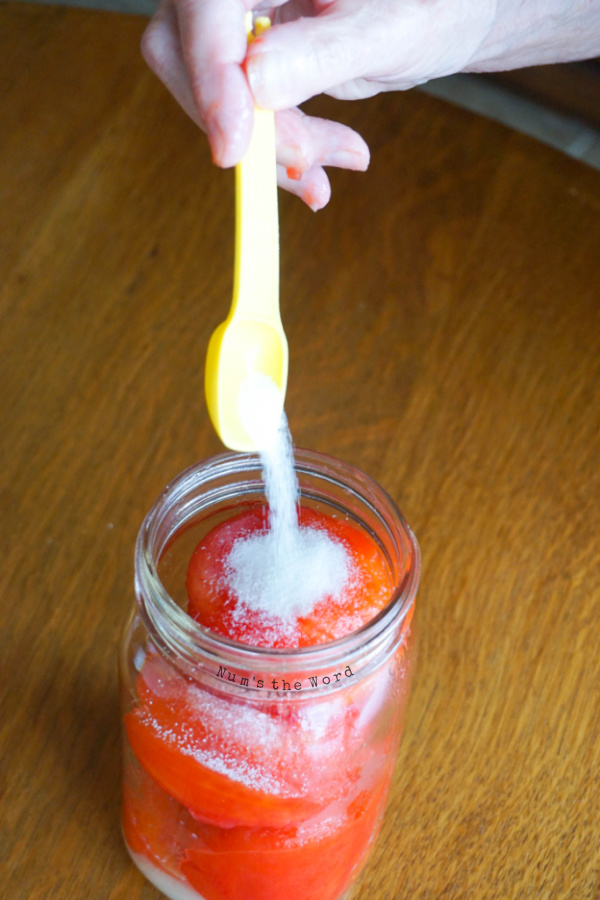
Step 9: Canning & Pickling Salt
Now that each of your jars is full of yummy fresh whole or quartered tomatoes, you’ll want to add your Canning & Pickling Salt.
Add 1 teaspoon of Canning & Pickling Salt to each Quart Jar or 1/2 teaspoon of salt to each Pint jar. Do NOT use table salt.
Canning & Pickling salt is not the same thing as table salt. It does not contain iodine, which table salt does.

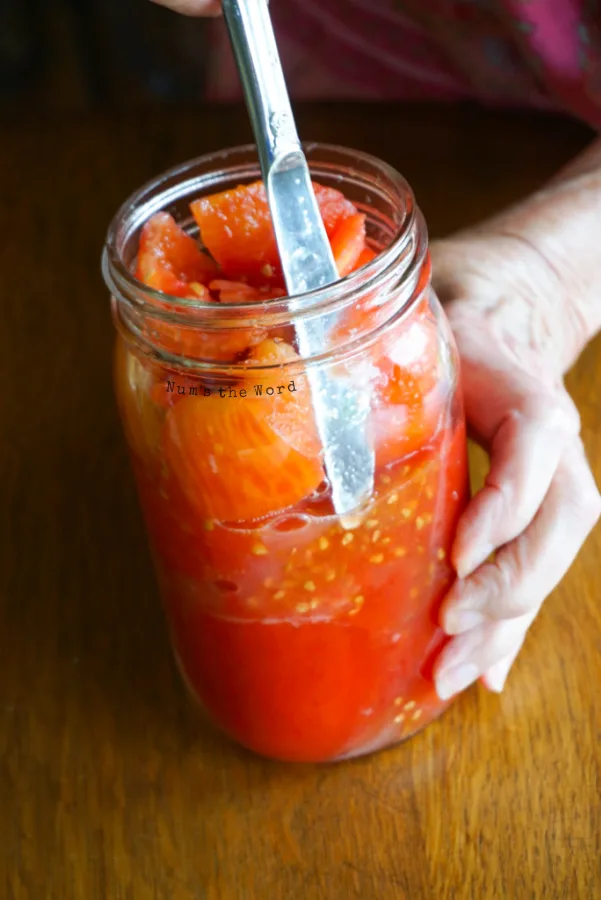
Step 10: Knife Your Jars
You’ll want to grab a butter knife and gently slide it down the side of your filled glass jar.
Gently press tomatoes towards the center of the jar as you run your knife along the inside edge of each jar.
This process may seem tedious but it’s important you remove as many air bubbles as possible from your jars. And this simple step will do just that!

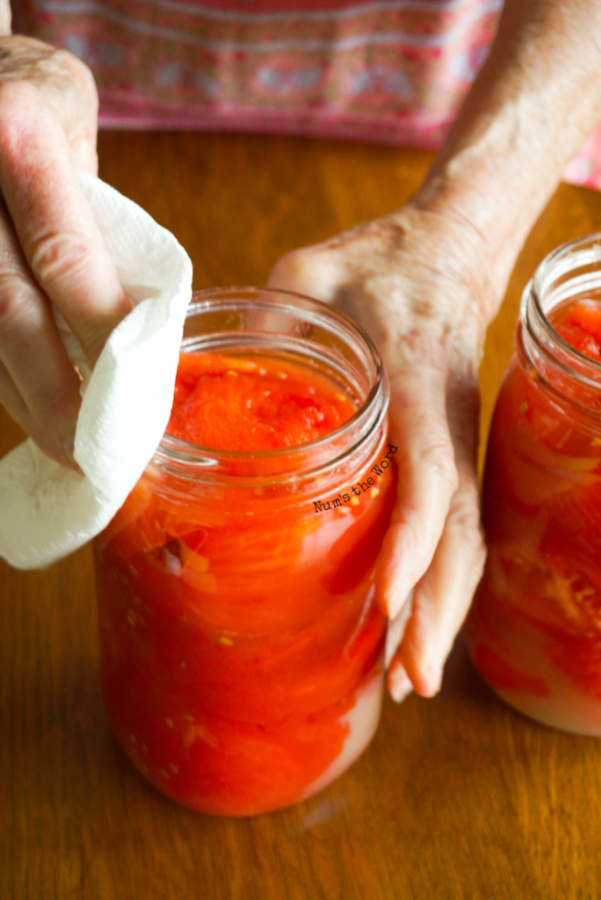
Step 11: Clean Rims
Grab a clean paper towel and run it under water to get it damp. Ring it out and wipe the rims with your damp paper towel.
This is to remove any salt that may have landed on your rim. The reason for this is that if there is a speck of salt on the rim, it will prevent your jar from properly sealing.
This step takes only a few seconds but could make the difference between a successful canning session and a ruined one.

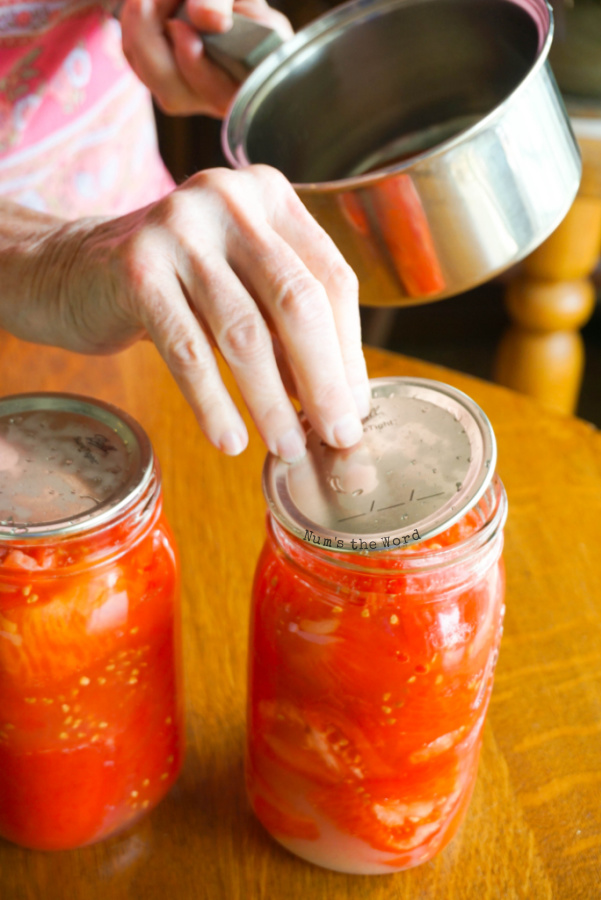
Step 12: Place Lids on Jars
Lids are not rings. Place the NEW – never been used – lids on each jar. They should still be hot/warm from boiling them earlier so be careful. Place one lid on each jar.

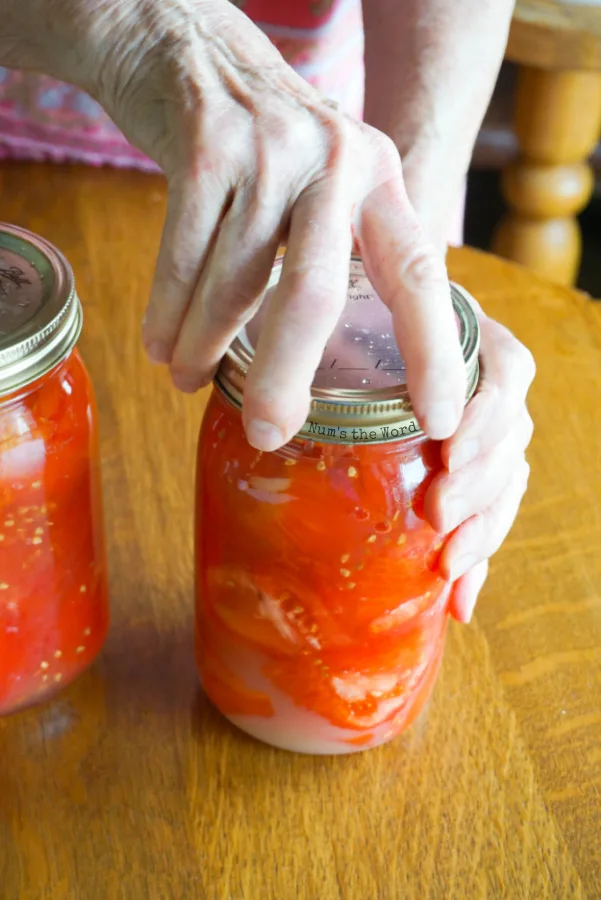
Step 13: Place Rings on Jars
Now it’s time for your rings! Screw bands onto each jar. Tighten well, but not TOO tight, you’ll want to do it “finger tight”.
I had one person ask why his lids buckled during the canning process with the green beans. He must be super strong because he put his rings on SUPER TIGHT.
You shouldn’t need a wrench to remove the rings. Simply tighten them well.

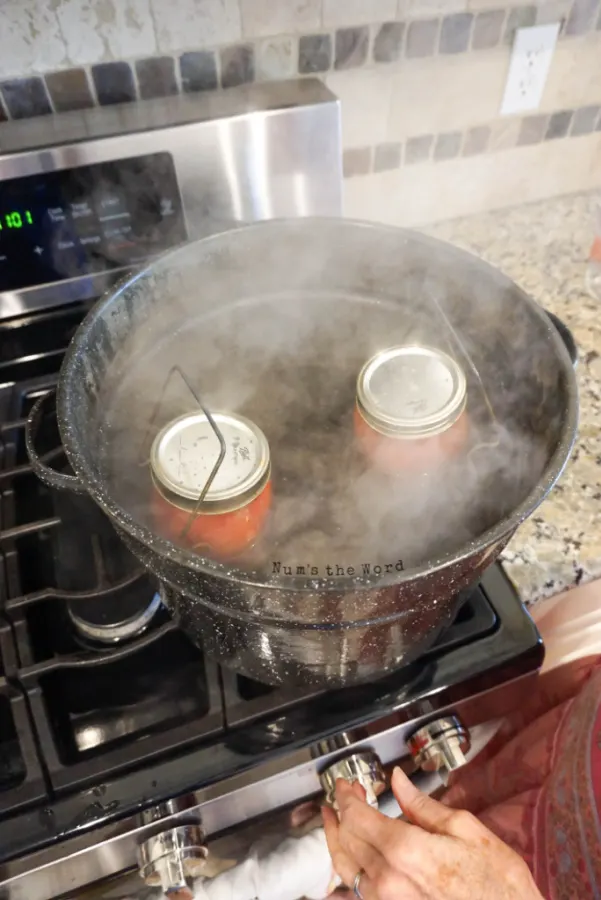
Step 14: Place Tomatoes into Canning Pot
Make sure canning rack is in the bottom of a large pot, over high heat and the water is boiling.
Place jars into canner and ensure they do not touch the sides or each other in the pot. Depending on how big your pot is, and how many jars of tomatoes you are processing, you may have to do this in two or more batches.
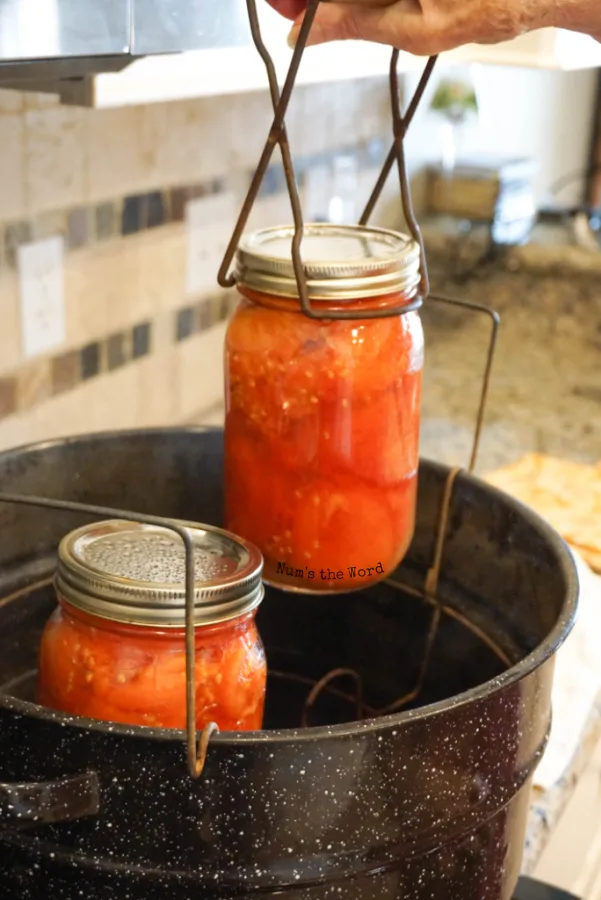
Photographed is a canning lift. This is a LIFE SAVER when it comes to getting your bottles in and out of the canner without burning yourself or having the jars touch.
Once jars are in pot, place lid on and lock. Processing times for tomatoes is 45 minutes. SET YOUR TIMER!

Step 15: Remove Tomatoes from Pot
When your timer goes off, carefully open lid AWAY FROM YOUR FACE. That may be steam that comes out of pot and we do not want to singe your eyebrows off. So always lift lid away from your face.
Using a Jar lifter, remove each jar and place on a trivet, cookie sheet or wooden cutting board – essentially something that wont melt your counter tops.

Step 16: What is that Popping Sound?
As your jars cool on your counter, you’ll hopefully hear a popping sound. As each jar seals itself, the metal lid will give a pop. This indicates to you that the jar is properly sealed.
This could take up to 12 hours, so don’t panic. However if after 12 hours, if a jar isn’t sealed you’ll want to eat those right away or keep in fridge for up to a week.
To test each jar to see if it is properly sealed, simply press in the center of each lid. If the lid gives a little it is not sealed properly. If the lid is firm, then it is sealed.
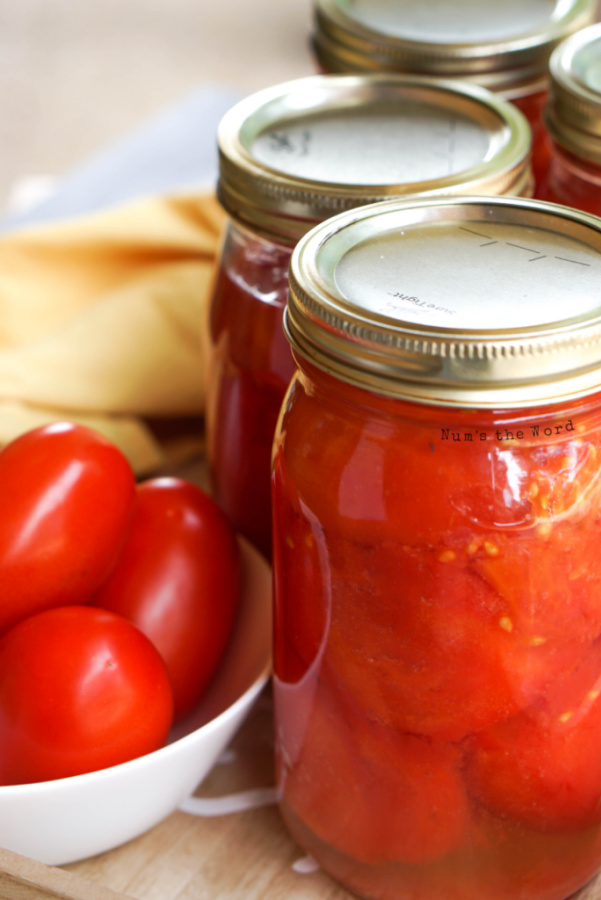

Step 17: Storage
First off, if you are doing multiple batches, repeat your batches. No need to add extra water to your pot each time – unless it looks like there is barely any water left in the pot.
Once your jars are sealed and ready to store, write on the jars what is inside, and the date you canned them. Home canned tomatoes will last up to 18 months in a cool dry location.
Step 18: The Happy Dance
If you’ve made it this far, that means you are officially a pro when it comes to canning tomatoes! You should celebrate.
The first time takes the longest, as you’re constantly stopping to read directions, but each batch after should go fairly quickly!
While one batch is cooking, you can start prepping the next batch! Give yourself a round of applause and do a happy dance because you were successful!
Congratulations! You’re one step closer to self sufficiency!

Can I make tomato juice from my canned tomatoes?
Yes you can make tomato juice from canned tomatoes. You’ll notice when we can tomatoes we do not add extra water or liquids to the tomatoes. Instead we fill as many tomatoes as we can to the top of the jar. You wont add any liquids to the jars.
Instead you’ll notice the tomatoes will naturally juice and as they cook, more juice will be released.
To make homemade tomato juice, simply take the liquid from your canned jars (once opened) and blend that with a few of the tomatoes in a blender. Strain out the seeds and enjoy fresh tomato juice.
Can I make tomato sauce from canning tomatoes?
Yes you can make homemade tomato sauce from canned tomatoes! Simple drain off any excess liquid, blend up and add your favorite spices. Oregano, basil, salt and a hint of sugar are staples when it comes to homemade tomato sauce. Go with what tastes good to you!
Favorite Recipes with Tomatoes:
- Instant Pot Spaghetti Meat Sauce
- 8 Can Taco Soup
- Bacon Spinach Dip
- Black Bean Corn Relish
- Panera Turkey Avocado BLT
- Chicken Parmesan with Mushrooms
- Green Tomato Bread
- Salami Sandwich
- Spiral Pasta Salad
- Caprese Bites
- Bacon Lettuce Tomato Salad
- Fiesta Salad
If you’ve ever wondered How to Can Tomatoes like your grandmother, then I hope this easy to follow step-by-step tutorial has been helpful.
This recipe has been used for generations and always produced excellent results that will ensure food on your table even during the most difficult times!
Canned tomatoes are great in soups, sauces and even on pizza so why not learn how to make your own today!
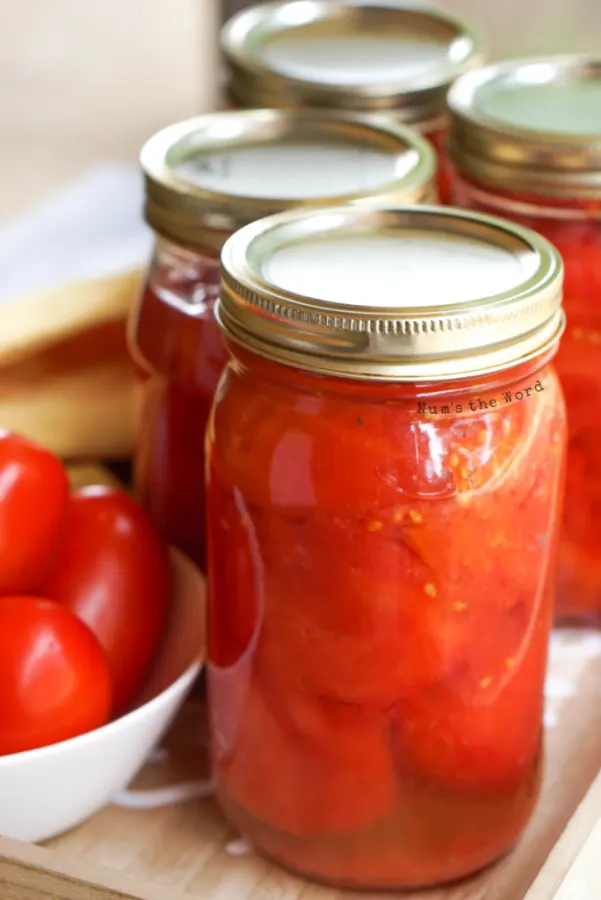
How to Can Tomatoes
Canning Tomatoes is easy and well worth the effort come winter! Use fresh grown tomatoes from your garden or buy your favorite variety at the store.
Ingredients
- Tomatoes - we like Roma, Big Boy or Early Girl
- Canning & Pickling Salt - 1 teaspoon per quart jar or 1/2 teaspoon per pint jar
- Lemon Juice - 2 Tablespoons per quart or 1 Tablespoon per pint jar
Instructions
- Gather and wash your tomato - freeing them from any dirt.
- Boil each canning jar in water for 5 minutes to sterilize them. Remove from water and let cool and drip dry on a clean cloth.
- Boil lids for 5 minutes to sterilize them. Leave them in the water until ready to use.
- Place a canning rack in the bottom of your pot and fill pot 3/4 full of water. Bring to a boil. While waiting for water to come to a boil, prepare tomatoes.
- Prepare a big bowl of ice water, set aside.
- Bring a pot of water to a boil.
- Once water is boiling, add tomatoes - do not crowd your pot. Boil tomatoes for approximately 3 minutes. Skins should crack and start to peel.
- Remove tomatoes from boiling water and place in ice bath to cool instantly. Keep in ice bath for 2 - 3 minutes until cool to the touch.
- Gently peel skin away from tomatoes, discarding skins.
- Cut and remove tough stem at the top of your tomato and discard.
- To each sterilized jar, add 2 Tablespoons of lemon juice to Quart jars and 1 Tablespoon of lemon juice to Pint jars
- Fill each jar with whole tomatoes or cut tomatoes to desired size and add them to jars. Fill each jar leaving 1 inch of head space at the top.
- Add 1 teaspoon Canning & Pickling salt to each jar of tomatoes for quart jars and 1/2 teaspoon of canning & pickling salt to pint jars.
- Using a butter knife, slide the knife all along the outside edge of each jar of tomatoes, releasing a little juice and air from the bottom of each jar.
- If any juice remains in your bowl from peeling your tomatoes, add that equally among the tomatoes. Do not add any extra liquid to jars.
- Wipe each rim with a wet paper towel to remove any salt or tomato residue. This will ensure a clean tight seal when canning.
- Place a NEW, never before used lid, on each jar. Canning lids CANNOT be reused. They will only seal once in their lifetime.
- Screw canning lid on top of each jar securing lid into place. Tighten as tight as you can but not tight enough that you'll need a tool to remove the lid.
- Place canning jars in the hot canning pot, ensuring each jar does not touch each other or the sides of the pot. A canning rack is recommended so you don't burn yourself or have the jars touch.
- Place lid on and cook for 45 minutes.
- After 45 minutes, remove jars from pot with a canning lifter and let cool.
- As jars cool you should hear a popping sound as each metal lid seals itself. This could take up to 12 hours.
- When jars are cool and sealed remove rings and write date and what it is on the lid.
- Canned tomatoes can be stored for 18 months safely.
- If any jar did not seal properly, then store in fridge and use within 1 week.
Text Updated: July 20, 2022
Is it required to peel tomatoes for pressure canning?
Peeling tomatoes is not required for pressure canning. You could easily leave the skins on and remove the hard stem instead.
However skins can be tough and bitter, especially if cooking with them later. Most people do remove the skins, but it is optional.
Can dogs eat tomatoes?
Unfortunately dogs cannot eat tomatoes. The leaves and stems contain a substance called Solanine which IS harmful to dogs.
In addition green tomatoes also contain a higher amount than ripe red ones and can also be harmful to your favorite pet.
If that wasn’t enough, ripe tomatoes contain tomatine which can be fatal to dogs. If you’re growing tomatoes at home, make sure to keep your dog away.
Can guinea pigs eat tomatoes?
Guinea Pigs can eat tomatoes, but only the ripe tomato itself. Before serving up this tasty treat to your guinea pig you’ll want to remove the stem and any leaves.
You’ll also want to ensure your tomato is juicy ripe. Unripe tomatoes, leaves and stems are considered poisonous to your guinea pig.
Can bearded dragons eat tomatoes?
Your bearded dragon can eat tomatoes and actually benefit from the Vitamin A found in tomatoes. However like all things, if eaten in excess can make them sick.
Because they only require a small amount of Vitamin A it’s best to serve them this as a treat on occasion and not daily.
Can rabbits eat tomatoes?
Rabbits can eat tomatoes! If you’ve ever grown tomatoes in your garden and noticed a few missing, it may be from a sneaky rabbit!
However before you offer up a juicy ripe tomato to your pet bunny, take note. Stems and leaves should not be consumed by your rabbit.
Also wash your produce well as they may be covered in pesticides that could harm your rabbit.
Can cats eat tomatoes?
Like dogs, it is not recommended that cats eat tomatoes. The stem and leaves are poisonous to them as they contain Solanine as does green unripe tomatoes.
Ripe juicy tomatoes contain Tomatine which can make your cat sick and possibly cause death. So it’s best to avoid any risk and not feed your cat tomatoes.
Can chickens eat tomatoes?
Yes they can! As with other pets, you should not feed Chickens the stem, leaves or flowers of tomato plants.
However a ripe tomato is good for your chickens and recommended. If it’s a hot day, you could also freeze your tomatoes for a cool treat for your chickens!
Can you eat tomatoes on Keto Diet?
YES! Tomatoes are technically a fruit and are Keto diet approved!
According to the USDA (United States Department of Agriculture) 1/2 cup serving of tomatoes contains two grams of sugar and 4 grams of carbs! So eat up!
Can I freeze tomatoes?
Yes you can! Freeze them whole, peeled, diced, or chopped. Just keep in mind that when tomatoes are frozen then thawed, they will be mushy.
They cannot hold up to the freeze unfreeze process. So if you do freeze them, just know you’ll most likely want to use them in a sauce of some sort when thawed.
Carol
Sunday 22nd of September 2024
The 45 minute cook time should start once the water bath starts to boil. That didn’t seem clear for a beginner. Thank you for all your other details regarding canning tomatoes.
Verland and Jean Engle
Tuesday 12th of July 2022
Can tomatoes be processed using the oven method ?
Janelle
Wednesday 13th of July 2022
I've never tried the oven. If you do, let me know how they turn out. I'm super curious now and want to try myself.
CARLA COLLINS
Sunday 22nd of May 2022
Last year I had a huge over abundance of grape tomatoes and had run out of people to give them to. It took a little patience and a little more time but I followed all instructions as you have used.I have used your same method for years.I did have to adjust the salt and lemon juice. They were beautiful. I basically used them as any other canned tomatoes but they were so pretty in the jars I almost hated to open a jar. I used 1/2 pint jars hence the adjustments. HERE'S TO GREAT CANNING !!!
Janelle
Wednesday 13th of July 2022
Wow Carla! Thank you so much for sharing your recipe on how to can grape tomatoes! The tips are priceless to all readers! Thank you so much for taking the time to leave your comment. I'm glad they turned out for you!
wilhelmina
Wednesday 12th of August 2020
This makes canning so approachable, thank you! I have lots of garden tomatoes that I want to can this year.
Justine
Wednesday 12th of August 2020
I've been afraid of canning tomatoes, but this seems pretty easy! Guess I know what I'll be trying with all the tomatoes I have growing in my garden!
Janelle
Sunday 30th of August 2020
So glad that this has given you the confidence you need to jump into canning tomatoes!