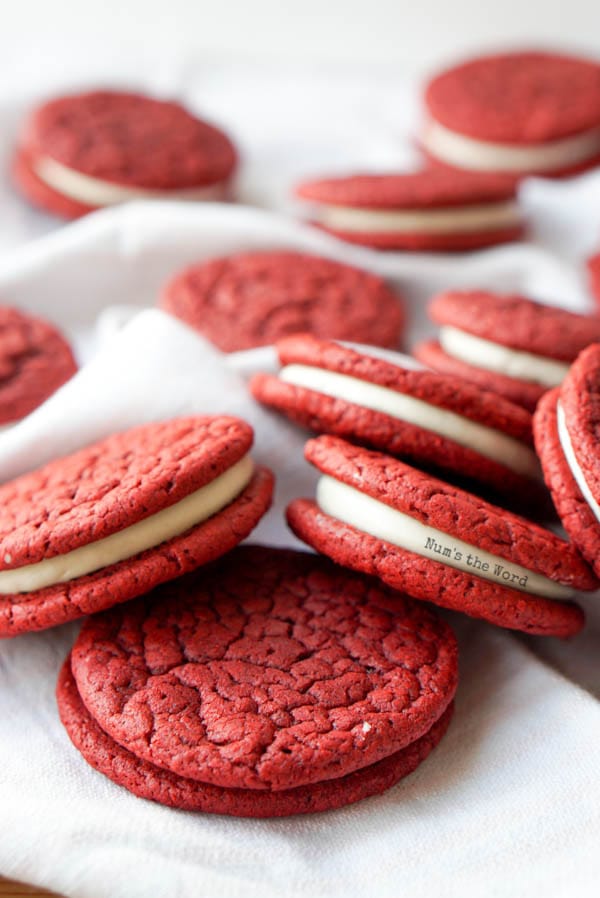
These Red Velvet Whoopie Pies are made with a cake mix and come together in minutes! A perfect treat for your kids to help you with and oh so tasty! Yummy cream cheese frosting sandwiched between two red velvet cookies is truly a beautiful and festive holiday treat!


When it comes to Valentine’s Day, you know we’re always baking up a few new fun recipes! These Red Velvet Whoopie Pies are just one of our favorite Valentine’s treats! A few of our favorite holiday treats that we like to give to teachers and neighbors are:
- Peanut Butter Pretzel Hearts
- Oreo Truffle Hearts
- Twinkie Hearts with Raspberry Puree <– perfect for the culinary challenged
- Peanut Butter, Caramel & Pretzel Bites
Showing appreciation for someone can be done with a store bought box of chocolates. But how much sweeter is it to show those you love and care about than with your time? Plus these cookies are SO easy to make!
These cookies are practically fool proof as they start with a cake mix and are a perfect treat to make with your kids! Spending time with someone you love is the perfect way to show them you truly love them!


What you’ll need to make Red Velvet Whoopie Pies:
- Red Velvet Cake Mix – this is the key ingredient for cake mix cookies. You’ll need a cake mix. And since these are red velvet whoopie pies, we’re definitely going to need a red velvet cake mix!
- Butter or Oil – Ah the great debate! Both will work great for this recipe, but down below I tell break down both ingredients in this red velvet whoopie pie recipe.
- Eggs – known as the glue that sticks everything together, eggs are a must have ingredient!

Should I use Butter or Oil with my cake mix cookies?
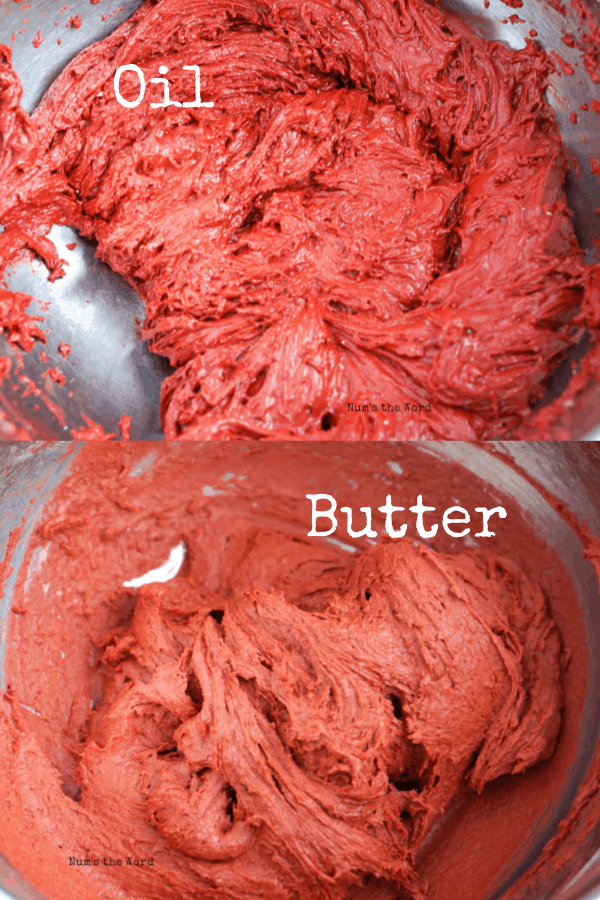
MOST recipes out there will tell you to use oil. Generally speaking the standard cake mix cookie recipe is a cake mix, oil and eggs. However I was curious what would happen if I swapped out the oil for room temperature butter instead.
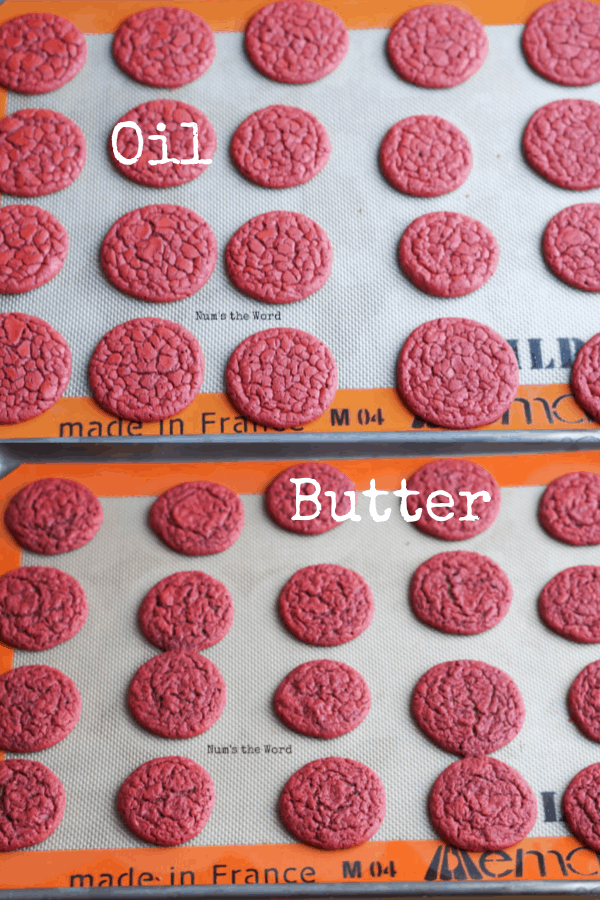
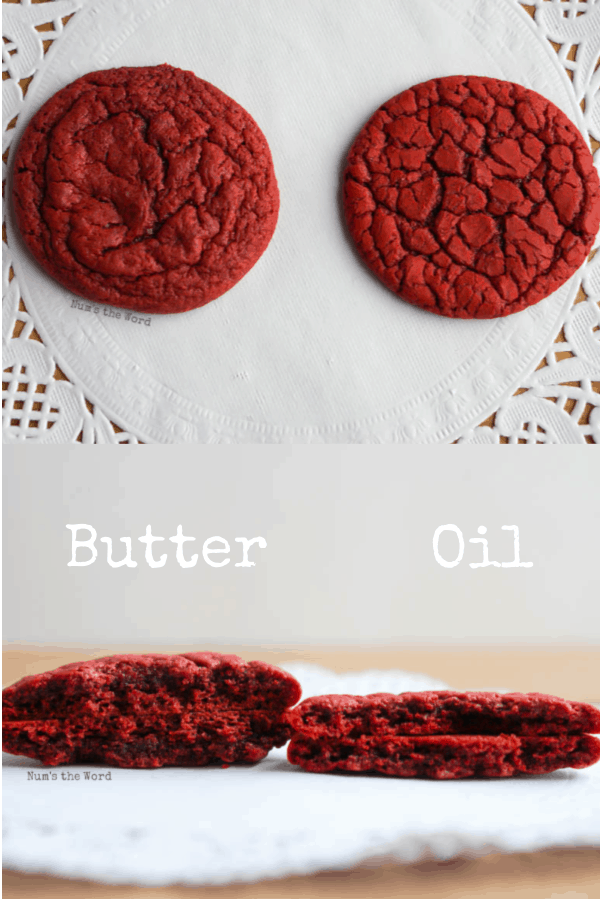
As you can see from the photos, there WAS a difference in the cookies.
Oil Cookies:
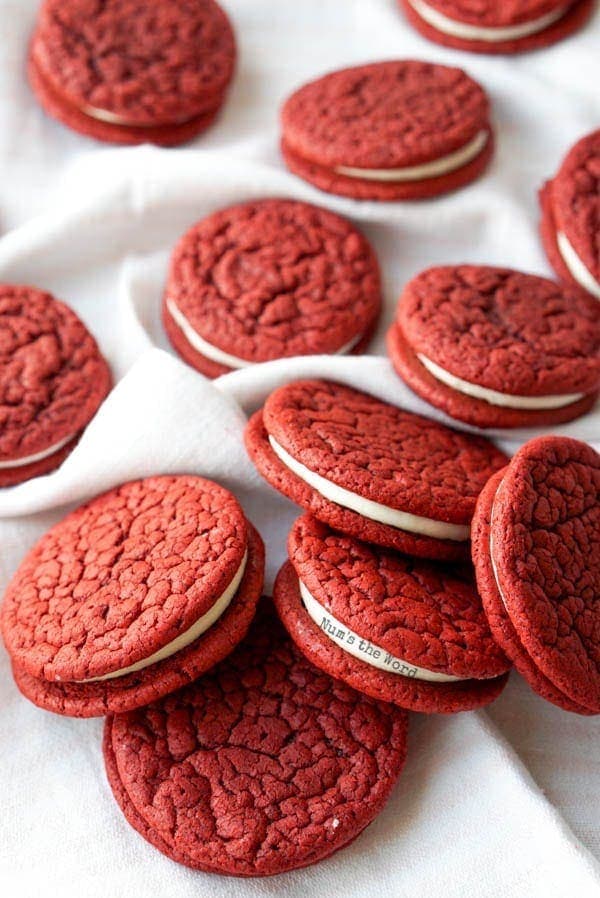
The oil cake mix cookies give a better crinkle look and the dough is easier to work with as it’s super oily. Oil cake mix cookies also spread more for a flatter cookie and dry out faster. If you go with the oil method, make sure to eat them within a few days.
Butter Cookies:
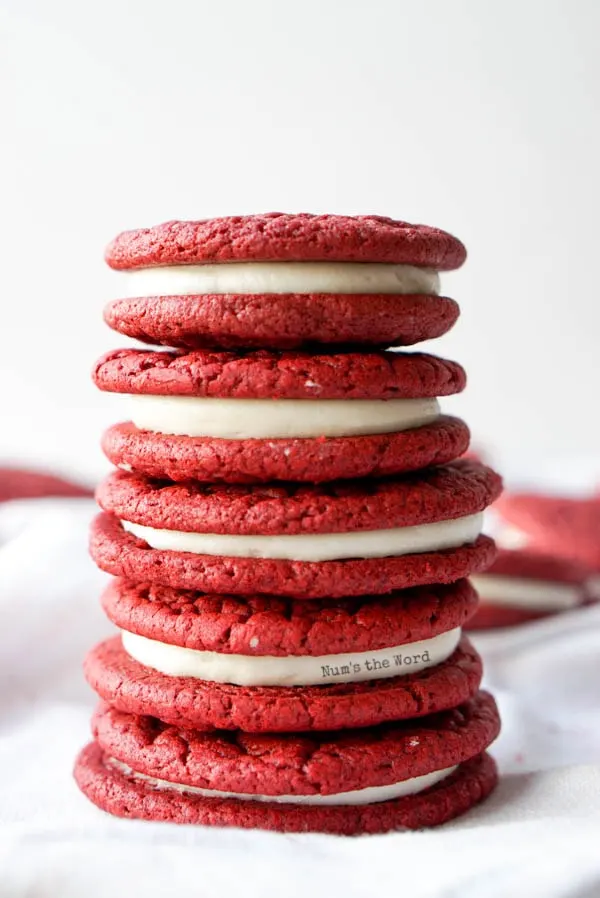
Using room temperature butter will give you a gummier batter that will stick to your hands and scoop more than an oil cookie batter. These cookies do not spread quite as much and produce a softer, slightly puffier cookie. By using a butter cake mix cookie batter, you’ll get a cookie that stays softer for longer than an oil cookie.

Should I use Oil or Butter for these Red Velvet Cake Mix Cookies?
The decision is really up to you. I’ve made cake mix cookies with BOTH and personally I like the softer, slightly puffier cookies for whoopie pies more. Which means I prefer BUTTER for this Red Velvet Cake Mix Cookie recipe. Flavor wise, you wont really be able to tell the difference, as red velvet has a strong flavor and the cream cheese center will distract you from any difference. However for look and moisture, I’m hooked on using butter.

How do you make Red Velvet Whoopie Pies using a cake mix?
Step 1: Butter or oil? Decide if you’d rather make these with butter or oil. There isn’t a wrong choice here, and it may come down to what you have on hand. Oil is cheaper and both taste great, however I like the texture of butter better for these whoopie pies. I should also mention that I used REAL butter and am not sure how they’ll turn out with a butter substitute like margarine.
Step 2: Batter up! Time to mix together your cake mix, butter and eggs. Whisk the batter well to ensure all cake mix is incorporated.
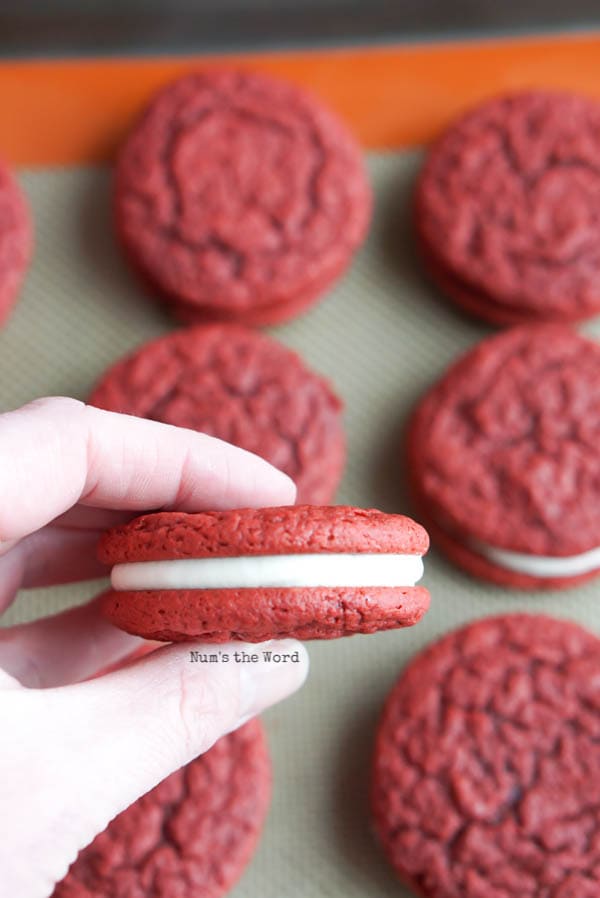
Step 3: Bake! Because you get two cookies with a whoopie pie, I tend to make them a bit smaller than a traditional single cookie. I measure my cookie batter into 1 Tablespoon scoops. These will seem pretty small on your cookie sheet, but trust me, when they bake, they’ll turn out to be the right size.
Baking red velvet cookies is tough because you can’t tell when they are done. 9 – 11 minutes works great and each oven is slightly different. I suggest making a single cookie and testing the time. For my oven 10 minutes was best.
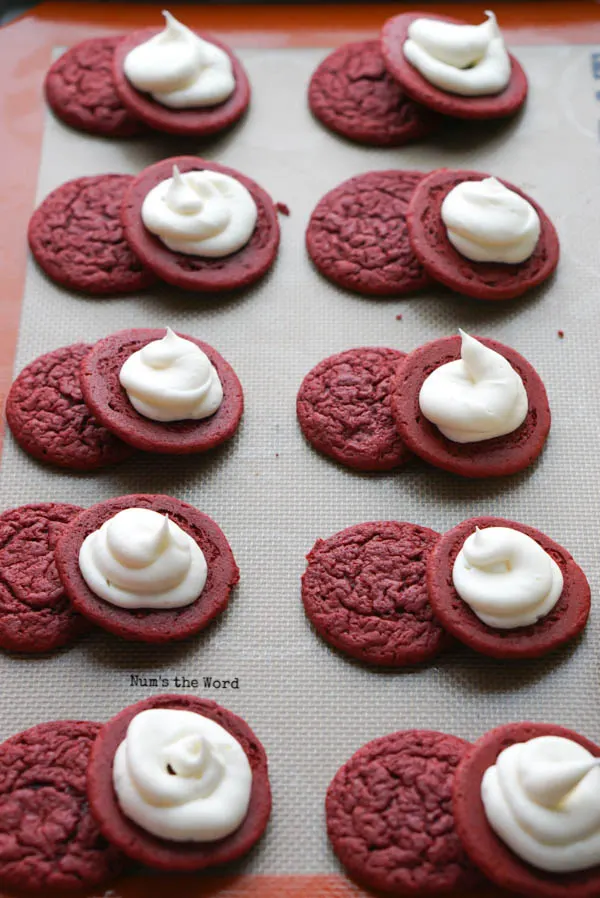
Step 4: Fill! Red Velvet Cake is traditionally served with cream cheese frosting. These Red Velvet Whoopie Pies are no exception. Whip up this recipe for THE BEST cream cheese frosting and pipe it on the center of half the cookies. Take a second cookie and gently press down, squeezing the frosting to the edges. Serve immediately, store in an air tight container for up to 5 days or freeze for up to 2 month.

Do Red Velvet Whoopie Pies Need to be Refrigerated?
There are many who will stand on both sides of this debate. And you’ll want to go with your gut. However for me, I say no. Mainly because I do NOT have any room in my fridge to store cookies.
The real question you should ask, and the one that will solve this debate is: Do you refrigerate cake with cream cheese frosting? If YES, then refrigerate these cookies. If no, then don’t.

Other Flavor Combinations for these Red Velvet Whoopie Pies
- Ice Cream Red Velvet Whoopie Pies – Instead of cream cheese frosting, Put a scoop of softened vanilla ice cream in the middle of two cookies and freeze. Pass out after dinner to your family and friends and enjoy the praises that come in!
- Mini Chocolate Chips – Use mini chocolate chips or chopped up white chocolate and roll your cookies (frosting part) in them for a festive decoration.
- Favorite Candy Crushed up – Imagine your favorite candy around the edges (frosting part) of your cookie! Double yum!
- Candy Canes – If you’re making these for Christmas, roll them (frosting part) in crushed candy canes for added festive color and flavor.

Other recipes that start with a cake mix:
- Devil’s Food Cake Mix Cookies
- Banana Pudding Poke Cake
- 3 Ingredients Chocolate Caramel Cookies
- Pistachio Bread
- Root Beer Float Cupcakes
Other Red Desserts You’ll Love:
- Strawberry Crisp
- Strawberry Shortcake Trifle Cups
- Raspberry Ice Cream
- Strawberry Crumb Bars
- Cherry Rhubarb Crisp

When it comes to easy Valentine’s recipes, these Red Velvet Whoopie Pies are a favorite in our home. Easy enough to make with my kids and tasty enough to forget my diet! If you’re looking for a way to share the flavor of love with your friends and family this year, try these easy cake mix red velvet whoopie pies!
Red Velvet Whoopie Pies

When it comes to easy Valentine's recipes, these Red Velvet Whoopie Pies are a favorite in our home. Easy enough to make with my kids and tasty enough to forget my diet! If you're looking for a way to share the flavor of love with your friends and family this year, try these easy cake mix red velvet whoopie pies!
Ingredients
- 1 (15.25 ounce) Red Velvet Cake Mix
- 1/2 cup butter or 1/3 cup vegetable oil
- 2 eggs
- 1 recipe for Cream Cheese Frosting
Instructions
- Preheat oven to 350*F
- In a bowl blend cake mix, butter and eggs.
- Scoop 2 Tablespoon of dough into hands and roll into ball.
- Place cookies on a cookie sheet and bake for 10 minutes.
- Allow cookies to cool completely.
- Once cool, place a Tablespoon of frosting on the flat side of one cookie. With a second cookie, gently press frosting and allow frosting to squish to the edges.
- Enjoy immediately or store in an air tight container for up to 5 days.
Nutrition Information:
Yield:
20Serving Size:
1Amount Per Serving: Calories: 181Total Fat: 10gSaturated Fat: 4gTrans Fat: 0gUnsaturated Fat: 5gCholesterol: 31mgSodium: 236mgCarbohydrates: 22gFiber: 0gSugar: 12gProtein: 2g
Mary
Thursday 4th of April 2024
How do you keep the tops so smooth whay is the secret
Beth
Tuesday 26th of December 2023
I used butter, and 1 Tablespoon of batter for each cookie as directed. However, my cookies were not as big as the ones you show here. These will only make whoopee pie bites. Next time I will use at least 2 Tablespoons of batter.
Janelle
Tuesday 2nd of January 2024
Thank you for your comment Shar. I just went to my kitchen to look at my cookie scoop to see what the size is, and you are 100% correct. It's a 2 Tablespoon scoop. Thank you for catching that! I appreciate your comment!