Want to get the perfect English Muffin from the comfort of your own home? Now you can! An easy recipe that you can follow and get great results from every time!

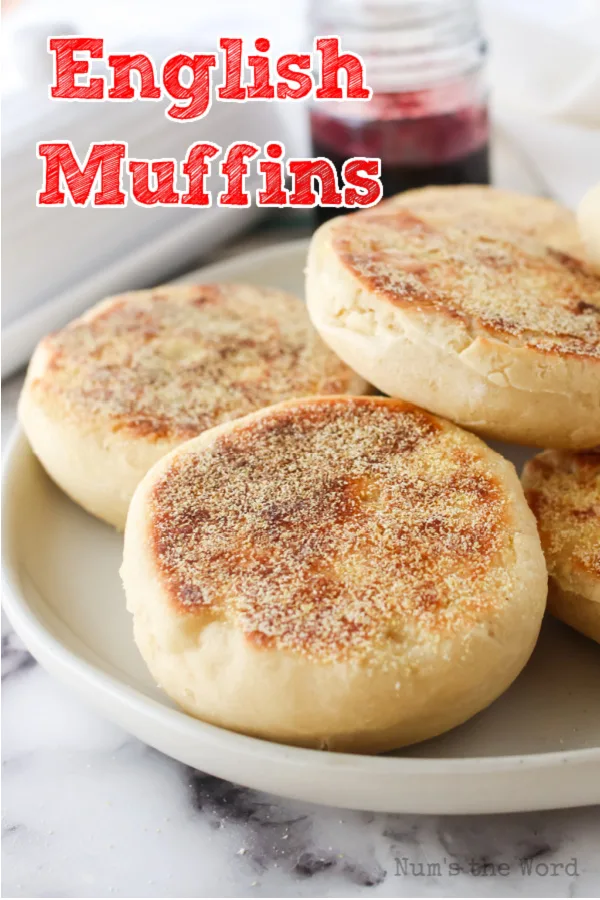
This English Muffin recipe produces light and fluffy English muffins that are perfectly crispy on the outside.
They are so much better than store bought English muffins. Trust me, once you try them, you’ll never go back.
While homemade English muffins do take some time, the process is pretty simple and can be made in advance and still taste great days later!
They can be served as both a breakfast item or a snack. We’ve even made them into pizza English muffins before!
And there is no hand kneading! Let your mixer take care of it and give your arms a break.

What is An English Muffin?
Is an English Muffin from England? Actually, no. In fact, in Britain, English Muffins are called American Muffins!
When English muffins were first created here in America, they were called a toaster crumpet. A crumpet is a small, round type muffin with many holes.
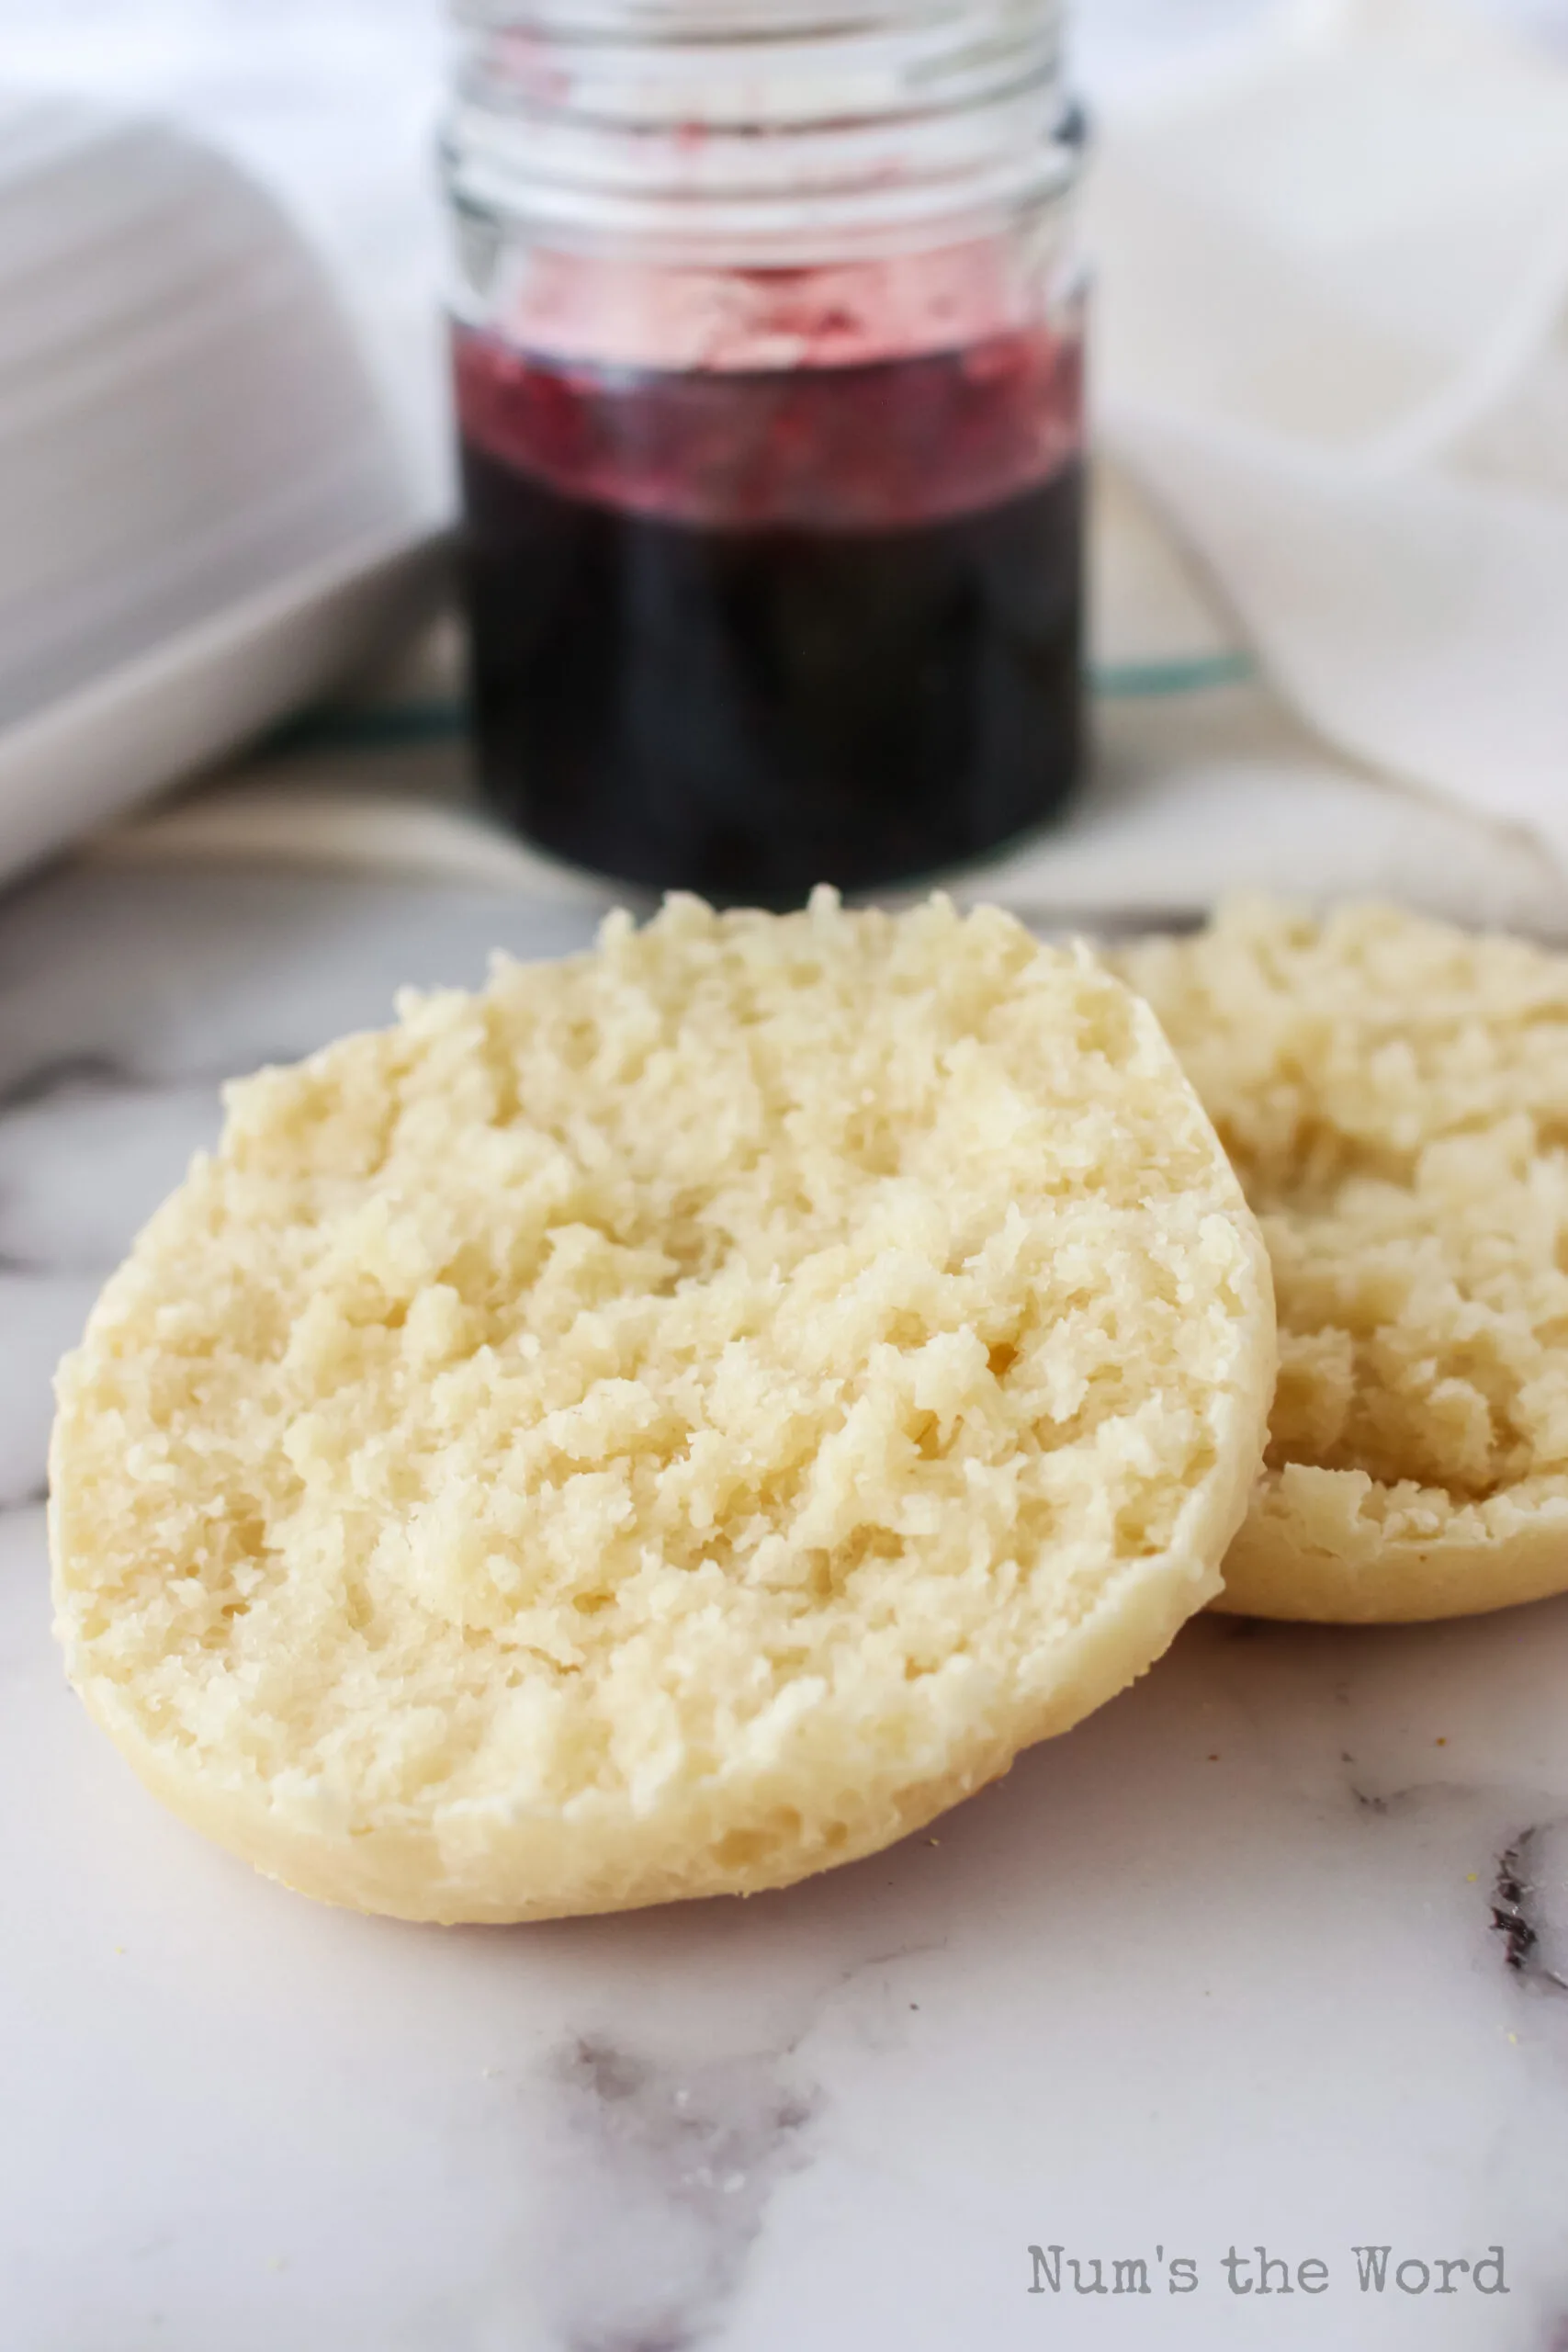
However, the English muffin didn’t have any holes on top, but instead had holes on the inside, when you opened it up. Those holes are famously called “nooks and crannies.”
Eventually, the name toaster crumpet was lost, but we couldn’t just call them muffins as what about our regular muffins?
Since they don’t resemble regular muffins at all, and the name toaster crumpets was a no go, we needed something else.
So the name “English Muffins” came about. They are dryer, more flat muffins that are full of lots of holes.
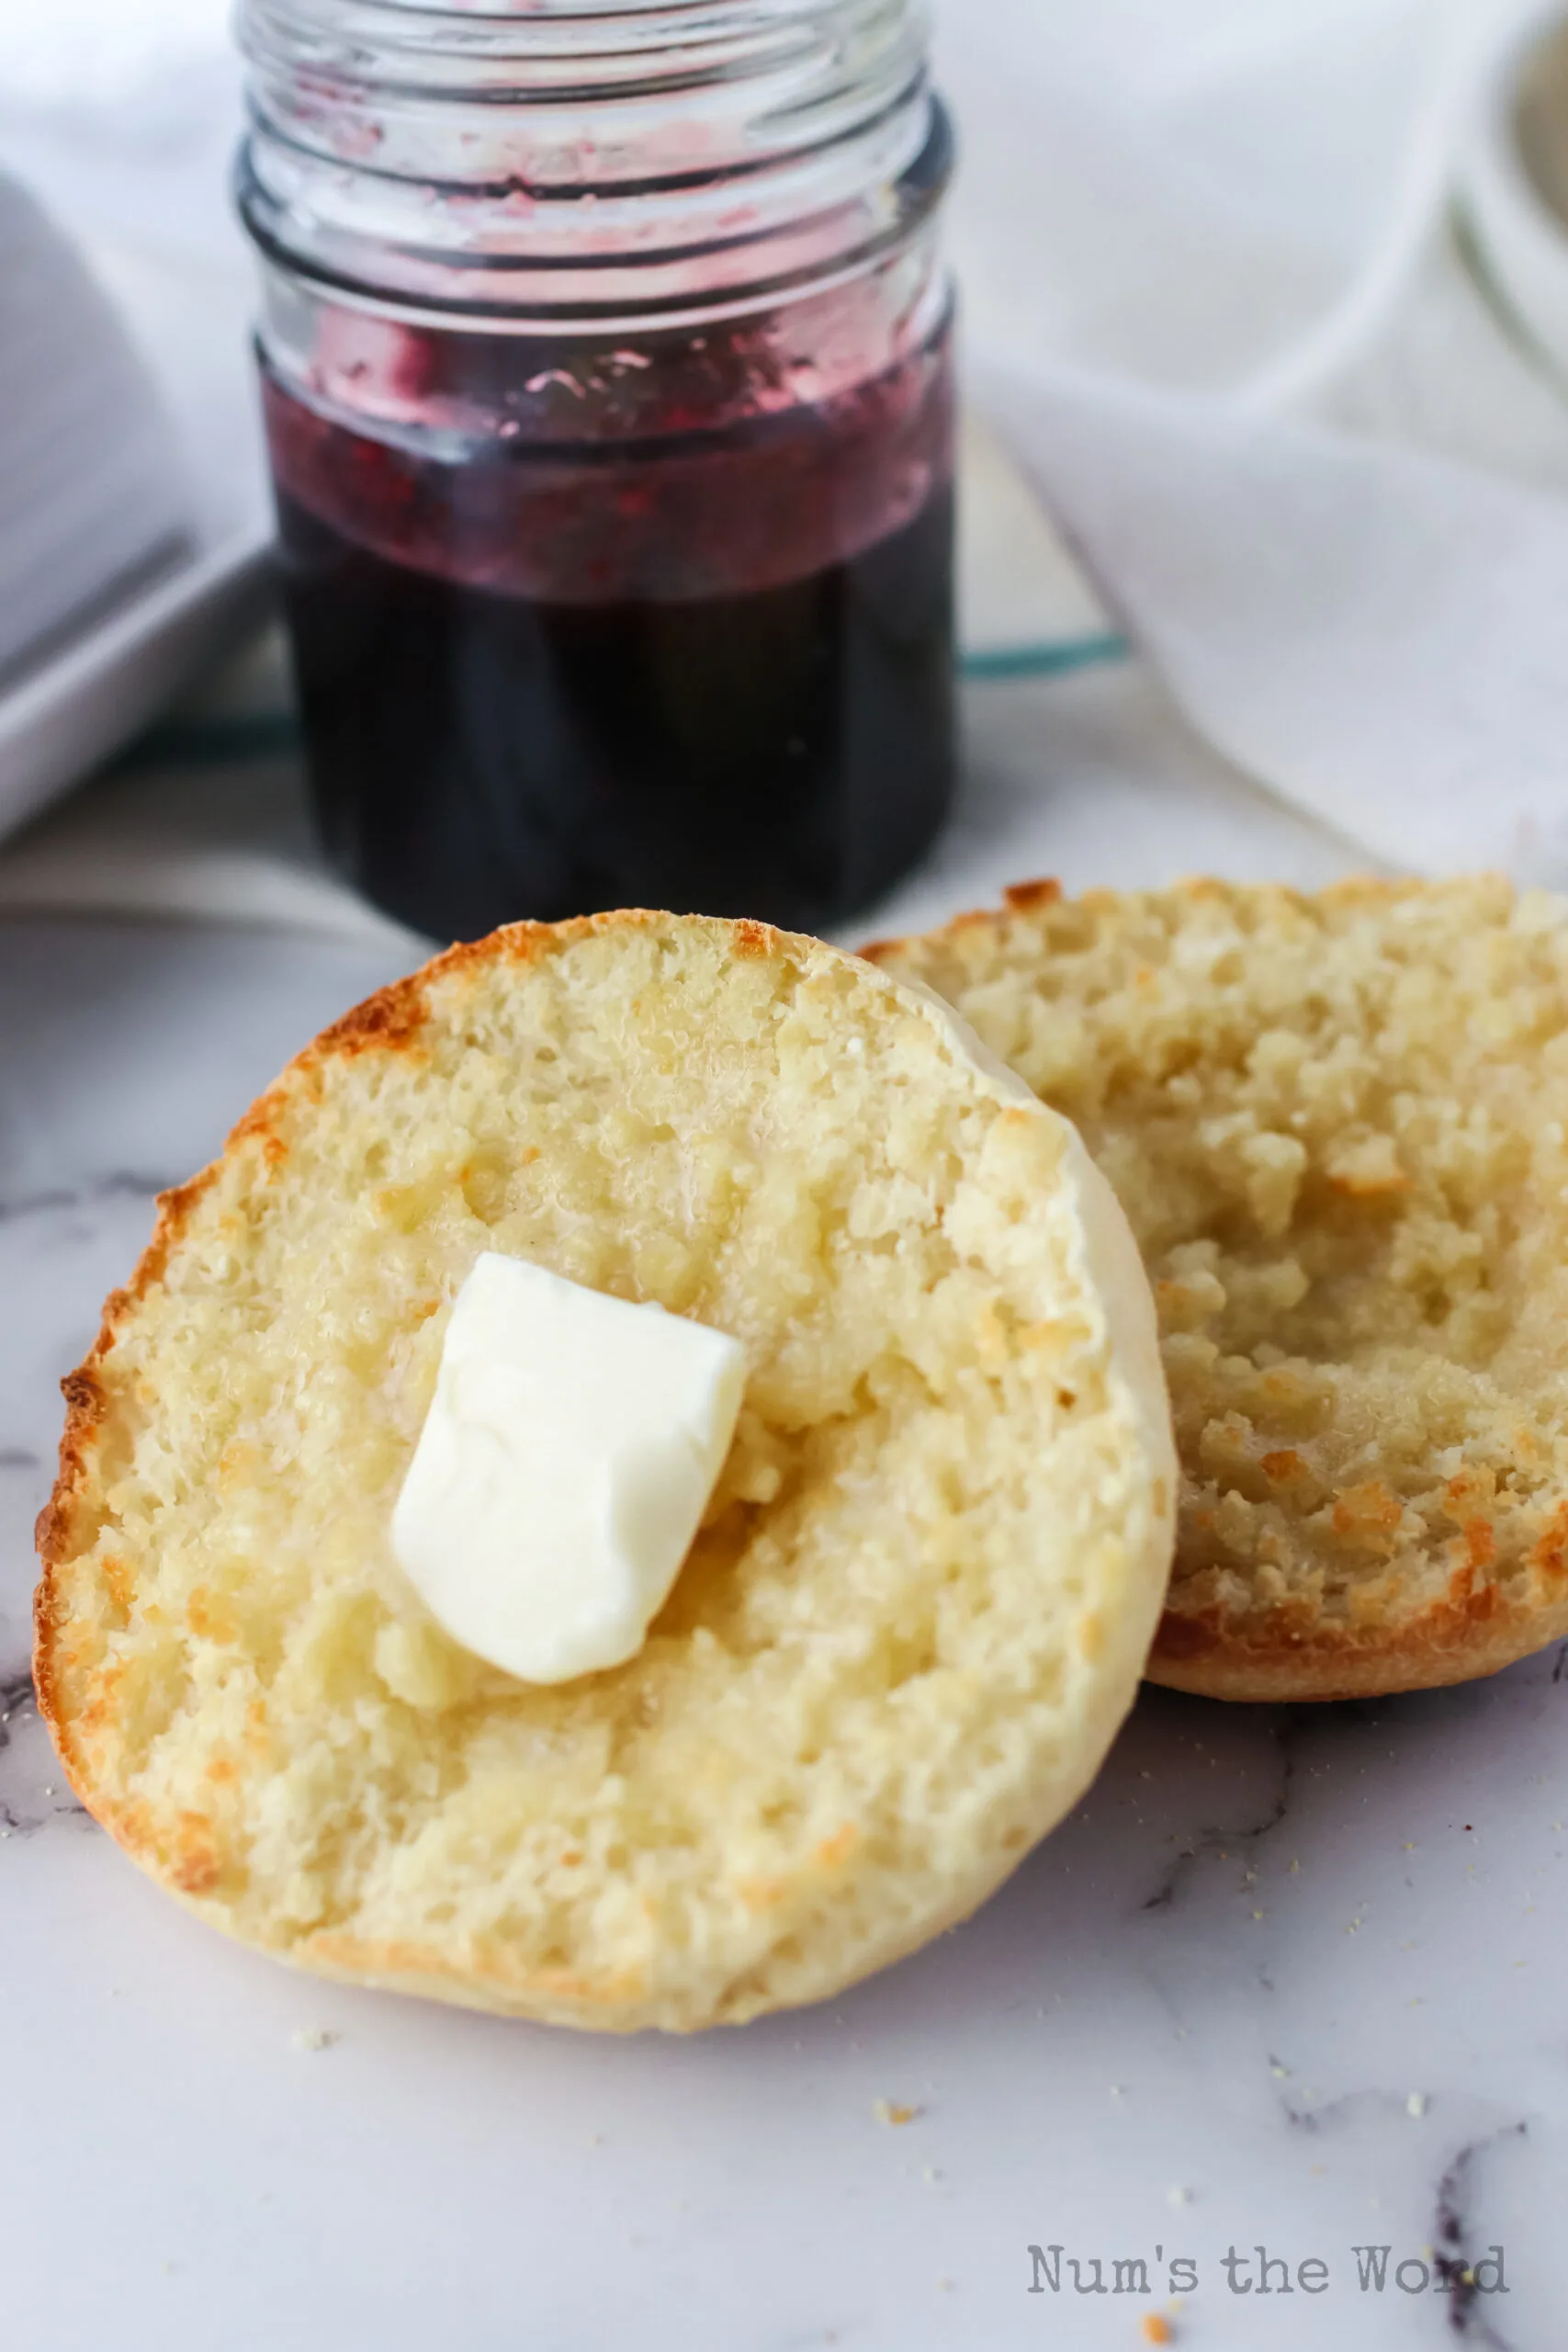
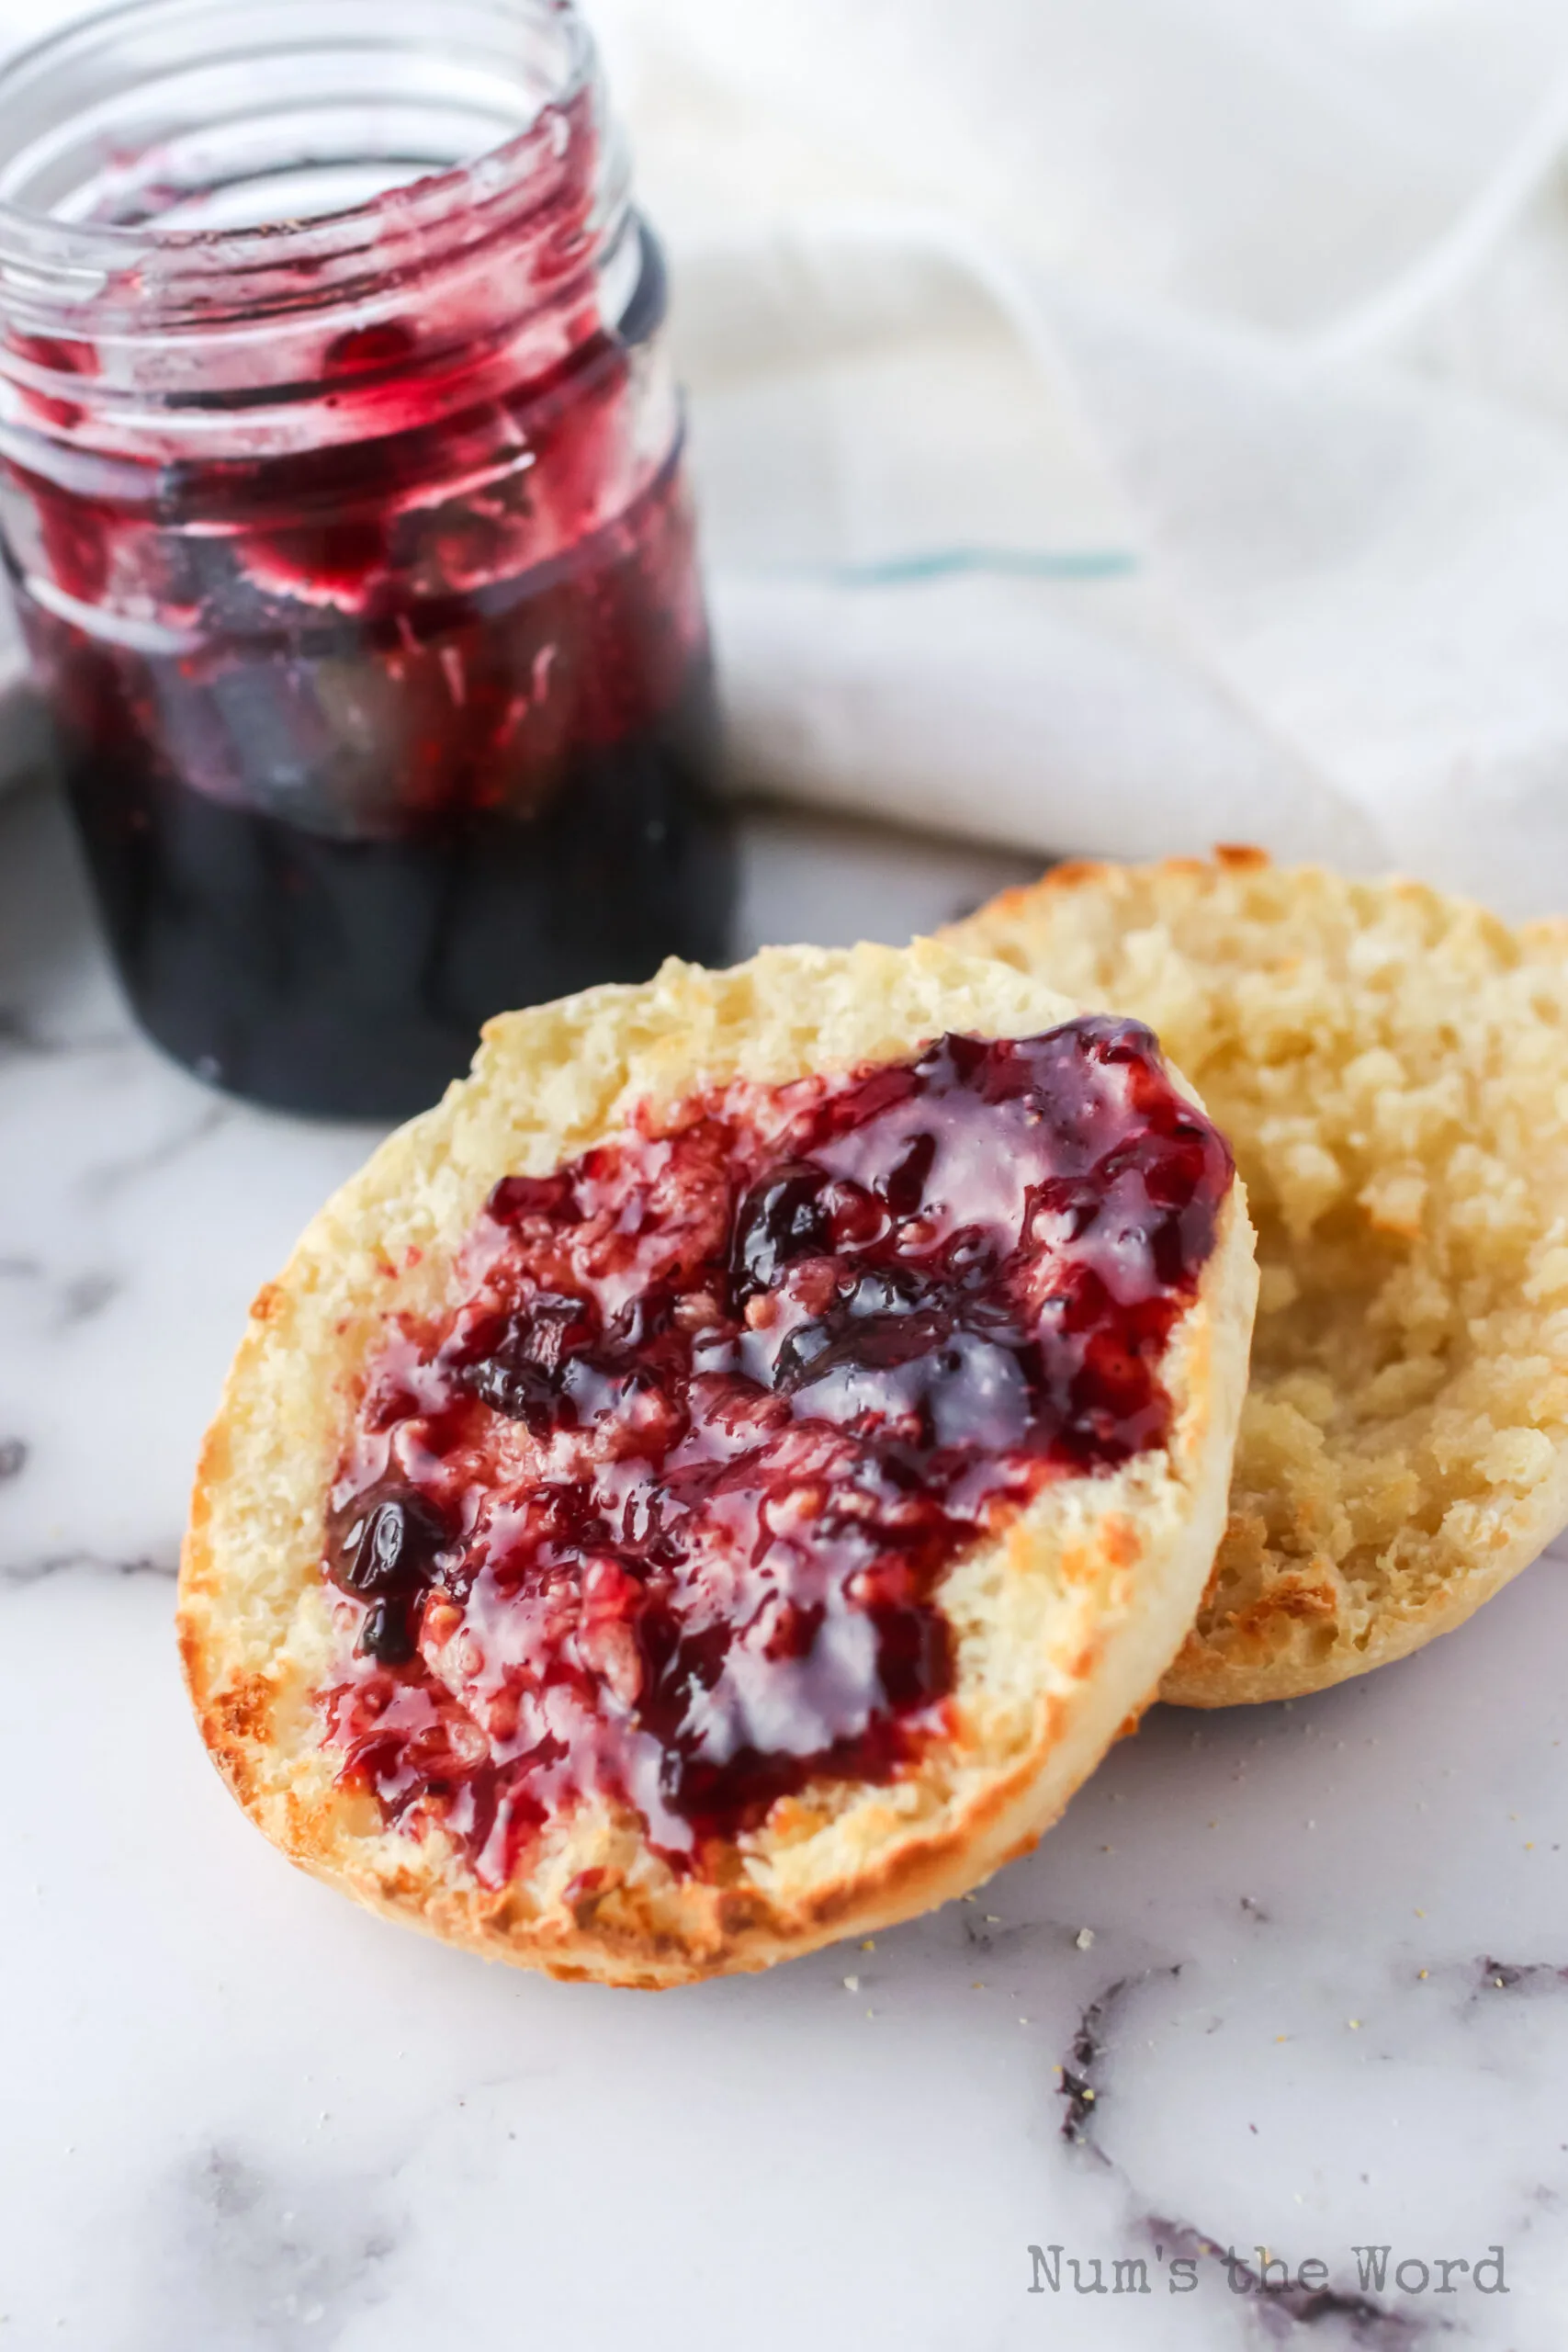
English Muffins are typically toasted and served with butter, jam, or honey. They are also famous now for being served with eggs and bacon or sausage called a breakfast sandwich.

What Ingredients are in an English Muffin?
Most of the ingredients in English muffins are pantry ingredients so you’ve probably already got them on hand!
- Flour: Use all purpose flour for best results. Bread flour results in a chewier bread.
- Salt: It is absolutely necessary to season the english muffins with salt.
- Buttermilk: You can buy this or make some at home with milk and vinegar.
- Butter: I always use salted butter in baking though you can use unsalted too.
- Sugar: I don’t recommend using brown sugar as it would completely change the flavor.
- Yeast: You need the yeast to get the bread to rise.
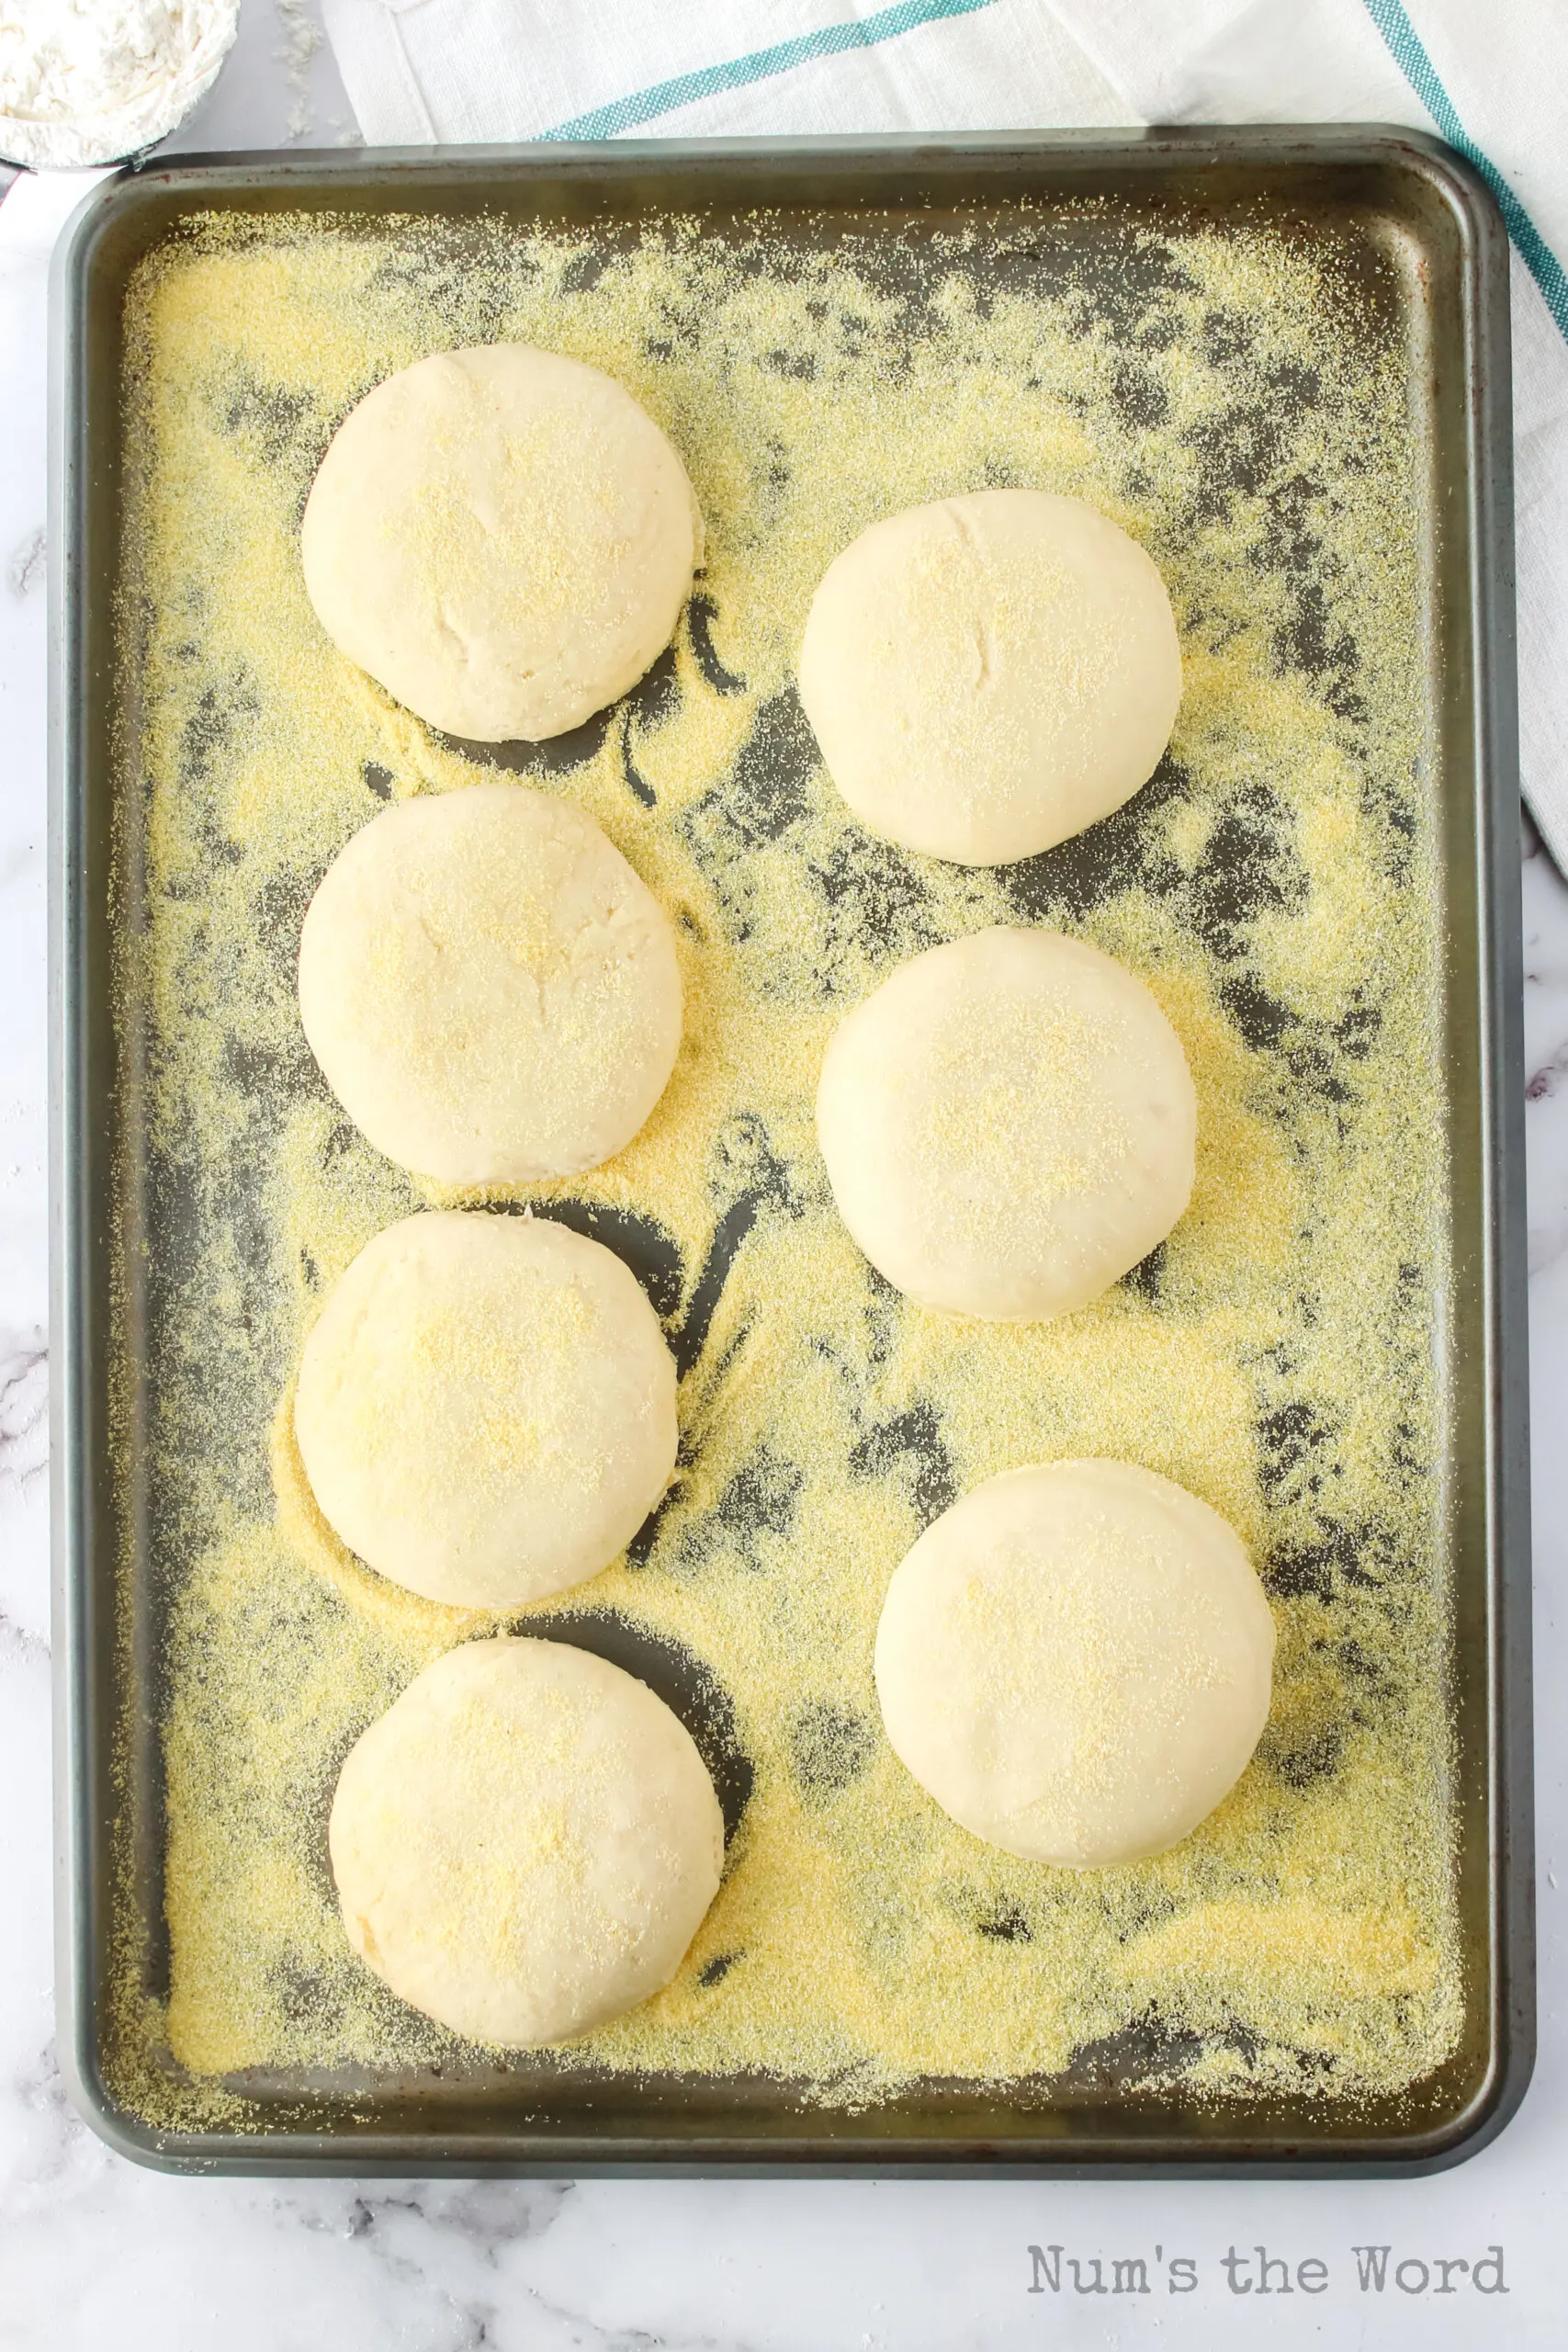
- Cornmeal: The cornmeal is sprinkled on the pans and the tops of the english muffins.

How to Make English Muffins?
A proper English muffin takes time to make, but most of it is rising time, so don’t be afraid.
- Proof Yeast: The buttermilk and butter need to be warm but not too hot when you add the yeast and sugar.
- Mix: Once the yeast mixture is bubbly, mix with the rest of the ingredients except the cornmeal.
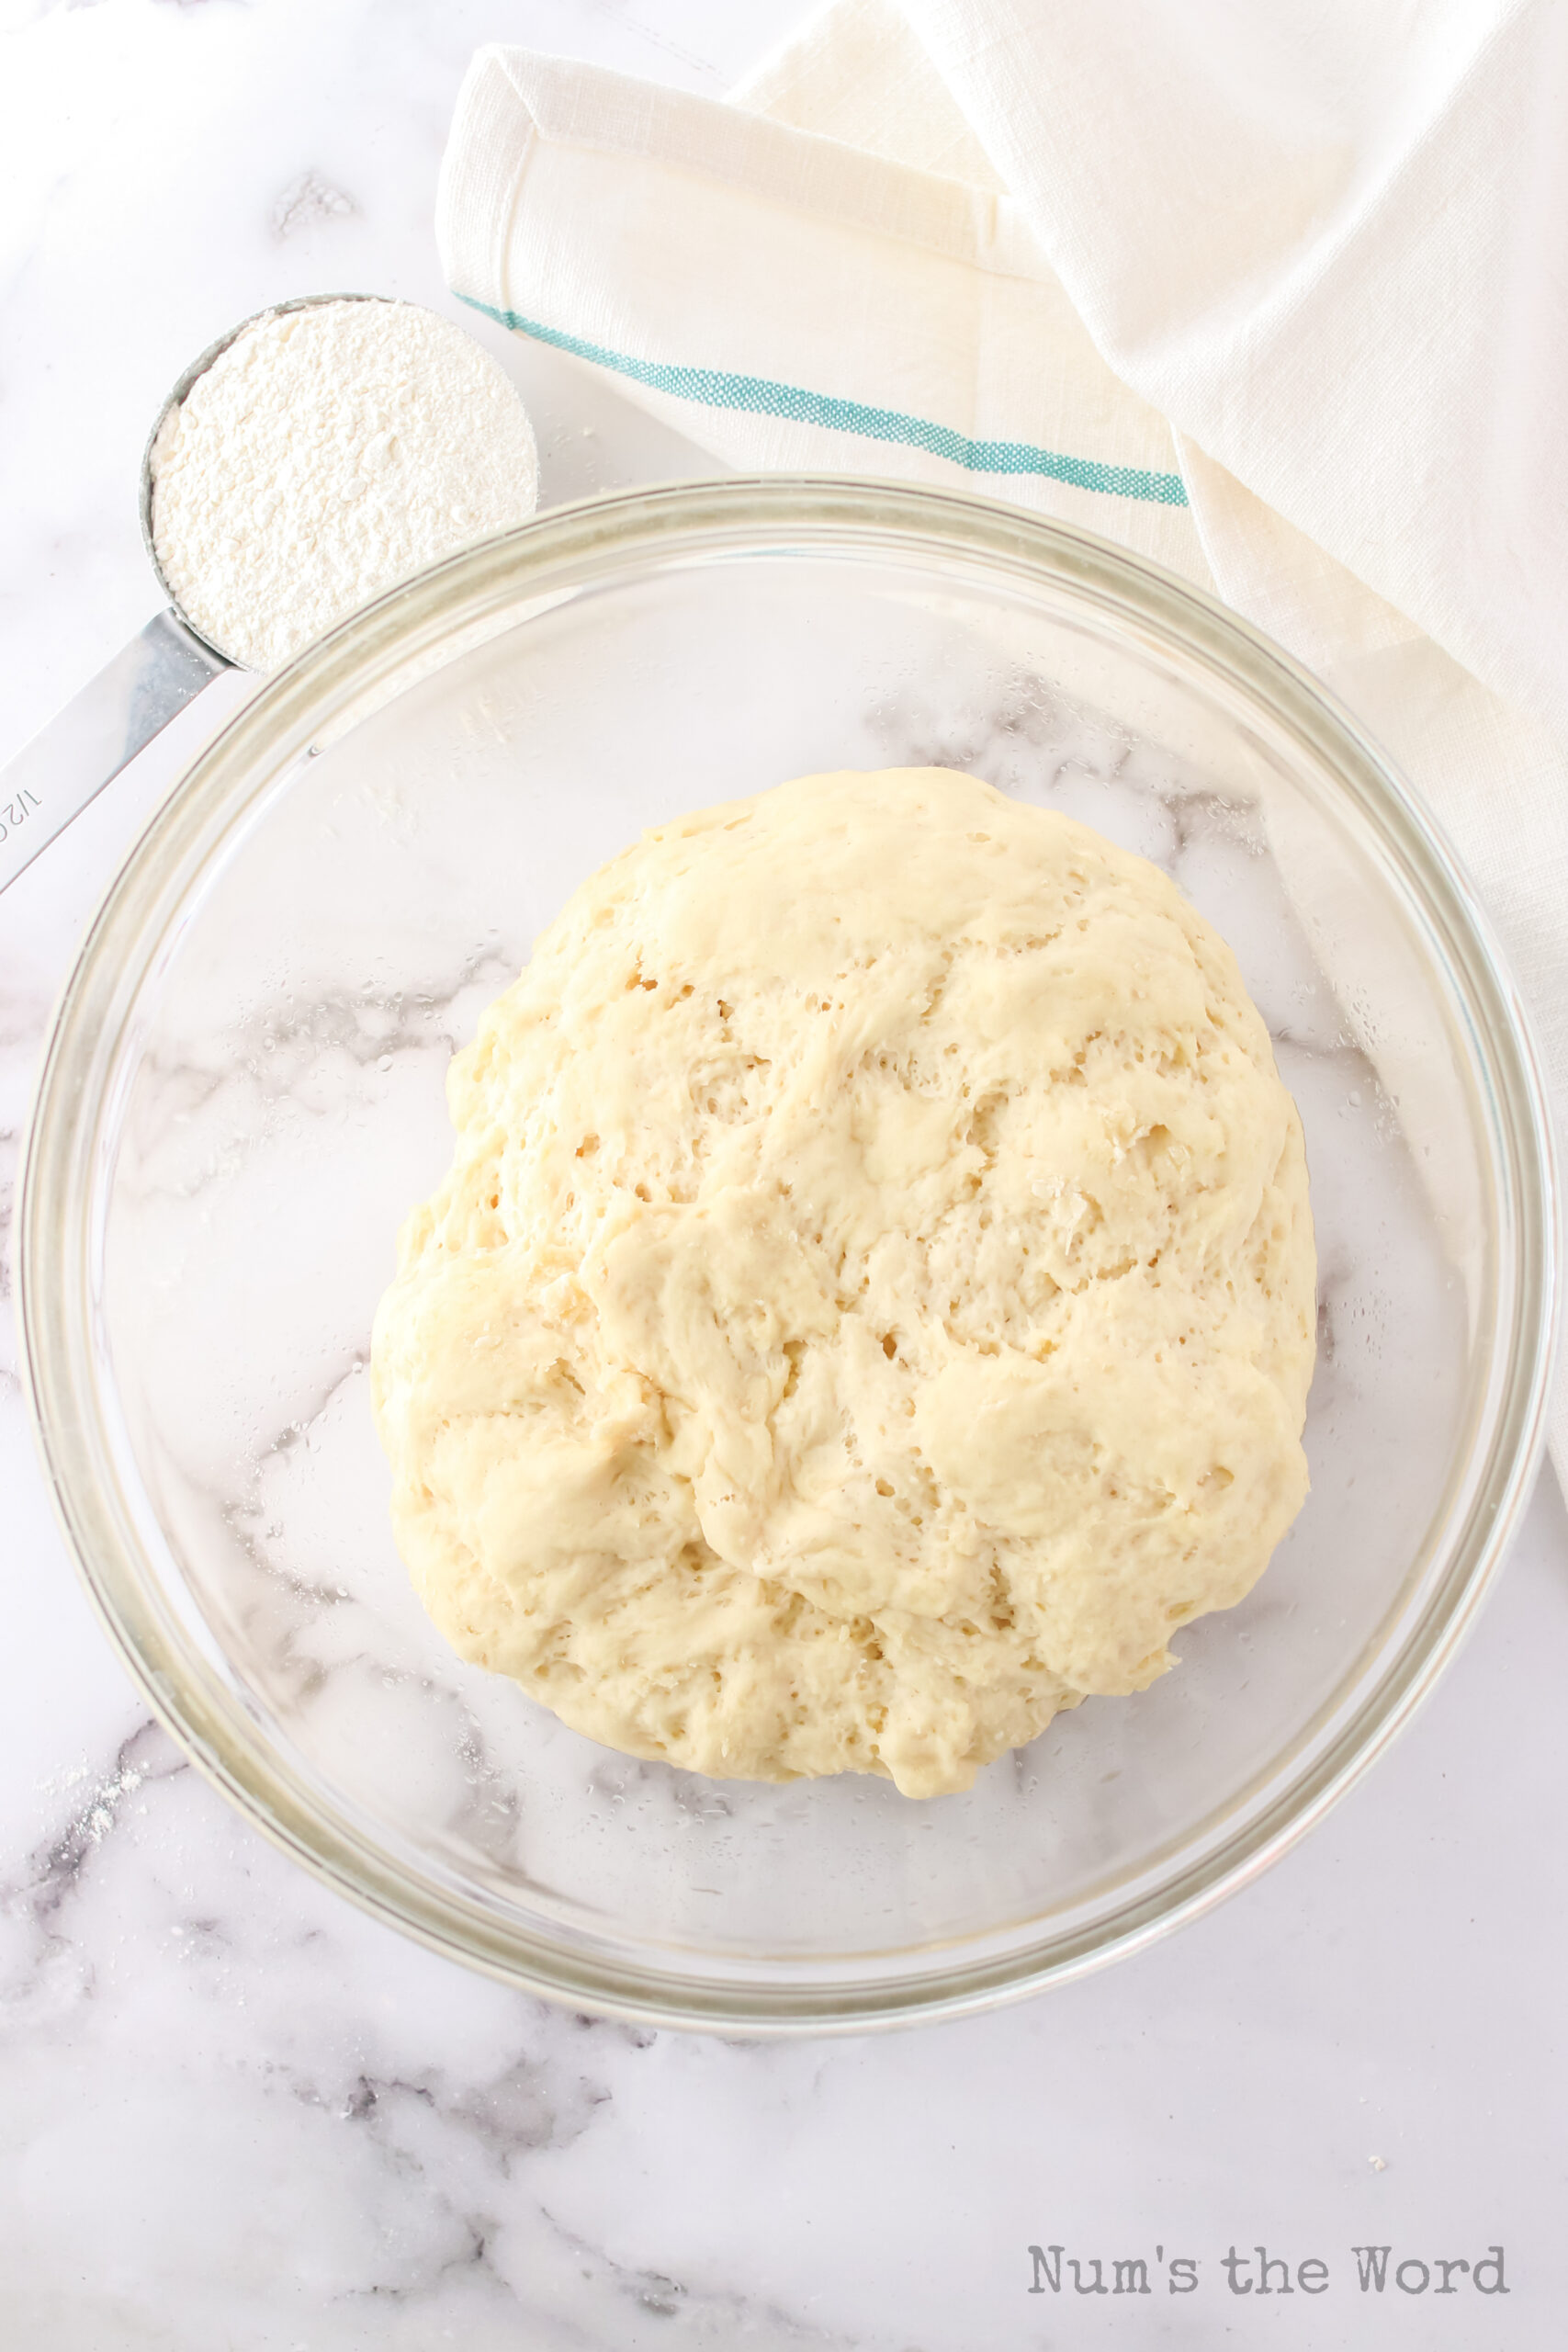
- Rise: The english muffin dough then needs to rise until doubled in size.
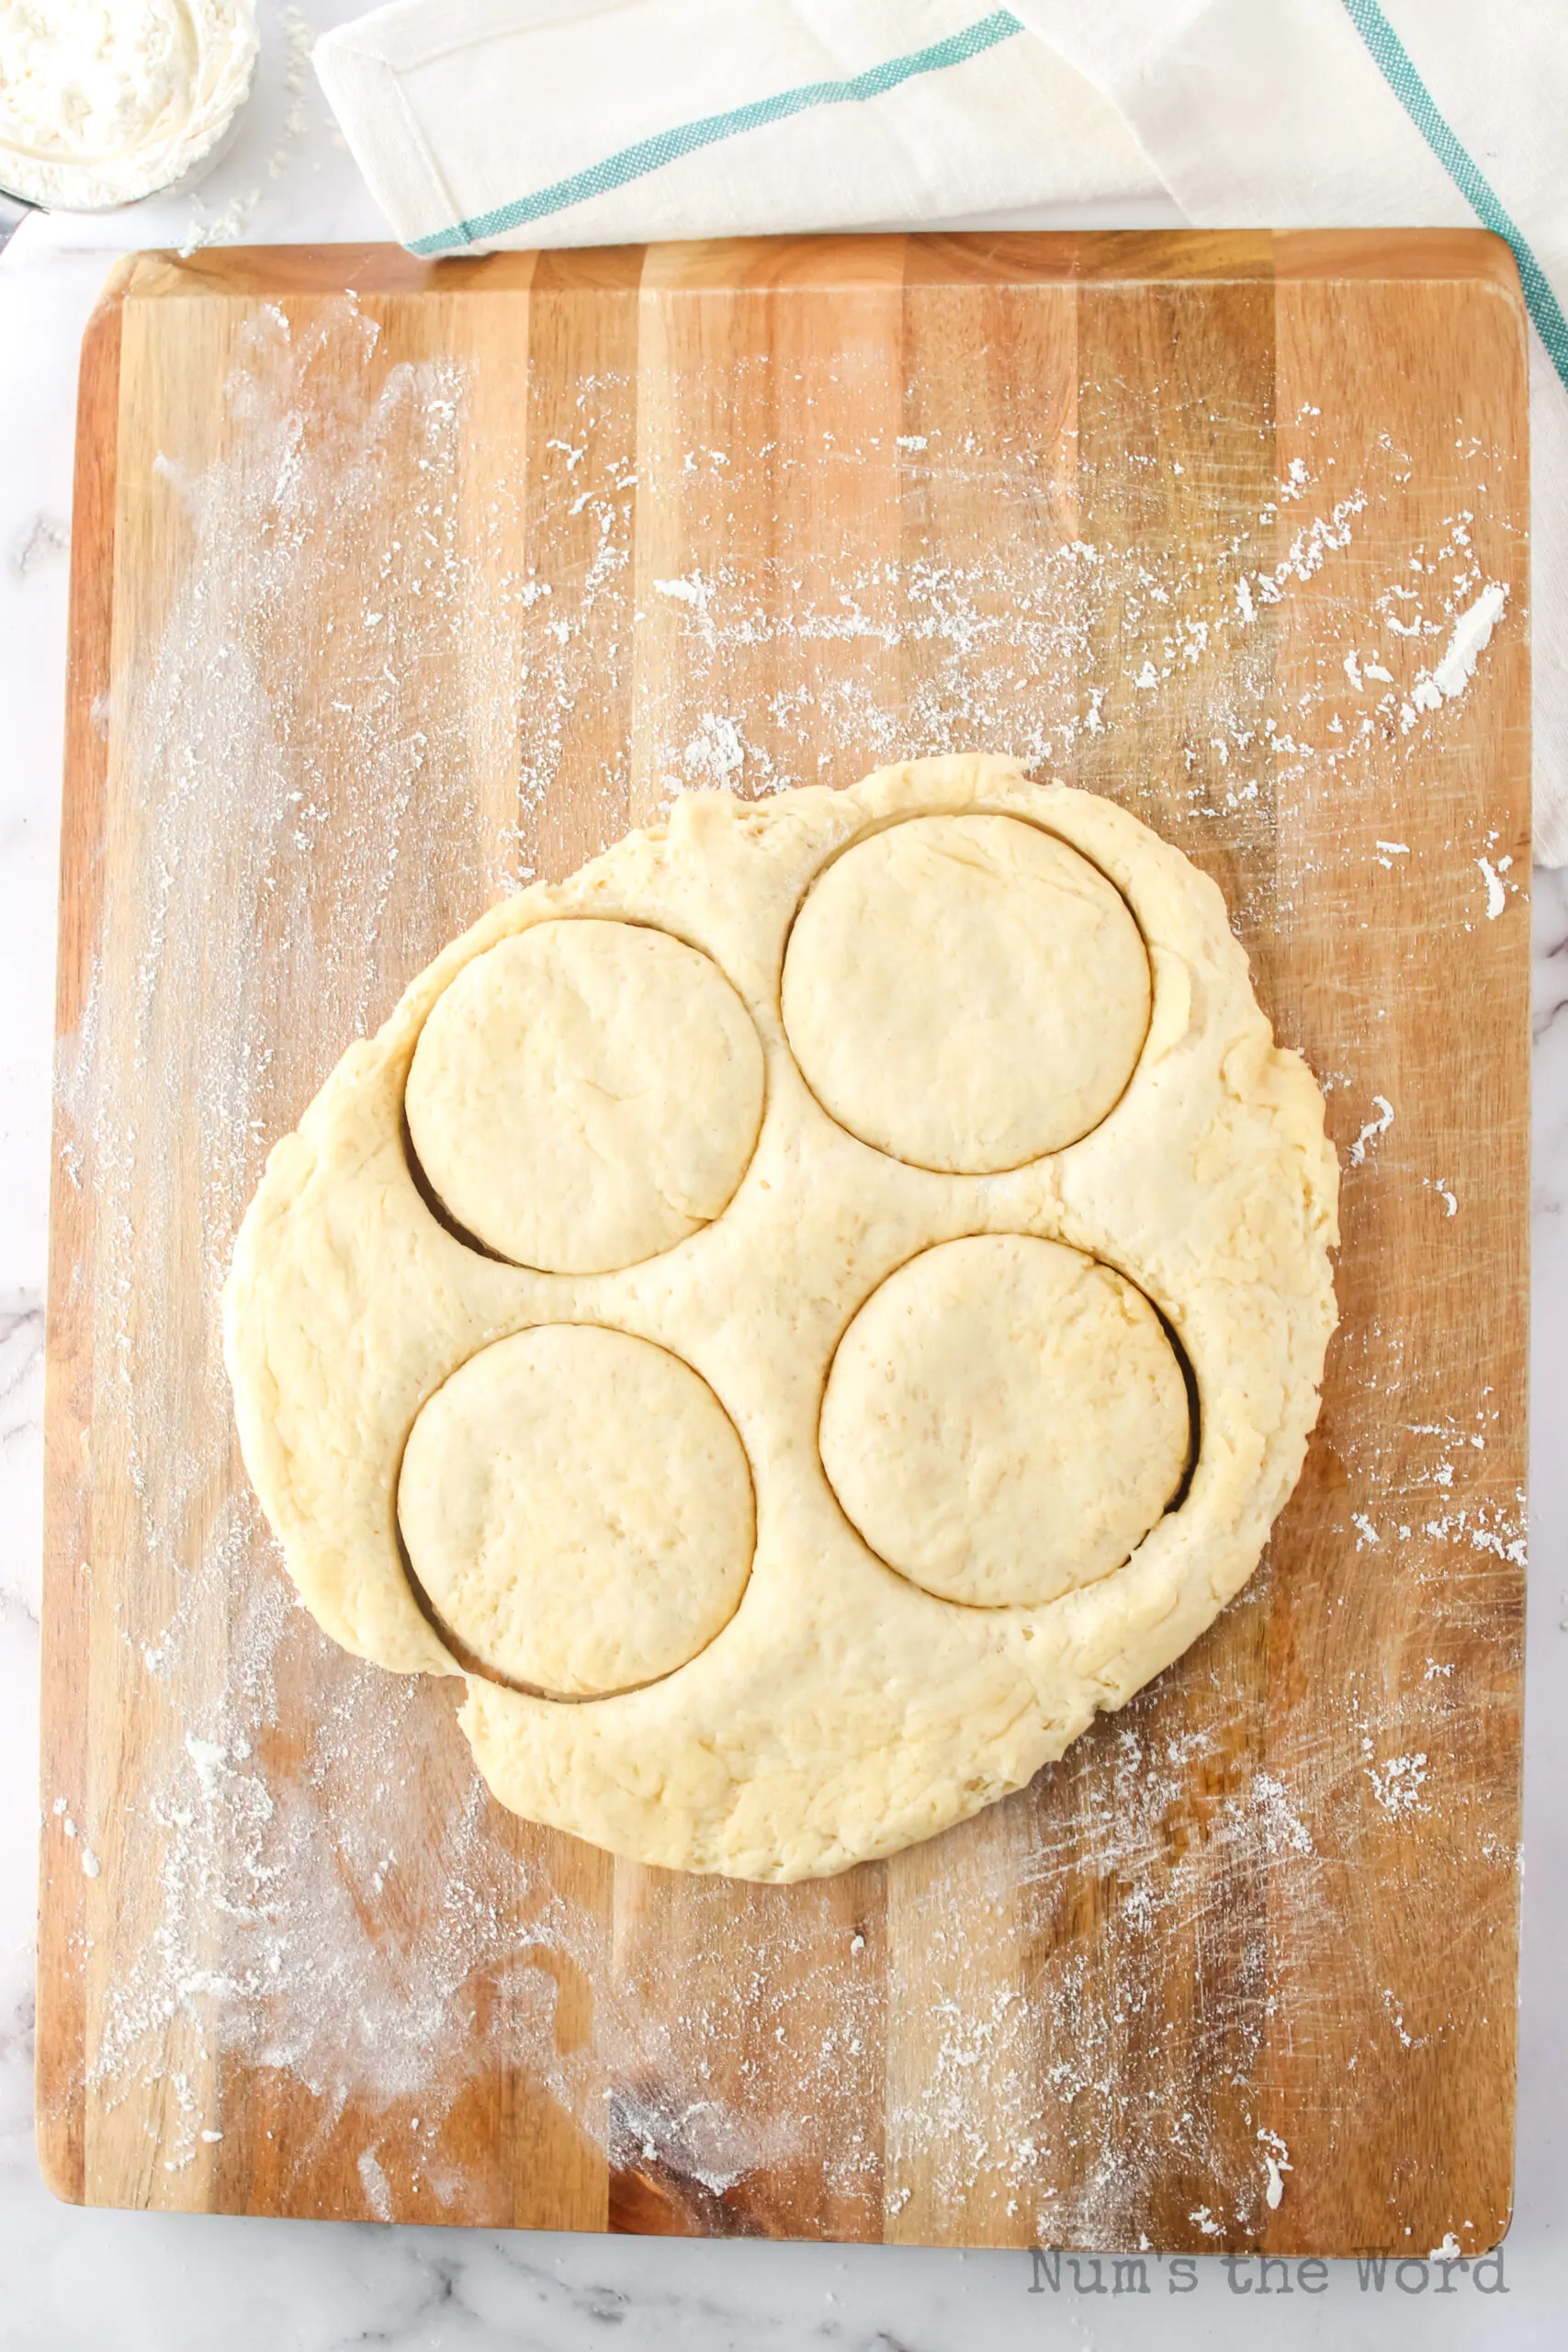
- Shape: Roll the risen dough out and cut out shapes using a cookie cutter or regular cup.
- Rise: Let the muffins rise again on the tray that is sprinkled with cornmeal
- Cook: No oven baking here! You’ll want to cook the English muffin on a skillet on the stove.
Pro Tips:
- This dough is really sticky! It’s supposed to be, so use your mixer whenever possible.
- Make sure the cup or cookie cutter is floured or it’ll stick to the dough.

Are English Muffins Healthy?
English Muffins are much less sweet than regular muffins, requiring only 1 tsp for an entire batch of muffins making them pretty neutral when it comes to a healthy muffin.
English muffins aren’t a dessert, but they aren’t a fruit or vegetable either. That means you can make them as healthy or unhealthy as you want.
Toppings like cream cheese may make them a little more unhealthy than others. However, an English muffin all by itself wouldn’t be considered an unhealthy food.

Are English Muffins Vegan?
No. The addition of butter and buttermilk to the English muffin means it is not vegan.
However, you may try dairy free milk and coconut oil instead of buttermilk and butter. I haven’t personally tried it, so can’t guarantee the results, but it is possible it would still work.

How Long Do English Muffins Last?
An English muffin is great for making in advance because it will still taste good for several days.
Keep them on the counter for up to 4 days and be sure to keep them well sealed because they will dry out quickly.


Can You Freeze English Muffins?
Yes! English muffins can be frozen. As they are already in portion sizes, it’s really easy to just pull one out whenever you need.
Make sure to wrap each English muffin individually and then zip up in a freezer bag. When you’re ready to enjoy, thaw at room temperature and then use as normal.
English muffins can be stored in the freezer for up to 8 weeks.

What Do You Put on An English Muffin?
So many options for an English muffin!
- Peanut Butter
- Jam
- Butter
- Cream Cheese
- Eggs
- Meat
- Cheese
- Honey
- Bananas
- Pizza Toppings

Are English Muffins Gluten Free?
This English muffin recipe is not gluten free.
Gluten free flours like almond flour, tapioca flour, cassava flour, etc. work totally different from all purpose flour.
However, there are some gluten free flours that claim they can be substituted directly for all purpose flour.
If you try one, let us know how it goes in the comments in case other people are interested too.

More Bread Side Dishes You’ll Love…
- Sandwich Rolls
- Irish Soda Bread
- Oatmeal Molasses Bread
- Crescent Rolls
- Green Tomato Bread
- Ham and Cheese Biscuits
- Banana Yeast Bread
- Mashed Potato Bread
- Butter Swim Biscuits
- Mashed Potato Rolls
- 2 Ingredient Biscuits
- Oatmeal Bread Recipe
- Old Fashioned Biscuits
English Muffins are a yummy breakfast or snack food that is simple to make. The results are incredible and you’ll be surprised just how quickly they get eaten.
English Muffin


Want to get the perfect English Muffin from the comfort of your own home? Now you can! An easy recipe that you can follow and get great results from every time!
Ingredients
- 2 1/4 cup all-purpose flour
- 1/2 teaspoon salt
- 1 cup buttermilk
- 1 Tablespoon butter
- 1 teaspoon white sugar
- 1 package of active dry yeast (2/3 Tablespoons)
- 1/2 cup cornmeal
Instructions
- In a 2 cup glass measuring cup, add buttermilk, and butter.
- Heat buttermilk mixture in microwave for 55 seconds or until butter is melted and mixture is approximately 100-110*F.
- If the mixture is too hot, mix and let cool until the correct temperature. Otherwise you’ll kill your yeast.
- Once the mixture is at the correct temperature, add sugar and yeast. Mix well.
- Cover with a kitchen towel such as a tea towel and let rest for 5 minutes.
- In a stand mixer add flour and salt with a dough hook. Mix.
- Once the yeast mixture has sat for 5 minutes (it should be bubbly and poofy on top. That’s how you know it’s ready), Pour yeast mixture into flour and mix well.
- Once dough comes together, mix for an additional 5 minutes.
- Transfer kneaded dough into a bowl sprayed with cooking spray.
- Cover dough with plastic wrap.
- Place dough in a cold oven and turn the oven on to proof. If your oven doesn’t have a proof button, then turn oven to 170*F. Once it reaches temperature, turn it off. Don’t open the door.
- Let dough rise in the warm oven for 1 hour. Dough should be doubled in size.
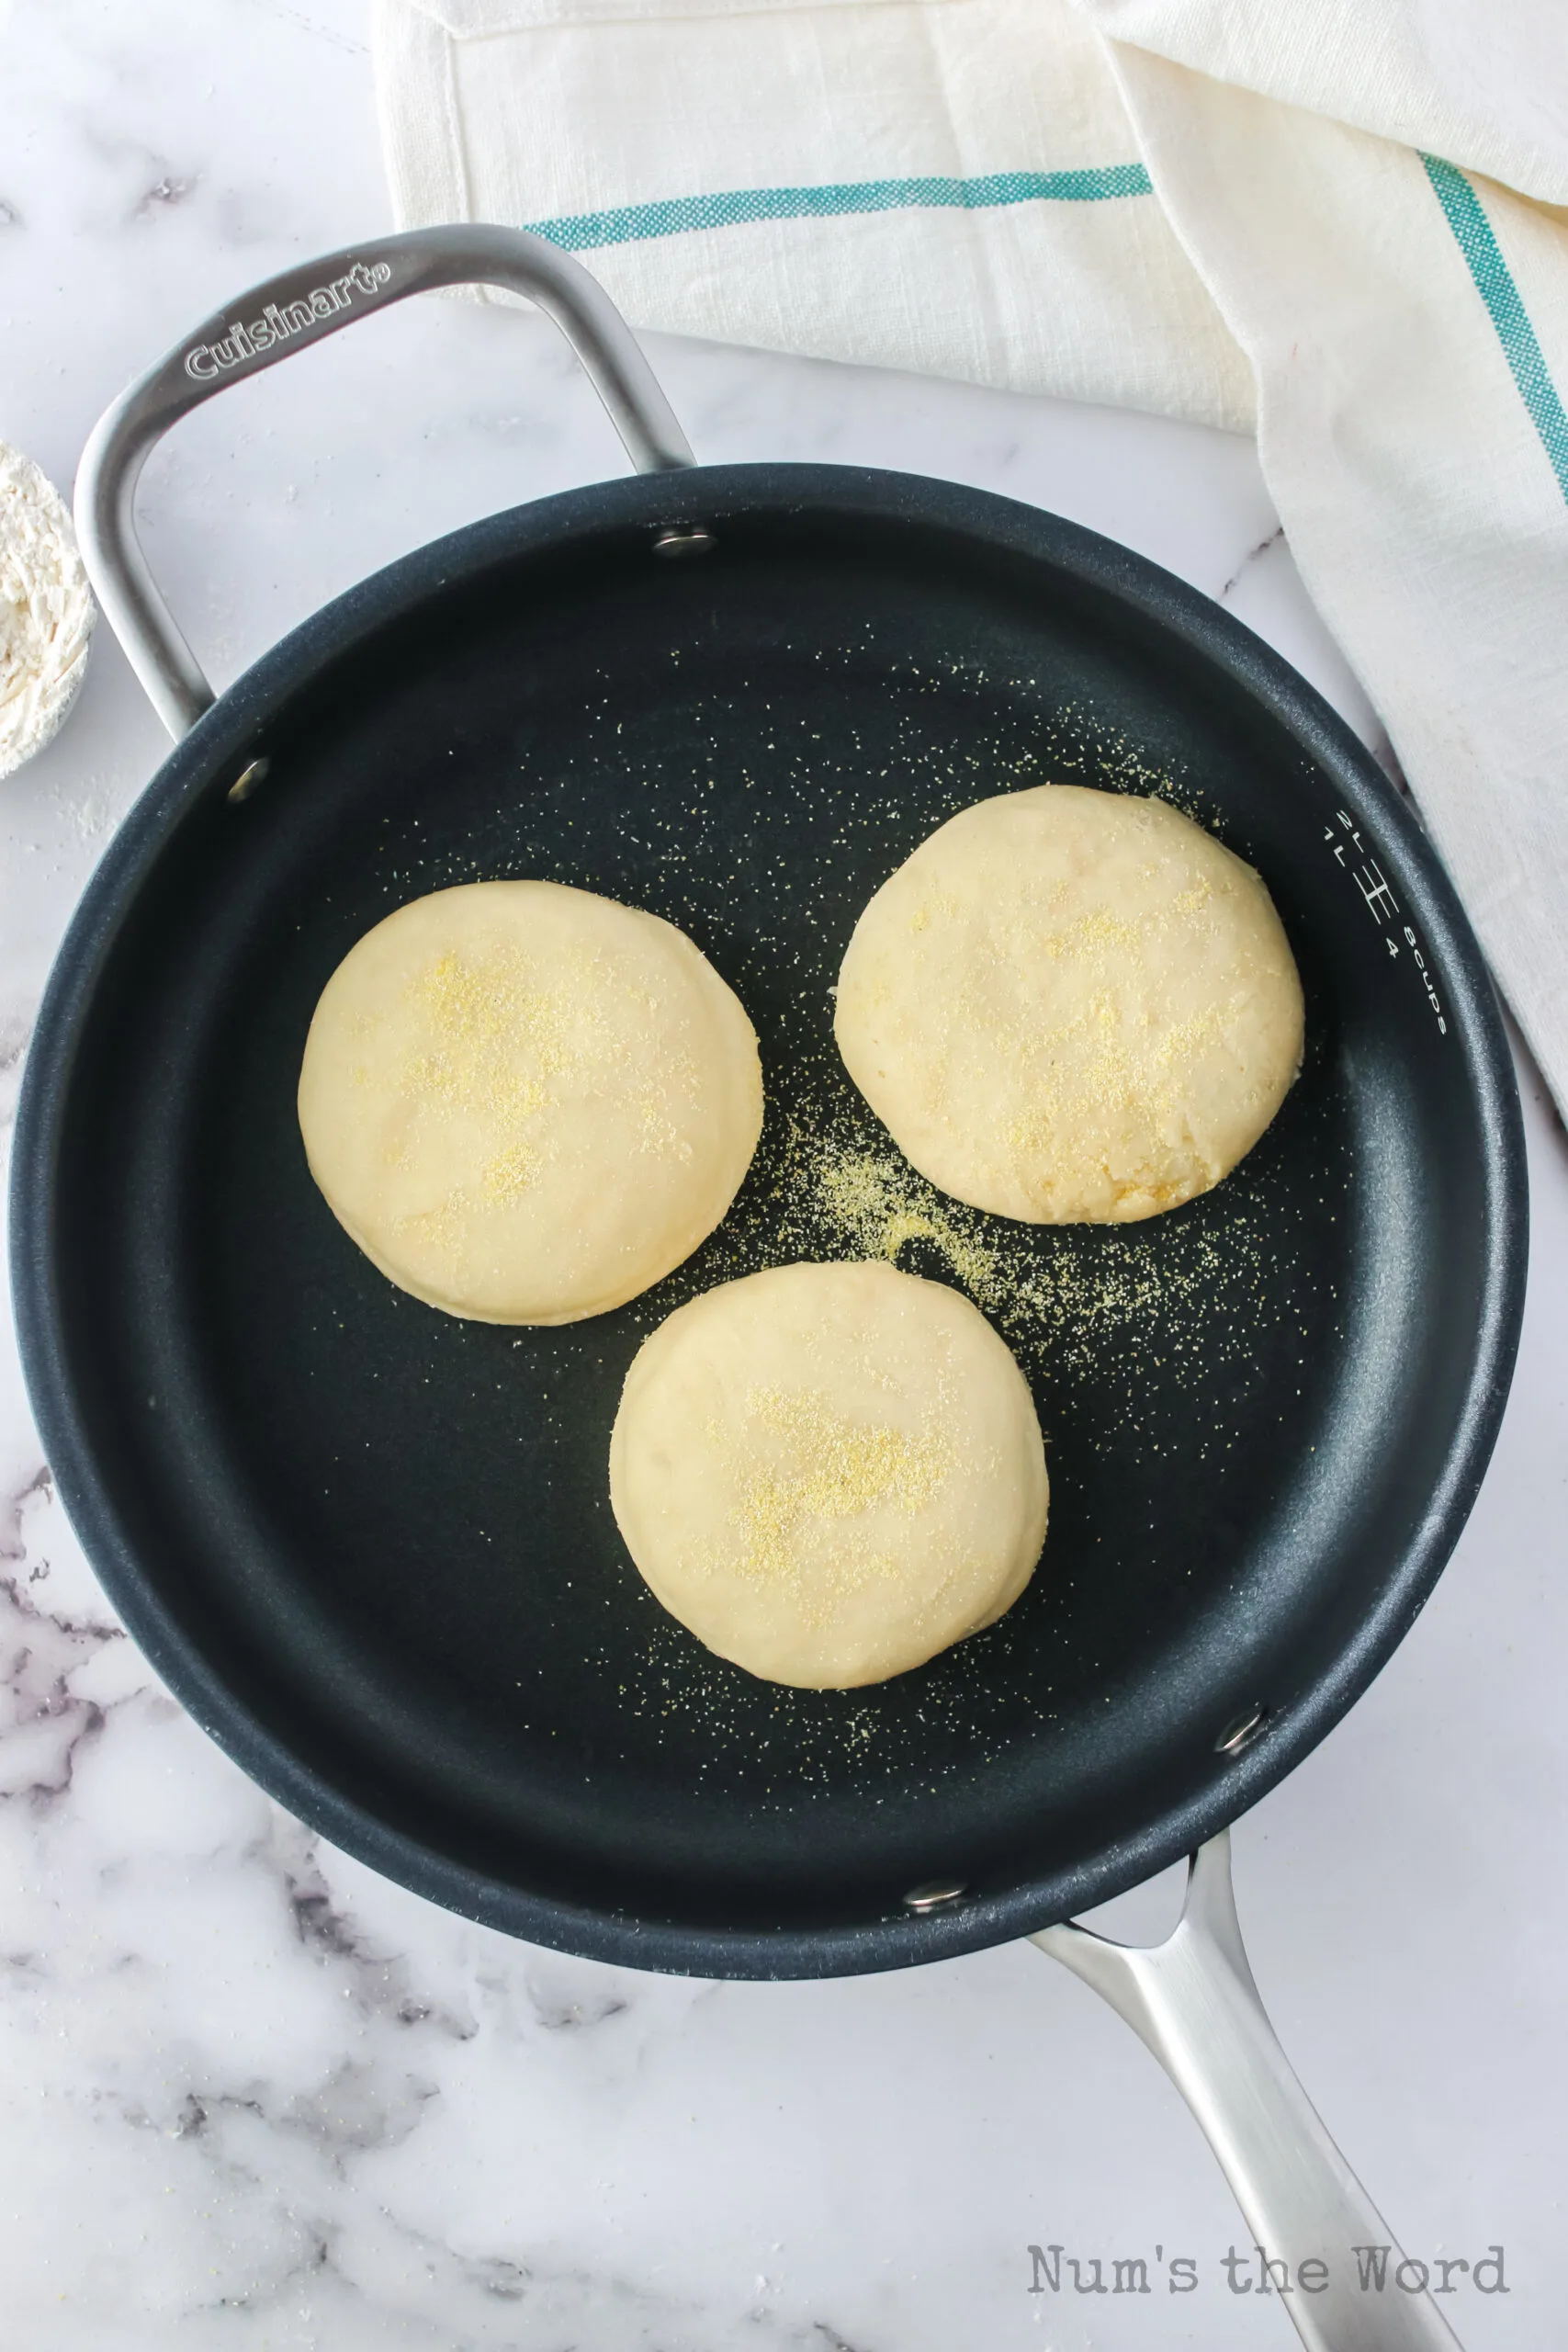
- While dough is rising, prepare a baking sheet. Sprinkle ¼ cup of cornmeal over baking sheet, getting a nice but thin layer. Set aside.
- Once dough rises, remove from the oven.
- Flour a clean flat surface that you can use to roll out your dough.
- Gently tip the bowl over the floured surface and let it slide out.
- Sprinkle a little flour on top (dough will be sticky) and flour your rolling pin.
- Then gently roll out dough to ½ inch thick. If the dough is still sticky, use a little more flour.
- Once dough is rolled to ½ inch thick, using a cup, dip the cup in flour then use it to cut the dough out like you would with biscuits.
- Gently transfer each English muffin to the cornmeal baking sheet.
- Repeat with remaining dough, kneading leftover dough.
- Sprinkle a light layer of cornmeal on top of each English muffin.
- Cover with a tea towel and let rise for an additional hour. Muffins will almost double in height. This is the air pockets being formed.
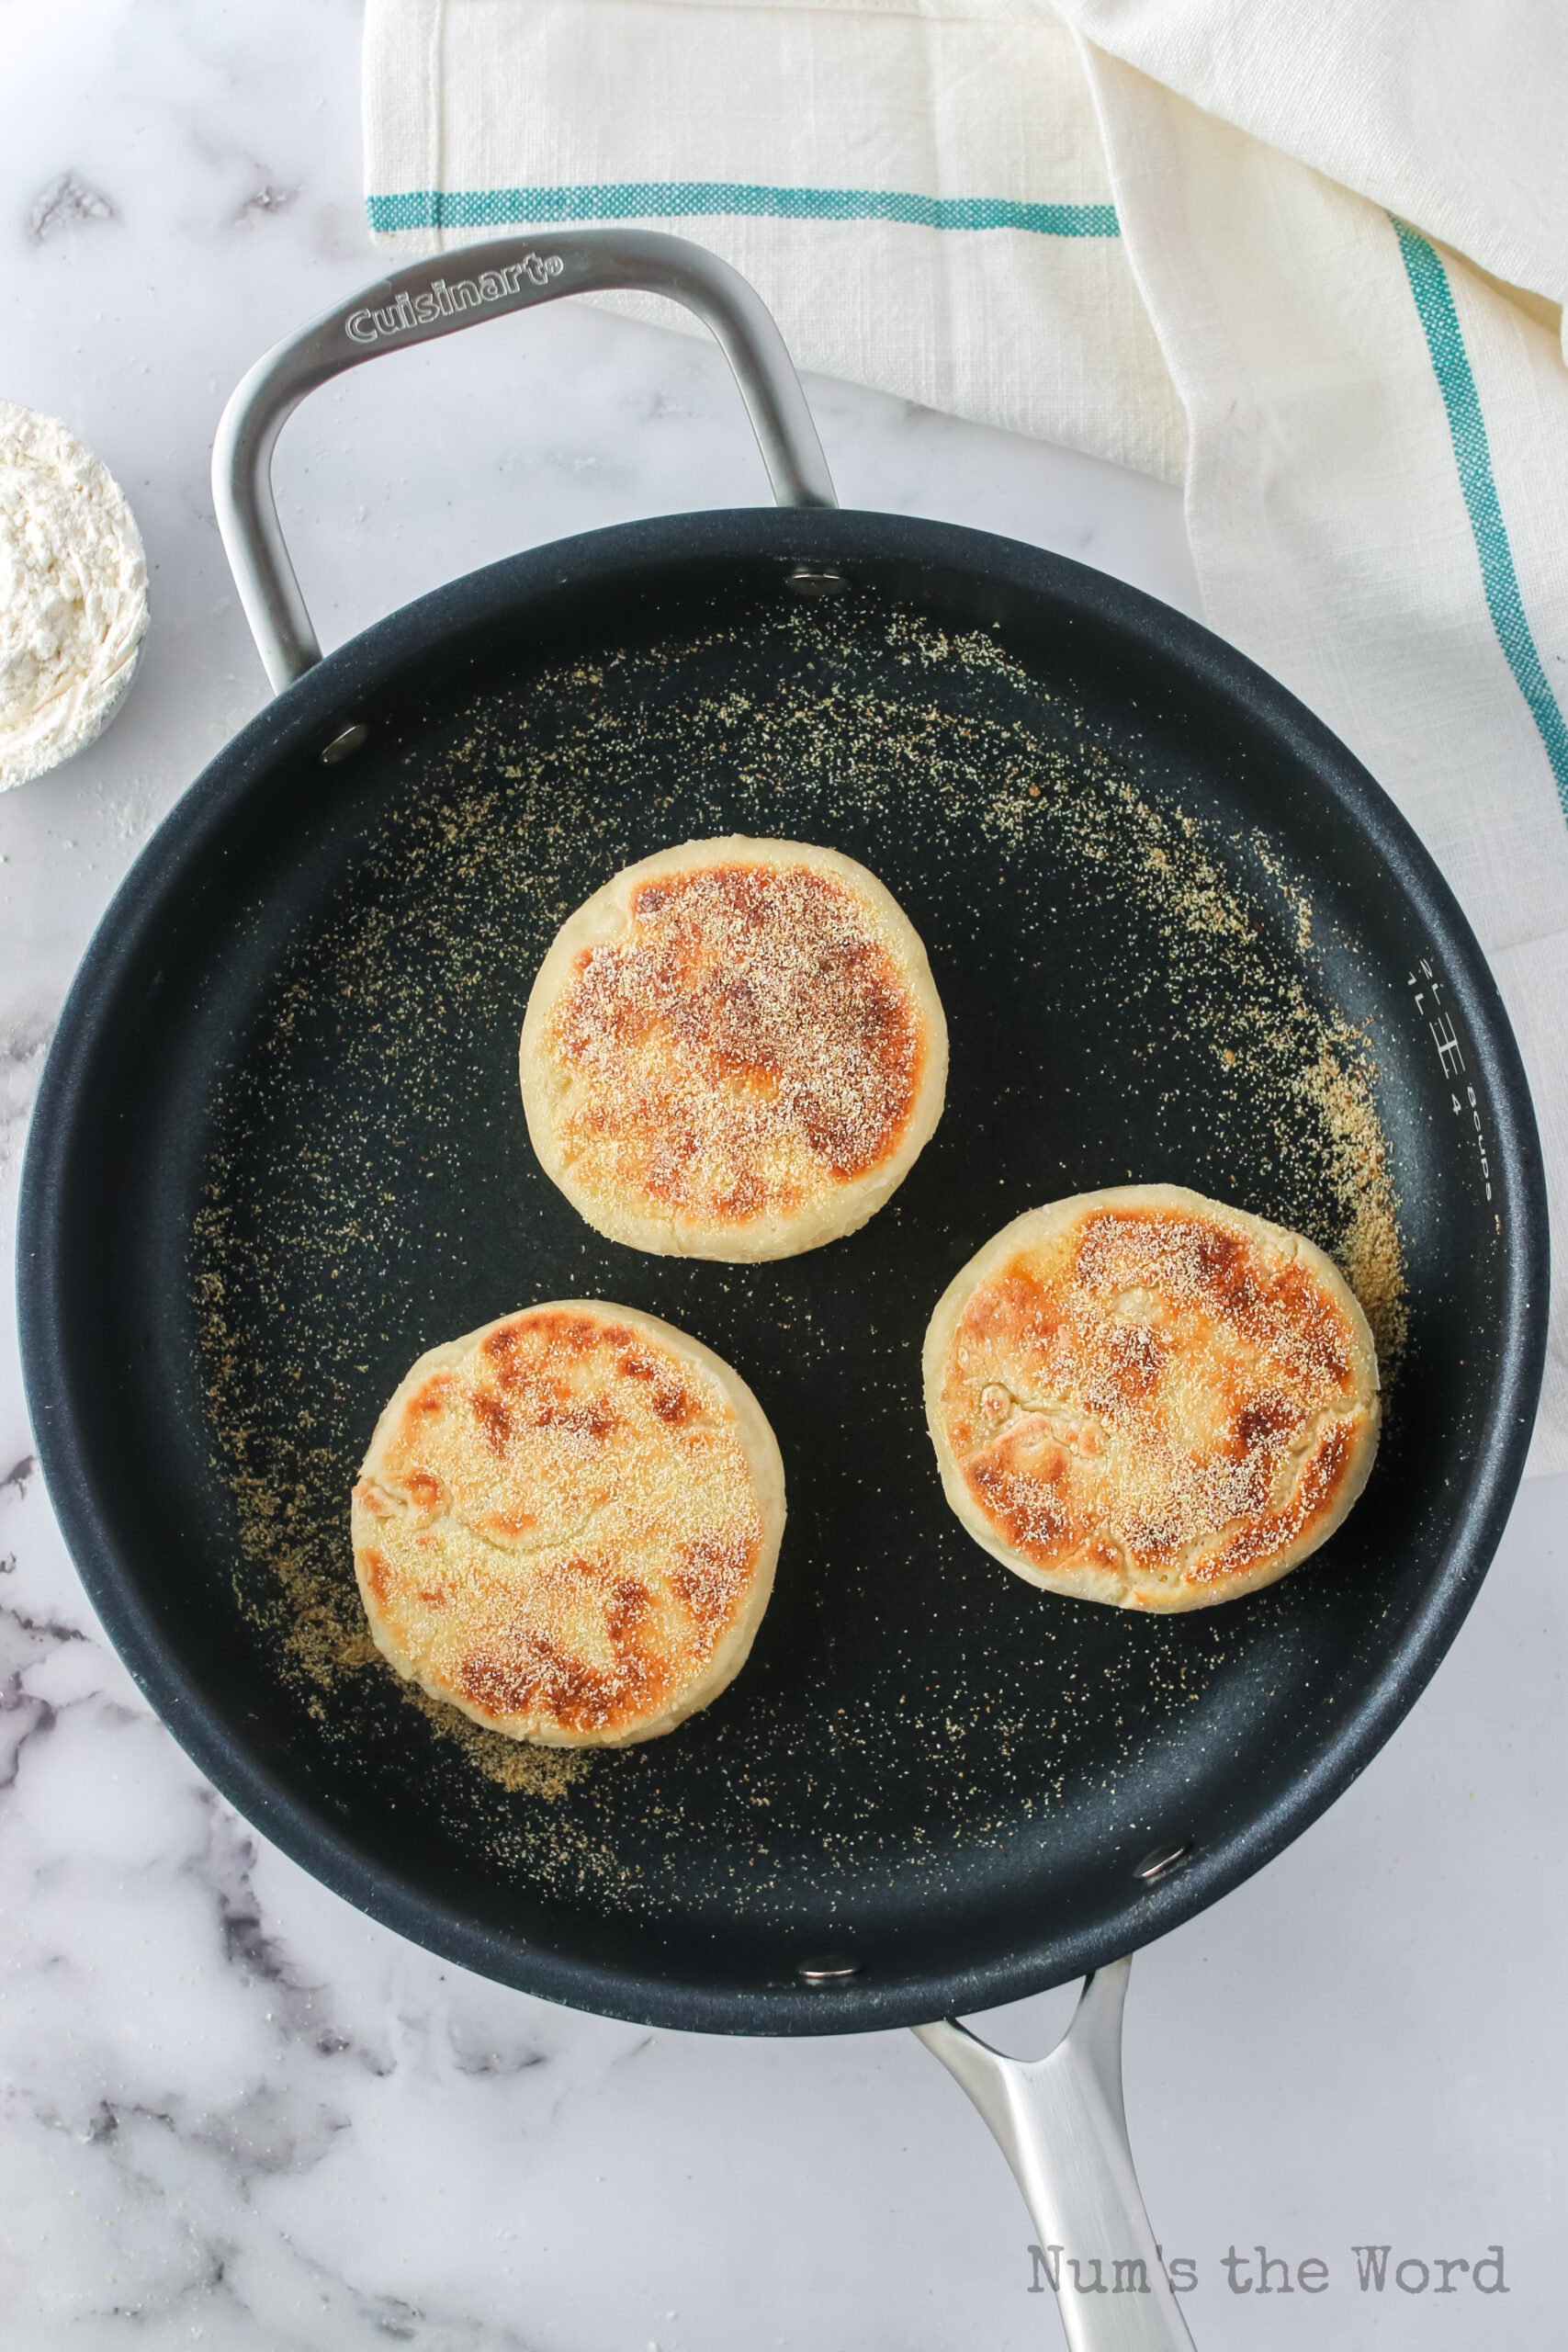
- After 1 hour, Grab a clean skillet and put it on the stove.
- Heat DRY skillet over medium heat until nice and toasty.
- GENTLY transfer english muffins into the skillet. Do not let them touch. This will take several batches and will depend on the size of your skillet. You’ll want to test one before doing them all as the timing is tricky.
- Cook each English muffin for 5-6 minutes then flip and cook the other side for 5-6 minutes. The dough in the middle will cook through.
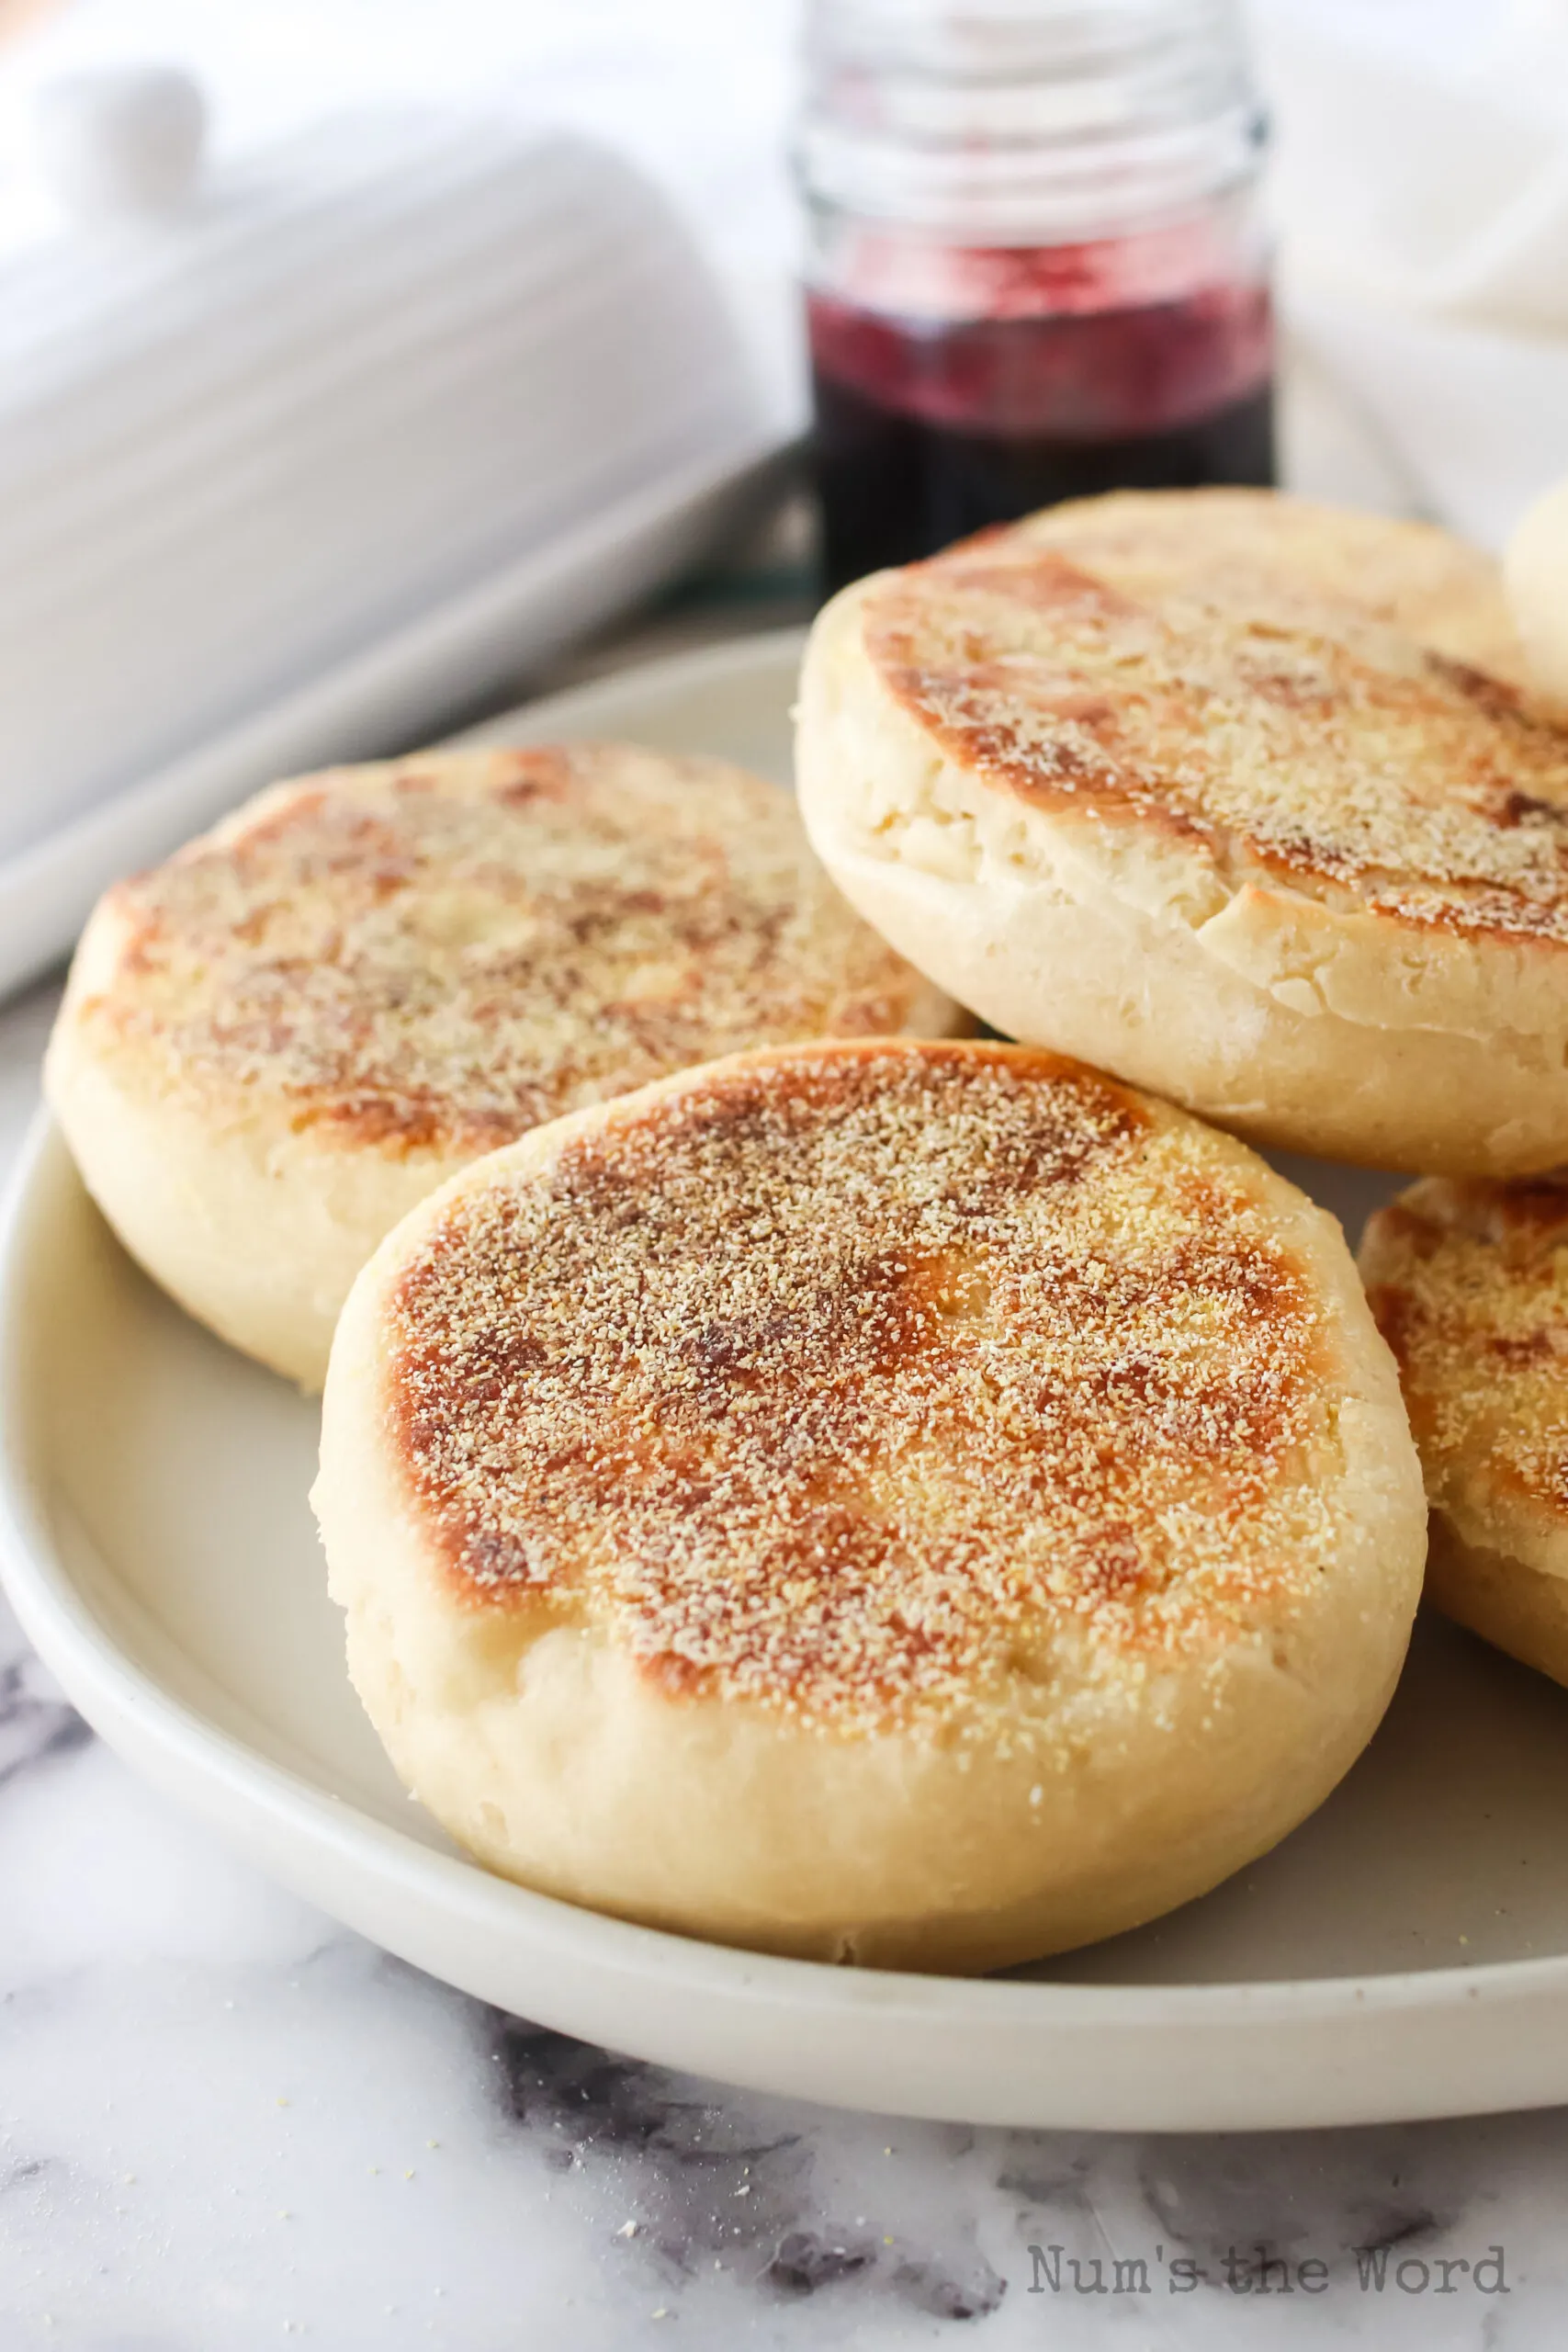
- Remove from the skillet and place on a cooling rack to cool.
- Once FULLY cool, it’s time to open!
- With English Muffins you NEVER USE A KNIFE.
- Take a fork and prick the outside edges around the muffin.
On your last prick (after you’ve gone all the way around, gently lift up on your fork and separate the muffin into two pieces.
Notes
Nutrition Information:
Yield:
7Serving Size:
1Amount Per Serving: Calories: 226Total Fat: 3gSaturated Fat: 1gTrans Fat: 0gUnsaturated Fat: 1gCholesterol: 6mgSodium: 236mgCarbohydrates: 43gFiber: 2gSugar: 2gProtein: 7g
Karen
Monday 13th of January 2025
Made these today..great instructions, came out great ! I’m going to be making these again ! Thanks!
Janelle
Thursday 16th of January 2025
YEA!! I find trying new recipes can cause me anxiety so I'm glad this one worked out great! Thank you for the comment Karen!
Alyssa A
Saturday 10th of August 2024
This recipe and directions were perfect! My only downfall was my cup mouth should have been wider and some are small lol. Any suggestions how to carefully get them off the counter after using the cup without ruining the circle?
Num's The Word
Monday 12th of August 2024
Glad you liked it! I'll admit I'm not perfect at that either, lol. Your best bet is to make sure your surfaces are floured.
Nikki
Saturday 4th of May 2024
I always wonder what the dough should look like before it goes into the oven to proof. I added vinegar to my milk to sour it. then thought damn did I kill the yeast. it was fine. The yeast was nice and puffy after 10 minutes. the rest of the recipe was explained wonderfully. Followed the rest of the recipe to a tee worked out as it should have. Passing this recipe on to my friends
Kaitlyn
Sunday 10th of March 2024
This recipe turned out great for us! We don’t have a proof button on our oven and I noticed the dough was doubled in size before the hour mark, so I took it out and started on the next step! Thanks for the pointer to start in the pan with just a couple, it was tricky to find the perfect temperature, but once we did, everything went great! We’re making them for the second time!
Amy
Thursday 7th of March 2024
Is it best to use bleach or unbleached flour?
Num's The Word
Thursday 21st of March 2024
I'd say that's up to you, though I prefer unbleached.