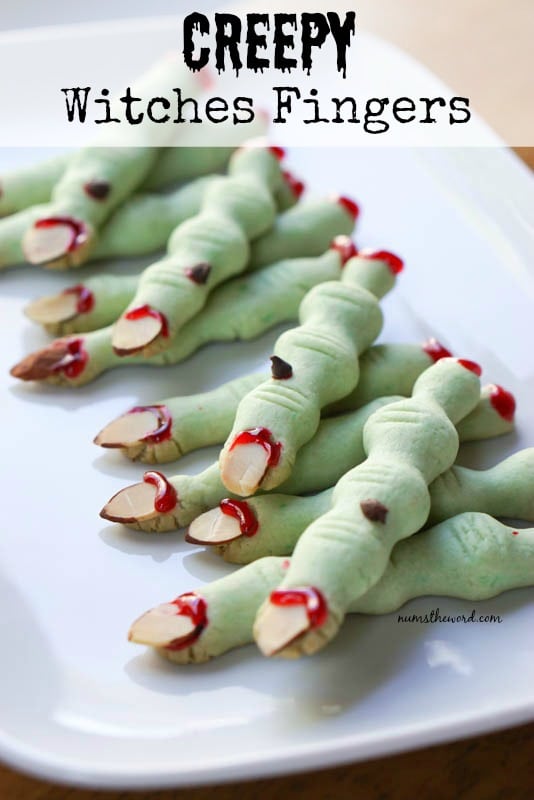
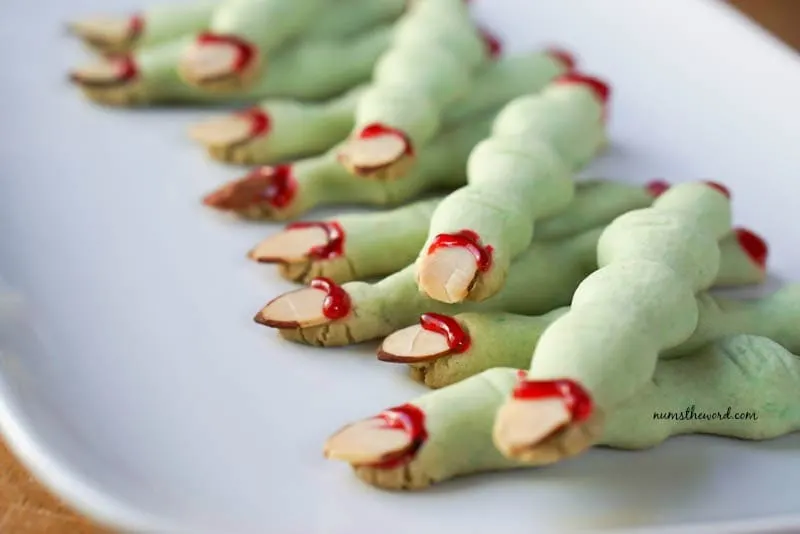
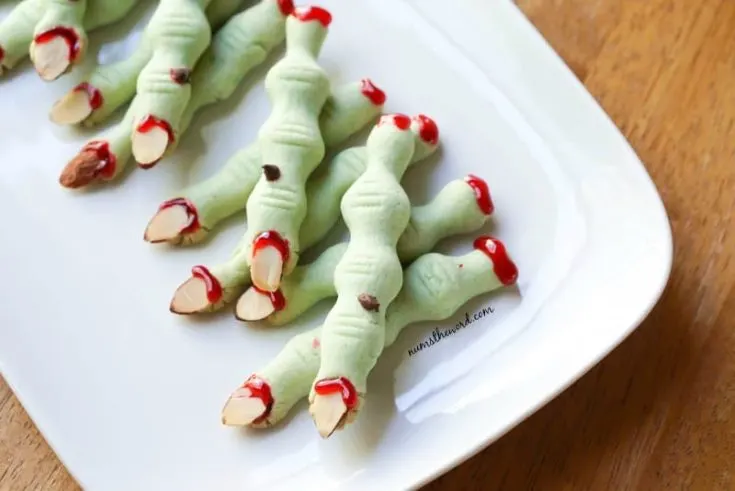
Creepy Witches Fingers are a fun and easy cookie that both kids and adults will love. Green and bloody arthritic fingers make a perfect treat for any event or party!

Autumn is my favorite season and one of the many reasons is because you can play with your food!
In our house, we try to include our kids in the baking and let them get hands on with fun, creative meals.
The month of October is no exception.
This is the month that we really whip out some creepy and spooky treats.
One of our all time favorite Halloween traditions is to make these simple but Creepy Witches Finger Cookies.
My kids absolutely love joining in with rolling out the fingers, pressing on the finger nails and making them look extra bloody.
They also enjoy eating them!
But then again, who wouldn’t?!
I’ve been making these Creepy Witches Fingers cookies for a good 12 years or more now.
Before we ever had kids, I would make it a point that every Halloween we’d take creepy looking treats to all of our adult friends.


We’d go to our church Trunk or Treat and I’d have all kinds of fun treats for the adults only.
Kids already get all the fun and attention so I wanted to do something that was just for the adults.
These Creepy Witches Fingers were one of the tasty treats I’d bring!
Everyone loved them and some would pass because they looked too creepy.
It became a tradition that many looked forward to each year.
Then once we had kids we began including our kids in this fun tradition.
The older they get, the more fun they have with it!
So if I’ve been making these for the last 12+ years why on earth and I just now putting them on the website?
Well….because every year I can’t quite remember the recipe.
And every year we play around with it, trying to remember just exactly what the cookie recipe is.

The biggest issue is that most of the time the cookies spread so much that they don’t really look like real fingers.
And therefore are not as much fun.
But this year….THIS YEAR, I finally remembered/perfected the recipe!
Whew….I tell you I do so much baking that I find it hard to remember everything.
So before I forget the recipe for these Creepy Witches Fingers or lose it or mess it up again…I figured I better put it on my website so it’s locked in forever!

One of our favorite things to do every year is to include these in Phantom Baskets.
A Phantom or Boo Basket is where you place several fun and tasty treats into a basket (or a plate) and take them around to your friends and neighbors.
You leave a fun note with it and then ring the bell and run.
My kids LOVE this.
And we hope the recipients enjoy it too.

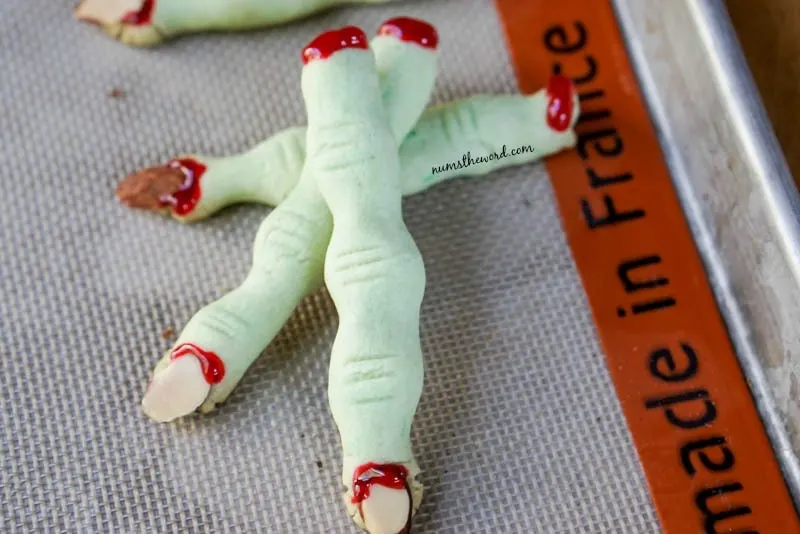
These Creepy Witches Fingers can be made with our without “blood”.
My daughter has deemed them too creepy to eat with the blood and so I make a few each year without the blood just for her.
And the kids LOVE the chocolate wart on each finger, however they look fun without them too!
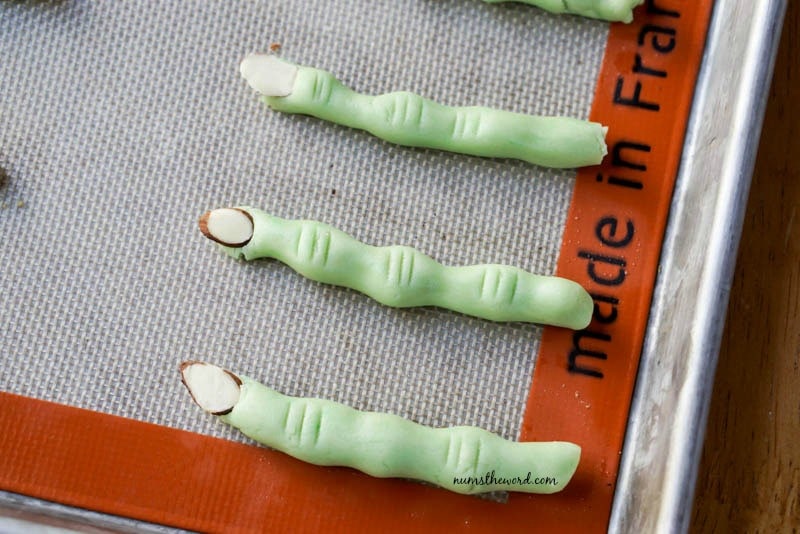
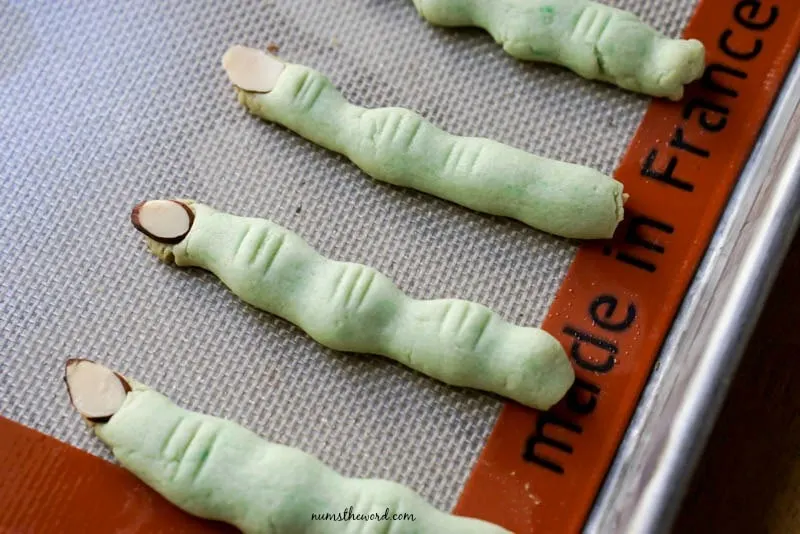
However, the one thing that is a must with these cookies are the knuckle marks.
That is what takes them from a wavy cookie to a knobby creepy witches knuckle.

Someone once pointed out that I have too many knuckles on my fingers.
I then responded that I’d never met a witch with normal knuckles so who’s to say my creepy witches fingers have too many knuckles!
The entire idea is to just have fun!
Now if you don’t know what to make for dinner this haunted season, I suggest these Mummy Dogs.
My kids love these and look forward to eating them every October.
Pair these with these Creepy Witches Fingers and you’ve got yourself a gold star for the season as well as a fun and tasty meal!
Creepy Witches Fingers

Ingredients
- 1 cup butter, room temperature
- 1 cup white sugar
- 1 egg
- 1 teaspoon almond extract (orange extract is also very tasty!)
- 1 teaspoon vanilla extract
- 1 teaspoon salt
- Green Food Coloring - several drops.
- 2 1/2 cups flour
- Sliced Almonds, almond halves or whole almonds depending on what your store sells
- 1 (0.75 ounce) tube red coloring gel
- Mini chocolate chips
Instructions
- Preheat oven to 325*F
- In a bowl beat together butter and sugar until fluffly. This will take generally 3 - 5 minutes.
- Add in egg and beat well, scraping sides of bowl as needed.
- Add almond extract, vanilla extract, and salt. Mix well.
- Add in a few drops of food coloring until desired green color.
- Add in flour 1/2 cup at a time until fully incorporated. Mixture should look like pea sized crumbs.
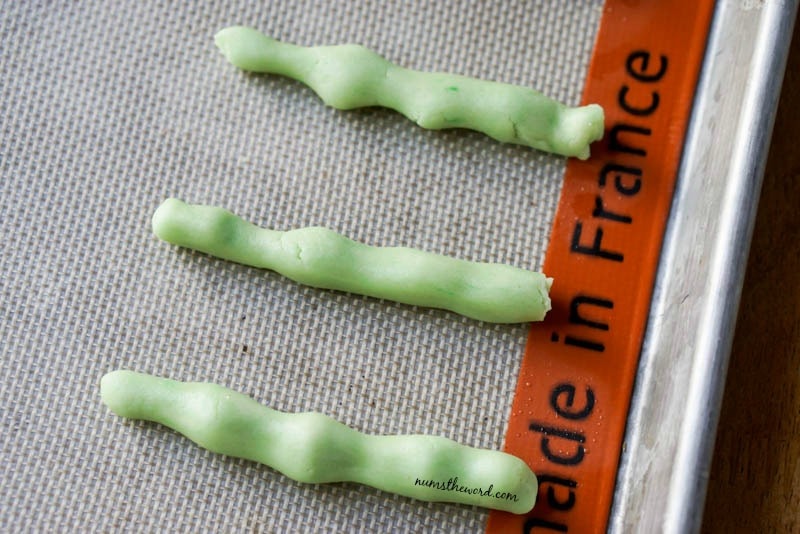
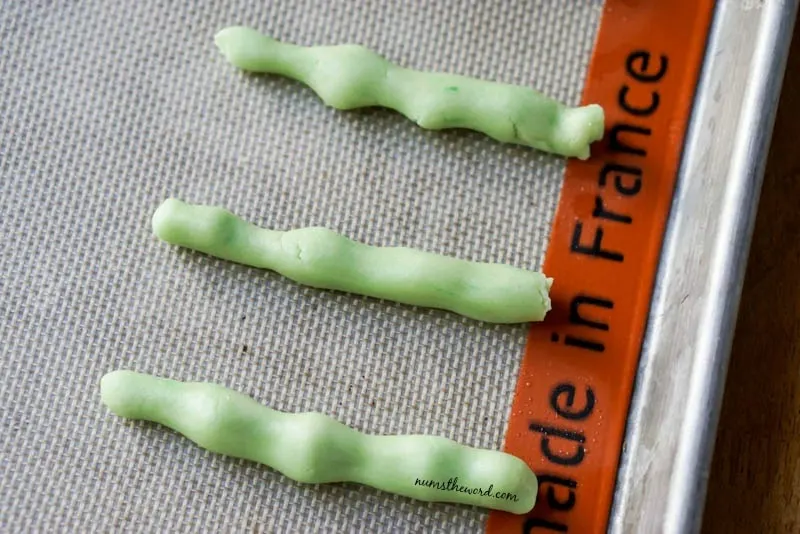
- Scoop out 1 tablespoon of dough and roll in your hands until soft and pliable.
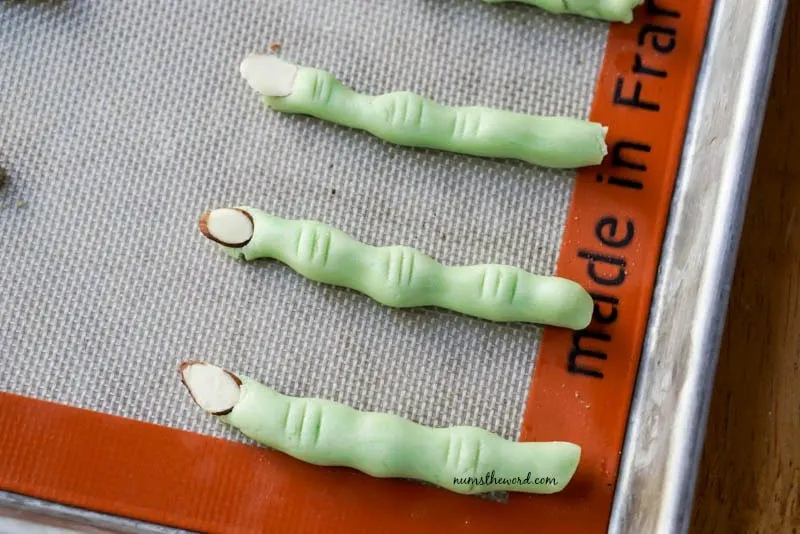
- Roll out snake like with your hands and make sure to keep the indents your fingers naturally make into the dough.
- Lay flat onto lined cookie sheet.
- Continue this process until cookie sheet is full.
- Place an almond on one end of the finger, press slightly so the almond stays in place but doesn't squish the dough too much.
- Next grab a butter knife and make 3 lines at each "knuckle mark." Don't worry about too many knuckles, it's well known that witches have arthritis and funky looking fingers.
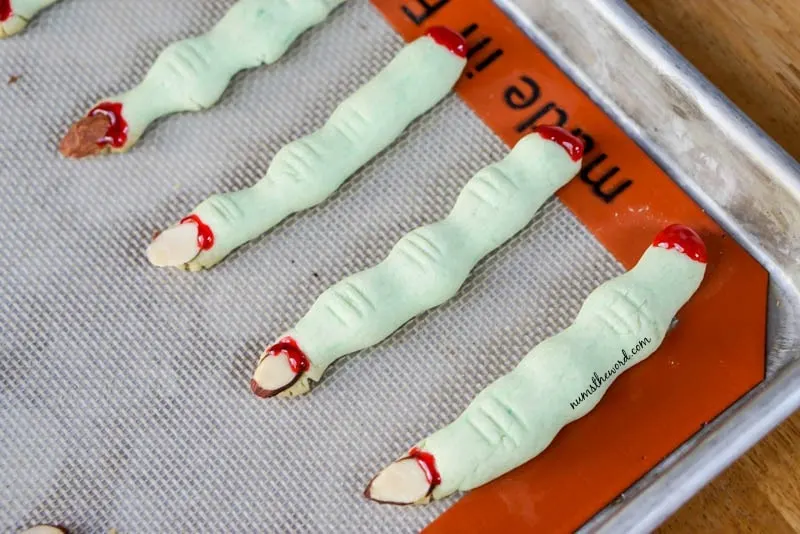
- Bake for 12 minutes or until cookies are BARELY golden on the bottom. Over cooking these cookies will result in hard biscotti type cookies that will work well for dunking in hot chocolate.
- When you remove cookies from oven immediately place a mini chocolate chip on each finger as a "wart."
- Once cookies are cool, pipe red gel around finger nails and at base of finger to make it look bloody.
- Enjoy immediately and share with friends and neighbors!
Nutrition Information:
Yield:
24Serving Size:
1Amount Per Serving: Calories: 209Total Fat: 12gSaturated Fat: 6gTrans Fat: 0gUnsaturated Fat: 5gCholesterol: 28mgSodium: 206mgCarbohydrates: 24gFiber: 1gSugar: 13gProtein: 3g